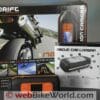
A nice motorcycle video camera with a useful form factor, but now surpassed by more advanced cameras.
I’m not sure when the phrase “camcorder” supplanted “videocam”, which is a contraction of “video camera”.
But VholdR calls this device a “wearable camcorder”, so there you have it.
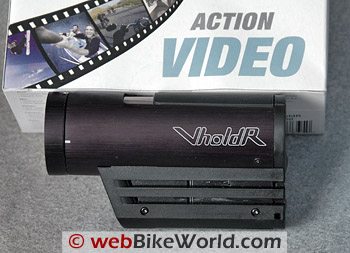
Wearable is probably stretching it (sorry), but the VholdR is designed to mount on a helmet, motorcycle, bicycle or just about anything else you can think of.
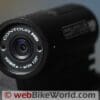
It’s a completely self-contained camcorder, with a rechargeable Li-ion battery and a 3.6 mm lens with a 90-degree viewing angle.
The VholdR videocam also has a CMOS camera (Minimum illumination: 0.04 Lux at f/1.2) a waterproof omni-directional microphone and a few on-board LEDs to indicate the various operational states.
The lens rotates 180 degrees, and it even has two laser pointers which can be illuminated to show the lens orientation and to aim the camera.
Using it is simple: mount it on your helmet or motorcycle, turn it on and go for broke.
It actually is that easy, as I discovered after a brief orientation, and making your own on-bike videos is pretty cool. But let’s take a look, because there are a few issues here and there that prospective owners should be aware of.
I’m still experimenting with the VholdR camcorder, so I don’t profess to know it all by any means. However, we have one of the first batch delivered, having ordered it late last summer for an anticipated end-of-the-year arrival.
So I’ve been playing with it for the past couple of weeks, and I probably have about as much experience with it as any other new owner.
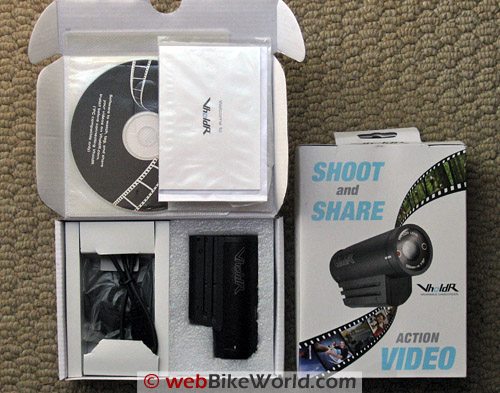
Introduction to the VholdR
The VholdR is yet another product in the continuing evolution of electronics and computing over the last 20 years or so that has put some pretty sophisticated technology into the hands of some pretty unsophisticated users like me.
Laptops, cell phones, digital cameras, camcorders and the software to make it all work is sitting there on the shelves of your local Big Boxy store, cheaper than dirt, just waiting to serve.
OK, so the VholdR may not be as cheap as dirt, but it still amazes me that all this technology is here right now and it fits in the palm of my hand.
Not that the VholdR is the only game in town when it comes to helmet camcorders.
As a matter of fact, as I started learning about the world of miniature video recording with the VholdR, I’ve also discovered that there are plenty of other mini- and micro-camcorders out there.
For example, how about the “PI-SpyCamStick“, which is about the size of a Bic lighter, and “can even fit into a standard pack of chewing gum”. It even comes with a 1 GB microSD memory card.
Unfortunately you’re on your own when it comes to a helmet or motorcycle mount though…
Then there’s the Oregon Scientific “ATC2K” camcorder, which uses a standard SD memory card and is waterproof to 10 feet.
It comes with a variety of straps to connect it to, well, whatever you can connect it to using straps.
I’m sure there are plenty of others, but the point is that very portable micro video is well within the means and capability of just about anyone.
I’m sure YouTube has a lot to do with the miniature videocam revolution too — there are devices out there that will record and upload directly to YouTube with the press of a few buttons.
You can literally shoot a video on your motorcycle and broadcast it to the whole world via your cell phone before you’re parked back in the garage! What’s next, real-time on-bike video? Hey, why not?
VholdR Features
So what makes the VholdR so special?
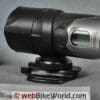
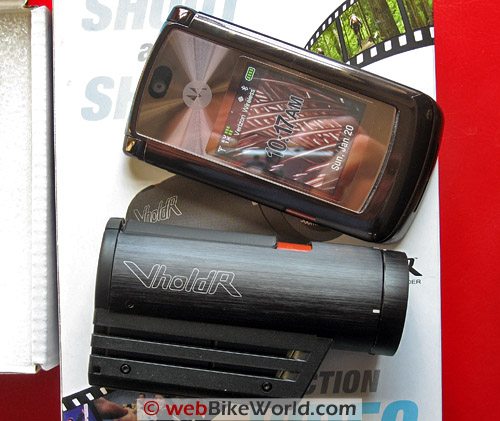
Well, it does have an aluminum body, although the base that sticks out on the bottom that holds the brains and also acts as a rail for mounting is made from “baked fiberglass”, according to the company.
The VholdR isn’t waterproof, but it is water resistant and it’s relatively tough, although our early example has a few too-loose tolerances that could probably be tightened up to give the device a more solid feel.
But the biggest advantage of the VholdR is that it is designed as a helmet camcorder.
There are zero wires on the VholdR, unlike most of the other helmet camcorders I’ve found, like the Bullet Cam, Archos, Helmetcamera and others, which have wires connecting the camera with the camcorder or videocam brains, which are usually carried in a separate bag.
A Look Inside the VholdR Video Camera
The VholdR uses a dedicated hardware video processor and obviously there’s some hard-coded software involved.
I did see a reference to Linux zip by on my screen as I was connecting the camcorder to my computer using the VholdR’s USB port, so apparently the penguin is involved.
The VholdR records MP4 videos in .avi format, which is a fairly common video capture format used to store video in many digital photo cameras that have a video capability.
The VholdR uses the Xvid codec to compress the video, which is available as a free download.
I had to download the codec to add to Windows Media Player to get the VholdR’s videos to play.
And you’ll also need the codec to read the file into Windows Movie Maker if that’s what you use to edit video, but the download and installation of the codec was a simple and straightforward process.
By the way, don’t discount the video capability of your pocket digital photo camera either — some of them take excellent video that rivals the best DV camcorders around, in my opinion.
My Canon SD700IS photo camera not only takes great photos, the video from its built-in camcorder is excellent.
It has a metal 1/4-20 threaded tripod screw on the bottom, so it wouldn’t take much to rig up a handlebar mount, although digital cameras are usually nowhere near as robust as something like the VholdR.
OK, so what about the quality of the videos that come out of the VholdR? Well, they’re OK, but I’ll have to say that I’m a bit disappointed, actually.
I guess I was expecting something close to the quality of the Canon, especially considering that the list price of the VholdR is $349.99, which is a lot of dosh for a simple camera.
You can buy a very nice digital photo camera for that kind of money, with excellent video capabilities included.
The VholdR’s video is not as sharp as I’d like, and it also seems like it needs more contrast.
The fixed exposure setting blows out the highlights very easily — that is, the camera does a pretty decent job of exposing mid-range colors like greens, browns and grays, but almost anything that’s white is completely blown out.
You can see this effect in the sample videos I took and uploaded to YouTube and which are embedded below.
One is a quick first video and the other is a sample video from on the road and I’ll post a video tour of the camcorder details within the next couple of days).
Most of the video available on the Internet that is playable through a browser is compressed in one way or another, either using DivX, Flash or one of the many other formats.
Every time a video is compressed, the quality drops, with artifacts, “noise”, dropped frames, smearing, smudging and everything else you can think of.
This is why it is important to start out highest quality video available to end up with a decent-looking video (and audio) after compression.
It’s my understanding that Google uses some form of Flash compression for YouTube videos, and it can make even a good quality video look pretty bad after it’s been put through the YouTube compression wringer.
But that’s the price we pay for free video I suppose, although as home bandwidth increases and as compression algorithms get better, we should have near-movie quality online video someday soon.
By the way, there are some free video upload sites that either use different compression algorithms or none at all.
Mounting the VholdR
The other issue I have with the VholdR camcorder is the camera mount.
VholdR doesn’t offers only a few choices for mounting the camcorder to a helmet, which is rather strange, considering it’s supposed to be a helmet camcorder.
They only provide one mount with the camcorder; the others are available as accessories.
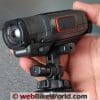
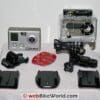
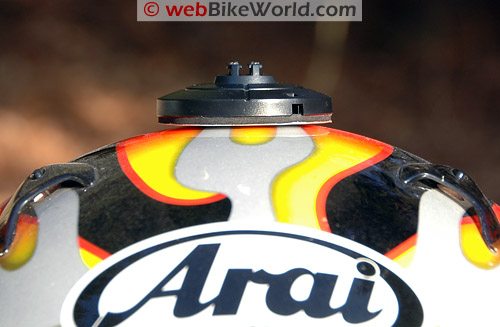
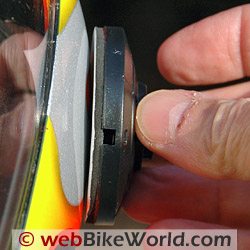
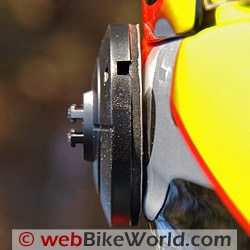
The VholdR’s helmet mounting adapter is a round, two-part plastic-like plate with double-sided tape on the base.
The VholdR has rails on either side, molded into the “baked fiberglass” gondola-type thingy that hangs off the bottom of the aluminum tube body, and the removable center of the mounting adapter has matching notches that slide into the rails.
The center section is held to the mounting base with some incredibly tough plastic “hook and loop” connector, and it takes a huge pull to separate the center from the base.
Once they’re apart, the camcorder can be rotated and re-attached to the base in any orientation, which is necessary to align the lens to ensure the camcorder is level or oriented in the plane you prefer.
The problem is that the round and flat mounting base is 57 mm in diameter (2-1/4″), which, as I discovered, is too wide and flat to fit to the shape of the contour of most motorcycle helmets.
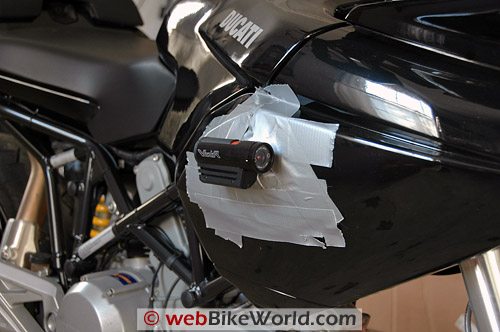
The base plate isn’t flexible, so this means that it isn’t possible to stick the full portion of the double-sided tape to the helmet — or at least the 3 helmets I tried. I ended up having to use a mess o’ duct tape to stick the base to the helmet.
When you think about it, there aren’t many flat surfaces on a motorcycle either — that is, surfaces that are both flat and which face forward and which are also unobstructed.
I had to duct tape the base to the side of the Multistrada to take the on-road video. But since duct tape apparently doesn’t like below-freezing weather, it was touch and go whether the camcorder would hold or not and I had to stop several times to re-stick it to the tank.
I wonder if a mount with a smaller diameter base that was more flexible would be better suited for a motorcycle helmet.
There’s also the issue of sticking the mount with its double-sided tape to the helmet, which won’t look very good and could also harm the surface of those helmets with rubberized finishes.
Or how about a mount that can be fastened up under the bottom of the helmet shell, so that it can be removed and which could also be transportable to other helmets?
The mount slides in to the rails molded into the base of the camera and holds fast with a detent molded in to the rails.
After placing the camera in and out of the mount several times, the detents in the mount have become loose and the rails look like they’re pulling away slightly from the base of the camcorder.
The camcorder just isn’t as secure as I think it should be when mounted on the base, but so far it hasn’t caused any problems.
And by the way — the “hook and loop” connector that holds the two parts of the base together is way stronger than the notch that holds the camera on to the rails on the base, which I find rather strange.
I think it would be better if the camera locked on to the rails, because as it is now, a not-too-hard hit to the back of the camcorder can easily knock it off the mounting rails.
VholdR does offer a square mount, a goggle mount, a handlebar mount that looks too low to me and a roll bar mount (for larger diameter round bars and tubes).
But they’re all optional and cost about $25.00 each (they’re available through our affiliate link to RevZilla). I think they should throw a few extra mounts in with the camera, considering the price.

Saving and Playing Videos
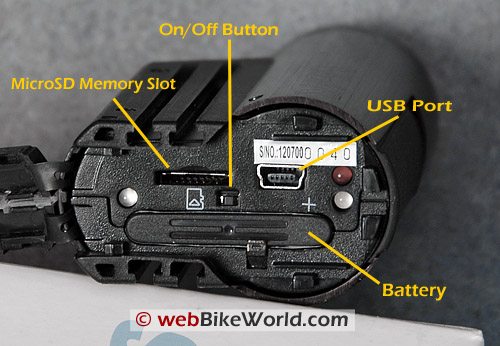
The VholdR stores the video file on a microSD memory card. MicroSD memory cards were formerly known as TransFlash cards, and they’re claimed to be the smallest memory card available.
They’re commonly used in cell phones to store music and video, and although they’re now available in an amazing 8GB capacity, VholdR specifically recommends the 2GB SanDisk microSD Premier, which is a faster version of the regular SanDisk microSD card.
I didn’t know about the recommendation, because there’s nothing in the owner’s manual, so I bought and used a basic SanDisk 2GB microSD card instead.
It seems to work fine, with no dropped frames or other problems.
A SanDisk Premier 2GB microSD card can be found for around $55.00 to $60.00, and unless you want to swap your cell phone’s microSD card in and out.
I don’t recommend this however, because the spring that holds the cards in on the cell phone and especially on the VholdR can easily — and I mean easily — launch the card across the room, never to be found.
When you buy a microSD card, make sure you get one with an SD card adapter.
The microSD cards are so tiny, it’s nearly impossible to get them in a reader, so you have to first slip them into a special SD card adapter, which you can then insert in your memory card reader.
I did some rough calculations on file size and found that the VholdR compresses the video down to around 25-30 KB per second (~1.8 MB/minute) of video, which seems about right for an Xvid compressed 24-bit .avi file at 640×480 pixels.
Connections
The VholdR has a USB port under the rear cap, but my computer doesn’t always recognize new USB devices, which is a problem with many other computers for some reason.
So I usually end up taking out the microSD card and inserting it in the SD card adapter and plugging it in to a memory card reader to get the .avi files.
The VholdR has a microphone in the front; I think it’s hidden under a very tiny hole on the bottom of the “baked fiberglass” appendage that hangs off the bottom.
The problem with this location is that it is very affected by the wind, making the sound that accompanies the on-bike videos pretty much worthless, because all that’s heard is a loud blast of wind.
(Tip from visitor E.F. below: cut a small piece of duct tape and place over the mic; this is will prevent all wind disturbance).
I would think the same might be true for fast downhill skiing or bicycling, and I wonder why VholdR didn’t locate the mic on the back of the unit or some other location that might not be affected as much by the wind?
So don’t plan on recording that nice, rumbling sound from your Termignonis, because you probably will be disappointed.
Also, there’s a glass cover on the lens, but no extra lens cap over that.
I’m not sure what will happen when the lens gets blasted with bugs and road dung; I’m hoping VholdR will either offer a lens cap or extra clear lenses to use as a replacement for the glass that’s on the camcorder now, because surely it will get scratched, if only from cleaning off the bugs.
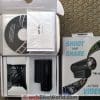
The VholdR comes with the most basic of owner’s manuals, but there’s more info online on the VholdR website.
The owner’s manual that came with ours didn’t say a thing about recharging, believe it or not. It can only charge via the USB port, which means that your computer must be on the whole time.
I plugged mine in at about 1:30 pm one day, and at 1:30 am, 12 hours later, the red light was still on, meaning it was still charging.
USB ports are powered, but just barely, and I think this isn’t really a very efficient method of recharging any device. I have a USB rechargeable MP3 player, and I never use it for the same problem.
Anyway, when I woke up in the morning, the VholdR was finally charged, with the red light out.
An email to support said that the battery was charged at the factory (there was nothing in the owner’s manual that indicated that) and that they’re coming out with an external charger, which is good.
I hope they include it in the price of the camcorder though.
Once the microSD memory is installed and the battery is charged, the VholdR camcorder is turned on by pressing and holding a membrane-type button on the back for a couple of seconds.
The red/yellow LED lights come on and about 10 seconds or so later, you’ll hear a beep, meaning it’s ready to go. A very tiny red light, located under the front of the camcorder, will glow when the VholdR is powered up, but this light is very hard to see outdoors.
The lens can be rotated through 180 degrees, and there are two laser pointers on either side of the lens, under the clear lens cover, that allow the user to align the lens horizontally or vertically.
It took me a few rides to figure out the best way to point the camcorder, but I eventually discovered that I could turn on the bike’s headlight in the garage and aim the VholdR using the laser pointers at about dead center in the headlight pattern on the garage door for pretty good results.
The problem, of course, is that you don’t know what you’ve captured until you get back home, unload the camcorder and check out the videos.
By the way, I wish there were a way to turn off the sound recording function, because the microphone is basically worthless when using the VholdR as a helmet camcorder or when it’s attached to the bike.
Way too much wind noise.
Turning off the mic would save memory and processing time.
NOTE: These videos have been post-processed with Microsoft Movie Maker and/or Adobe Premier Elements and saved as .wmv files. They have been re-compressed by YouTube, so they are lower quality than the actual raw video from the VholdR.
Post-Processing and Publishing
I almost never use a “raw” video right out of the camcorder; I first bring it into Adobe Premier Elements to do some processing, fading in and out, maybe add some music, and make any necessary cuts and edits.
For some reason, Adobe Premier Elements 3.0 and 4.0 just don’t like the .avi files that come out of the VholdR.
Premier Elements Version 4.0 won’t work at all with the .avi files from the VholdR – it tells me there’s a problem with the audio format; another good reason why I’d like to be able to turn off the audio recording at the source.
I had a 15-minute or so .avi file from the VholdR that I made out on the bike during a ride, and I wanted to edit it down to show you an example (above).
This should have been about a half-hour process, but it took me several hours of processing, rebooting both the computer and Premier Elements and a lot of other messing around to finally get about 2 minutes of video.
I’m not sure why, but I never have this problem with raw video from a mini-DV camcorder or even a mini-DV HD camcorder.
I tried it on two honkin’ computers, both with 2GB of RAM, muscular video cards and one with the latest dual-core Intel 2.4 GHz processor and a super-deluxe NVIDIA graphics card, so I’m not sure what’s up.
It could be the fault of Adobe Premier Elements, which is notoriously slow.
I know that Elements didn’t like the length of the video, so I’ll have to keep the raw videos to 3-4 minutes in the future. Still, this is something to note.
I did bring a couple of the VholdR’s raw .avi files into Microsoft’s free Movie Maker with no problems.
Note that because the .avi files coming out of the VholdR are already compressed using the Xvid codec, they won’t look very good when uploaded to YouTube, which will re-compress them again using its Flash-based compression system.
It does look to me like the uploading and sharing portion of the VholdR website is optimized for the Xvid codec and the videos there look similar to the quality that can be expected right out of the camcorder and played on your computer with Windows Media Player.
UPDATE: March 2008 – I never installed the software on the CD-ROM that came with the VholdR, because I usually find the software that comes with cameras to be mostly useless bloatware.
The software isn’t necessary to use the camera, so I forgot about it.
Then I got an email from VholdR letting me know there was a software update for the camera. There was a link to download what I thought was the update. It wasn’t – it was a downloadable version of the CD-ROM VholdR software application.
It first downloaded and installed Microsoft .NET 3.0, a major download and installation that may affect other software applications I have installed. There was no notice that this is what was going to happen.
The download then wanted to install the VholdR application. I guess they figure if they can’t get you via the CD, they’ll get you this way.
I read the license agreement, which seems very harshly worded and basically makes the user guilty until proven innocent. I declined the offer and backed out.
I am very disappointed that VholdR forces owners to go through all of this just to download a software update for the product.
Any camera software bug fix or update should be a simple process, just like every other camera and videocamera and GPS and MP3 player I own.
Download a small file, connect the device via the USB port and update the software.
The owner shouldn’t have to install some major software applications on the computer just to get a camera update.
I guess if you’ve installed the VholdR application, you won’t mind doing this, but I find it intrusive and annoying, so I guess I’ll have to go without updates.
Conclusion
TThat’s about all I can think of, but I’ll report back if I have any other findings. As always, we’re interested in hearing from VholdR or other helmet camcorder owners about tips and tricks.
The VholdR is a lot of fun. The quality of the videos could be better, and it’s too bad about the microphone location, and the mounting options could use some help.
But anyone can now go out and make some pretty cool videos to share with friends. VholdR owners also get access to a special website to upload and share videos, but it’s not focused on motorcycles.
More webBikeWorld:
▪ Video Action Camera Reviews
▪ Intercom and Radio Reviews
|
wBW Review: VholdR Helmet Videocam
|
|
|---|---|
| Manufacturer: VholdR | List Price (2008): $349.99 |
| Colors: Black. | Made In: China |
| Review Date: January 2008 | |
Owner Comments and Feedback
See details on submitting comments.
From “D.H.”: “I was cruising your site looking at helmet cam options and noticed your review of the VholdR: I was an early buyer and was very disappointed with this unit.
My first one was warrantied and the second was refunded so I won’t fault their support, however, the product just doesn’t cut it though.
As you can see on their forums they have a lot of unresolved issues such as software (they’re asking for Beta testers at this point in time?!).
Also hardware issues such as batteries, useless microphone (and no, the duct tape doesn’t work, as many have noted), muddy video, etc.
Didn’t they even use one in the real world before starting to sell these things?
I have since, admittedly paid more for a competitor’s unit but it is well worth every extra dollar as there is no comparison to the video, sound, simplicity and general build between the two products.”
From “E.F.”: “A helpful tip regarding your article: Your article stated, “the problem with this location is that it is very affected by the wind, making the sound that accompanies the on-bike videos pretty much worthless, because all that’s heard is a loud blast of wind”.
AA simple fix: cut a small piece of duct tape and place over the mic. this is will prevent all wind disturbance.”
From “R.L.”: “I don’t own one of these cameras, but I thought I’d let you know an easy way to charge it without leaving your computer on all the time.
Purchase a powered USB hub (comes with a wall-wart power supply of its own), and put that between the computer and the camera. Now it will charge with the computer on or off, and you get a few more USB ports out of the bargain.
I do this with my iPod, and it works great. Powered hubs are available at any semi-decent computer store; online or brick and mortar.”
From VholdR: “…You did appear to have some questions in your posting and I can answer those for you (see below). It did break my heart you put the video on YouTube in place of VholdR.com.
I also noticed that you didn’t use the (VholdR) software so any questions or feedback you have would be appreciated.
You are one of the first people to use a VholdR and we’ll continue to improve the firmware, software, and community over the coming months.
Thanks for being a customer and if you can, I’d love to hear feedback as you have it.
Recharging: right now the light doesn’t turn off when it’s fully charged. It’s a firmware piece we are updating soon. From 0 to charged is about 2 hours.
You’re right about the video editing programs not liking the Xvid codec.
It is a newer format so it is still being implemented into most video editing programs. The reason it’s used because of its compact file size and quality settings, especially in working with a hardware device.
In reference to your YouTube quality, it’s the reason we have an online community with the desktop software, so we can optimize for the file type and offer high quality video.
Users will run into an issue if they export the video from an editing program and then have any online video community host it, because of the compression settings.
VholdR uses a variable bit rate between 1.5Mbps and 3.0Mbps, so you will want to export with at least these video settings.
I’m surprised you didn’t like the video quality as much. It’s very advanced for a single chip, point of view, video product. Especially one that is digital.
We did everything we could to stuff the best video quality into such a small space, while still delivering a longer battery life and video speed. The CMOS sensors are the best of the bunch for handling fast changing lighting conditions.
Thanks for being a customer and I look forward to more feedback.”


