Summary
I never thought much about floorboards one way or another — I just assumed it was part of the cruiser thing. Then I got a chance to ride a brand-new Yamaha Road Star a couple of months ago, and I have to admit, I really liked it.
The floorboards were part of what made the bike seem so comfortable; not having to keep your feet locked in one position is really kind of nice.
Room to move your feet around is kind of like having a nice, big, wide saddle that you can move your butt around on — it’s always nice to have more options for body positions when riding.
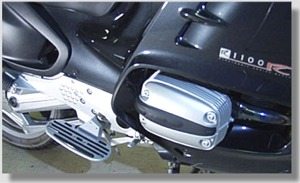
But, after the cruiser ride was over, I quickly forgot about the floorboards. Other than the R1200C, there was no place for floorboards in BMW-land…or so I thought. One day I opened up my email and there was a mysterious photo of a “Sportboard” on an R1100RT.
Hey, it looked pretty cool! Howard Carte at Ilium Works wanted to know if wBW wanted a set of Sportboards to review. I said “sure!” and quickly called up fellow BMW2(BMW Bikers of Metropolitan Washington) club member John Nickum to see if he’d be interested in “volunteering” his shiny black R1100RT for the cause. We picked a Friday that turned out to be a wonderful surprise day for winter — sun shining and temperature in the low 60’s.
Let’s first take a look at how to install them, then we’ll give you our impressions:

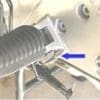
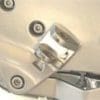
First, you need to remove the stock footpegs. This is fairly easy: remove the clip that holds the locating pin in place, then remove the spring (blue arrow) that keeps the footpegs located in the horizontal position, then pull the pin and the footpegs come right off.

We’re a bit uncertain about how the width of the boards might affect lean angle, but most RT riders aren’t really carving up the turns, so I suppose it’s not an issue.
After living with the Sportboards for a while, here’s John’s report:

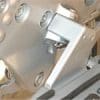
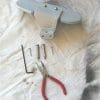
All you have to do is slip the Sportboards into place, drop the supplied locating pin down through, and insert the (supplied) cotter pin through the bottom.
It’s a bit tricky to get the cotter pin bent properly — it would be nice if the original BMW clip would fit, but then I suppose you’d have to pay for a custom-machined part when a stock hardware item works fine.
To keep the Sportboards from flopping around, tighten the set screws with the supplied Allen wrench. We found that they loosen up pretty quickly, so this would be a good place to use some “blue” thread locking product.

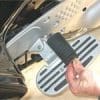
Here’s a photo that compares the size of the stock footpegs to the Sportboards. The Sportboards aren’t like the big monster platforms that you might see on a cruiser (I guess that’s where the “Sport” comes from) and they complement the styling of the RT-series bikes very nicely.
The finish on them was a very close match to the original BMW finish on the aluminum side panels.
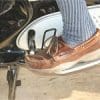
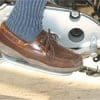
Here are a couple of photos to give you an idea of foot location in relation to the brake and shift pegs.
The boards really do look like they could have come from the BMW accessory catalog. John and I were curious as to whether the width of the boards would affect his ability to reach the ground when stopped, but as it turned out, that wasn’t a problem. John reported that it didn’t take him long to get used to the Sportboards — he took it easy at first to learn the location and the relationship of his feet to the shift and brake controls.
We’re a bit uncertain about how the width of the boards might affect lean angle, but most RT riders aren’t really carving up the turns, so I suppose it’s not an issue.
After living with the Sportboards for a while, here’s John’s report:
PROS:
Installation: The boards are EASY to install. It shouldn’t take anyone, even with minimal skills, more than 1/2 an hour to complete the job.
Left Board/Shifting: It took some time to adjust the old brain to the new angle of the board relative to the shift lever. It helps to stretch the Achilles tendon beforehand as the angle of the board to the shift lever is more acute than the standard foot peg. I found up-shifting quite easy but down-shifting requires lifting your boot toe up more to make contact with the lever. I made the adjustment rather quickly without jeopardizing safety.
Right Board/Braking: The same angle/board/foot problem exists it on the right side as the left and seemed for me to take longer to adjust to the proper braking pressure for the rear brake. I’m one of those that learned in MST class to use both brakes, even with ABS, and my habit continued for this test. Because of the angle of the board to the brake lever a softer touch is required to produce the same results as with the foot pegs.
“Cruisability”: These boards are really comfortable! I never thought I would say that about a Harley type product but for long cruising trips the Sportboards would be great. My legs were much more relaxed, which I think would help curb fatigue. Like sitting in a LazyBoy chair, almost?Here are a couple of photos to give you an idea of foot location in relation to the brake and shift pegs.
Foot Down Maneuvers: The thing I was worried about most, putting my feet down at stops and having the boards in the way of my legs/feet, was not a problem. I quickly adjusted to a little wider stance which actually improved my stability. The boards do hinder maneuvering the bike back and forth with your feet a little but not what I expected.
CONS:
Potential for bottoming out?: I’m a little concerned about bottoming out for the more aggressive rider that the boards would scrape/bottom out on the roadway if the bike was leaning over too much on twisty roads (like Harley’s do with BMW riders). I couldn’t tell how close I was to the road when leaning over but it worried me a little.
Shake-down: The Allen bolts really need a coat of “Loctite” (or other thread locking compound). The bike’s vibrations loosen them and I tightened them upon returning. Not much, but once they are set and tight they should stay.
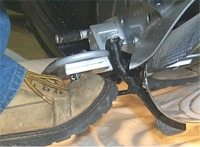
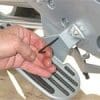
The only thing I could do, after placing the bike on the side stand, was reach down with my hand to start moving the center stand toward the ground and then place my foot on the flange arm. A bit tricky and requires hand/eye coordination? There is a tab on the center stand that you can catch with the toe of your boot, but depending upon the type of boot you wear, you may not be able to get enough leverage to hold the center stand down hard enough to rock your bike up on it.
Removal: The only thing I have to add is taking the boards off (easy) and putting the bike’s original pegs back on (not easy!). It is difficult lining up the pin through the bottom spring and bushing to get the cotter pin back in place. This makes it difficult to just add or subtract the boards from the bike for touring trips. A quick disconnect would be better to interchange the two but that would increase the price even more!
Bottom Line:
John and I both like the Sportboards. They install easily, have a good appearance that is compatible with BMW standards, and they are very comfortable. We would both definitely like to have the floor boards for long trips and live with their minor disadvantages.
However, we believe you may have to be a serious long-distance rider to justify the cost. The Sportboards retail for $399.00. If you are going to do a lot of long-distance riding — and I guess that’s what the RT’s are for — than the Sportboards may be just the thing to give you that extra bit of comfort.
Note: For informational use only. All material and photographs are Copyright © webWorld International, LLC – 2000-2011. All rights reserved. See the webBikeWorld® Site Info page. NOTE: Product specifications, features and details may change or differ from our descriptions. Always check before purchasing. Read the Terms and Conditions!
| Product Review: Sportboards – Floorboards for BMW Motorcycles by Ilium Works | |
| Available From: Ilium Works | Suggested Retail Price: $399.00 |
| Fits: 1996-2000 BMW R 1100 RT; 2001-2002 BMW R 1150 RT; 1998-2002 K 1200 LT, R 1200 C and K 1100 LT models. Made in: U.S.A. | |
| Product Comments: Easy to install; comfortable for long distance riding; allows varied foot placement to help prevent fatigue. Price may be an issue; potential for awkward foot placement with some foot/shoe sizes. | |
| More: wBW BMW Page | Motorcycle Accessory Page | |


