Part 4: Using the Sena SR10
This is “where the rubber meets the road: in a sense.
And with a lot of time spent in testing and using the SR10 adapters with many different devices over the last several months, its strengths, weaknesses, limitations and “bugs” become evident.
Two of the radio sets (the Motorola Talkabout MR-350R and Midland GXT1050VP4 FRS/GMRS devices) are on the Sena “Recommended Two-Way Radio” list for the SR10…not that I had issues with any of the two-way radios used.
Using the SR10 is essentially the same as using the Sena SMH10 Bluetooth headset (review).
Initiating the SR10: Turn the SR10 on or off by simultaneously pushing the small “Pairing” button found on the top of the unit and the large PTT button located on the face of the unit for one second or so. The blue LED indicates “power on” and the red LED indicates “power off”.
Bluetooth Headset Pairing: Put the headset into pairing mode using the steps specific to that system and with the SR10 turned on, press and hold the “Pairing” button for five seconds until the standard red/blue alternating LED pattern commences. If pairing is successful, both devices will revert to their blue LED pulse patterns.
Tip: some systems will take a bit of time to pair up initially especially if other connection configurations exist with the headset and the SR10. I found that resetting the SR10 and headset to be paired to clear any previous connections really helped in getting the SR10 paired up with any headset.
Bluetooth Mobile Phone Pairing: Turn on the SR10 and hold the “Pairing” button for eight seconds to put it into the mobile phone pairing mode, indicated by the rapid flashing of the red LED. The “SR10” device identifier will appear on the mobile phone display.
As needed, enter “0000” as the default password/PIN entry, although most new devices do the negotiation and security procedures automatically. Once paired, the red LED on the SR10 flashes slowly.
Fault Reset: If the system ceases to work properly or seem to be locked up, it can be reset by using the recessed reset button that resides under the dimple on the top of the module just to the right of the “Phone” button. Light pressure for about one second using a paper clip wire or pencil tip resets the complete system after which it turns off.
Full Reset: This will restore the SR10 to factory default configuration. Hold the “Pairing” button for 12 seconds and you will get a steady glowing Red LED. Tap the “Pairing” button again within five seconds to confirm the reset action and the blue LED will flash repeatedly and then the unit will power down.

Important Things to Remember When Using Bluetooth
In using multiple Bluetooth enabled devices it is important to remember the basics: the one-to-one relationship regarding active audio and, with the exception of one or two systems, that the headset, hands-free, A2DP and AVRCP profiles all provide different capabilities and switching between the supported audio protocols may or may not be seamless nor instantaneous.
Case in point: pairing a typical Bluetooth headset with a typical mobile phone or smart phone will result in multiple audio and audio management services being available allowing headset, hands-free and stereo audio streaming operations between the two devices.
But when another Bluetooth device is introduced or paired, profiles used and device sequencing become very important factors…even in a multi-device connectivity environment.
When a smart phone is paired to the SMH10 headset first, phone audio and media services are enabled and reflected on the device display, meaning that the essential headset/hands-free and A2DP/AVRCP profiles are assigned between the device and the headset and not available for use by other devices.
For the SR10 to establish a link with the headset, the required profile must be available. Accordingly, if SR10 access is the priority, then it should be paired with the headset first so its priority is established.
Alternatively, the needed profiles can be made available separately with some manual intervention that sees the required services (headset/hands-free) de-selected from an existing device to headset configuration, as with the smart phone configuration identified above. If this is done, stereo audio streaming and remote control functionality via A2DP and AVRCP services can be retained between the smart phone and the headset, while freeing up the headset/hands-free services for the SR10 to headset link.
Another workaround is to use the wired connection between the smartphone and the SR10. This overcomes the current Bluetooth v2.1 software implementation limitation in that only one connection per profile is supported.

Sena University: SR10 101, Using the SR10
So let’s step through a basic, typical SR10 configuration.
- Step 1: Pair the SR10 and the Bluetooth headset and make sure the connection is working.
- Step 2: Pair a Bluetooth or wired mobile phone via AUX 2 to the SR10 for hands-free use.
- Step 3: Connect other devices to AUX 1 (and AUX 2 if available).
- Step 4: Activate the SR10 and headset link to check for connectivity and audio.
- Step 5: Deactivate the link and pair other Bluetooth devices with the headset.
With the basic configuration completed, the blue LED provides the status of the SR10’s headset link while the red LED provides a visual status of any paired Bluetooth enabled mobile phone with the SR10 and a low battery indication.
As a hub, audio from a connected device (in/out) initiates establishment of the audio channel to the headset (based on the headset profile being available) and once the link is made, audio from single or multiple sources will be heard in the headset, with the SR10’s blue LED doing its double-flash sequence.
Once the incoming or outgoing audio ends, the SR10 closes the audio channel with the headset after the selected time (default is five seconds) indicated by the disappearance of any white noise and shortly afterwards the SR10 goes into standby, revealed by a slow pulsing of the blue LED.
After the link is closed and the profile released, previously active headset audio should resume including intercom functionality.
If the Bluetooth intercom does not restore or cannot be started the default “busy” tone or tone sequence used by the paired headset is typically heard, indicating that the necessary resources are not yet available. In reality, it usually took another 15 to 30 seconds after the SR10 went into standby before headset audio, including intercom access, would be restored or could be manually started by pushing the required control on the headset.
One issue that was often difficult to duplicate involves lost audio. After closing the SR10 audio link and resuming headset audio services, like the intercom, audio would be lost after seven to ten seconds (without fail). Sometimes the internal audio link would resume and sometimes it wouldn’t.
Is this a bug that might be addressed in the firmware update? In this instance, I wondered if audio levels were below the trigger threshold, something that can cause the link to be dropped, but that wasn’t the problem.
But if audio input is low or the system seems to get “confused” at times, opening or closing the SR10 audio channel with a quick double-tap of either PTT button works wonders. I found this a useful feature in restoring audio feeds that seemed to have gone missing in action.

Audio Management
Sena states that the SR10 provides a true hands-free environment. While this may be true regarding typical phone use yes — but not exactly when using a two-way radio. Activating the PTT is needed and that does take physical effort (i.e., using the hands) however minimal.
As an audio hub, the SR10 has proven extremely reliable in providing single audio channel for the wireless link between it and the paired headset although it lacks audio prioritization and switching capabilities meaning that all active audio connected to the SR10 is mixed together into a single mono stream.
If you treat the SR10 adapter or hub as a single peripheral device that functions as a mixer everything will be kept in perspective. Another important point to remember is that the SR10 pairs with compatible headsets using the Headset Profile (HSP), with the Hands-Free profile reserved for use with any (paired) Bluetooth mobile phone.
Given this, headsets will therefore recognize the paired SR10 as a mobile phone device and given that most (but not all) Bluetooth systems treat mobile phone or navigation device audio as the highest priority, the SR10 will become number one priority, once it can grab or be assigned the headset protocols. When this happens, the other headset audio sources will be bumped.
I must add a caveat of sorts here though: some headsets do manage multiple connections better than others; and, some headsets coming to market will allow users to modify traditional audio priorities via firmware settings. Both of these issues will or may impact results in using devices like the SR10. As such your results may vary from mine.
Audio generated in the headset is crisp and typically clear especially the two-radio communications as long as audio from each connected device is adjusted at the device and/or the headset. There is no volume control, onboard automatic gain control (AGC) or voice-activated (VOX) support with the SR10; these duties are handled by the headset.
The SR10 provides further audio management on an intervention basis if so needed for any particular configuration or situation. A quick double-tap on the unit’s PTT button or double-click of the handlebar PTT will manually activate or disconnect an active link between the SR10 and the paired headset.
A triple-tap on the PTT activates another intervention or lock-out feature; this disconnects the SR10 and headset link for three (3) minutes even if audio is generated by a device connected to the SR10.
In instances where dedicated use of the headset and connected peripherals are needed or for safety reasons, this is a good user option. The lock-out can be released by double-tapping the PTT or of course just waiting for the three minutes period to expire.
Note: not all headsets are equal in respect to detecting the link and switching between audio services. Individual switching and performance observations for specific systems are found in Part 6: Compatibility of this review series.
Two-Way Radio Use
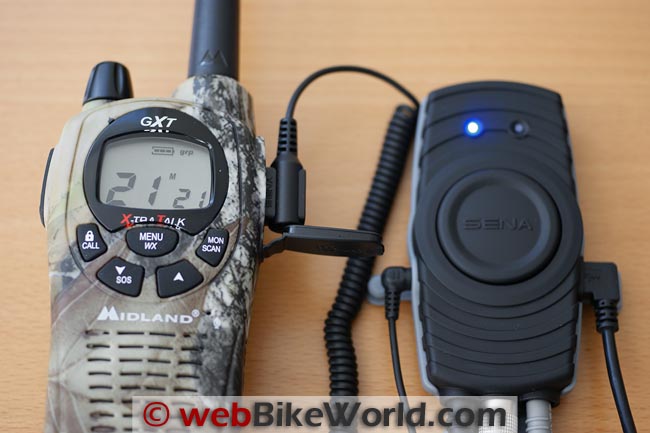
The PTT switch lead on the SR10 connects to the 2.5 mm input jack on the left side of the module and the appropriate mini-DIN connector cable for the radio connects to the prominent mini-DIN port on the bottom of the module.
Integrated push/pull latch-ring connectors used on the cables are absolutely foolproof, easy to use and seemingly very sturdy. To connect, align and rotate the mini-DIN end of the cable with the port until the pins align at which point the integrated latch ring will lock itself into the connector. To remove, pull the latch ring back to release the cable.
While the SR10 is a little lacklustre in the general audio department, it really shines when the two-way radio feature is brought into play. “Impressive” best describes how the SR10 manages the connected two-way radio and the audio link to the paired headset.
Right from a solid blue LED, indicating no headset connected, the SR10 makes it all happen seamlessly…at least most of the time. Using the PTT or receiving a radio call results in other active headset audio to be closed, the audio channel opened between the SR10 and the headset and just like that, a two-way radio link is established.
Elapsed time from initial keying to active link was typically two seconds or less — waiting in line was never this good!
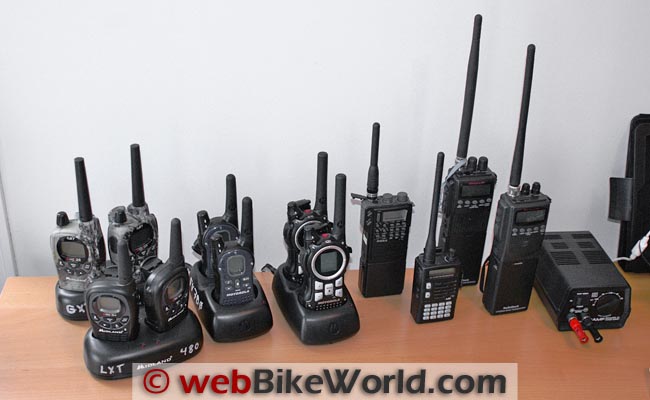
In using six different two-way radio systems with the SR10 and multiple paired headsets, minimal differences in switching or keying were found, although the higher-end VHF transceivers are far more responsive (faster) than the less expensive FRS/GMRS radios. But no matter which radio device is used, the SR10 does an excellent job of managing them.
Without formal test-equipment based measurements (a longer term project), switching delays of 300 to 500 milliseconds were the norm during active communications sessions. Starting a count and then pushing the PTT button always resulted in the link open by the count of two as received by the other two-way radio participants.

Auxiliary Audio Inputs, Bluetooth Connections and Connectivity
The auxiliary audio cables for the SR10 all have 3.5 mm connectors, with the stereo audio connector cable being a standard 3-pole connector and the two phone cables having the longer four-pole connector.
For standard audio output to the SR10, either of the two AUX ports can be used and if more cable is needed, any standard 3.5 mm audio extender cable would work.
When using a non-Bluetooth mobile phone, one of the (optional) compatible phone cables must be used and the connection can only be made using the AUX 2 port so that both audio output and input capabilities are provided via the SR10 for mobile phone hands-free operations.
Bluetooth Connection
The single Bluetooth connection uses the hands-free profile. Once the mobile phone is paired to the SR10, the Bluetooth headset provides hands-free services with the phone with the Red LED providing connectivity/use confirmation.
Connectivity Issues
There are a number of known issues surrounding the use of mobile phones, particularly smart phones, including the iPhone 4 and 4S while paired or connected to the SR10. Most of these issues concern the use of advanced features available on the devices.
Sena is aware of these and other timing and connectivity issues reported by users, some of which have been posted under the Feedback section of the original SR10 article and I have been anxiously awaiting release of the first firmware update.
Conclusion: Features, Form, Function and Use
With the SR10 Manager software and first firmware update released on 2 January 2012, these topics will be addressed in the following sections and we will see just how truly compatible the SR10 is when put up against different Bluetooth headsets.
Owner Comments and Feedback
See details on submitting comments.


