The Return of the Yellow Bike:
THE RETURN OF THE YELLOW BIKE
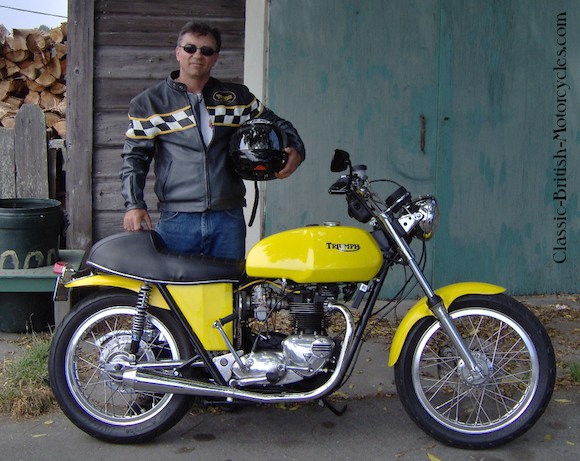
First off, what is the Yellow Bike? It’s my personal favorite motorcycle that I’ve ever owned, and I’ve owned several. It started out life as a ’73 Triumph TR7 that I built from scratch, nearly down to the last nut-and-bolt. It’s the bike I always dreamed of building in my youth, but never had the resources. I started on it in 2002 or so, rode it all over the state, won shows with it, saw it written about in magazines, then for some unknown (and foolish) reason, I sold it in 2009 at the Vegas auction. I never saw it again, but always regretted selling it. Recently a good friend of mine said he’d seen it, and the detective work began. I tracked it down, then bought it back from the guy who bought it at the auction. it was one of the happiest days of my life. This page will follow the journey from finding it to getting it running again and back on the road, and back between my legs, where it belongs. For the whole story, please visit our page on the Yellow Bike.
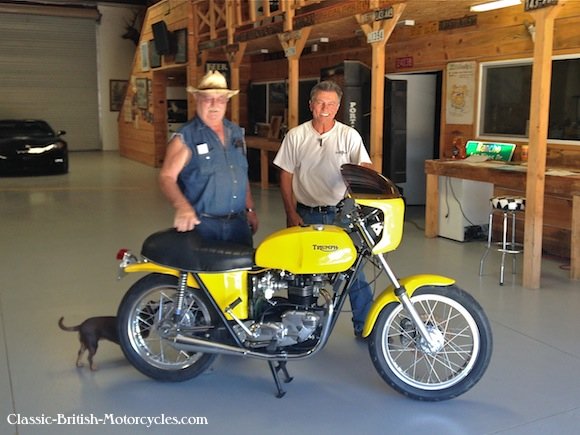
ABOVE: Carey Stewart bought the Yellow Bike at the MidAmerica Motorcycle Auction in Las Vegas in 2009. He was nice enough to sell it back to me. He never even started it in 7 years. He has quite an impressive collection of motorcycles already, so it’s not like he’s going to be doing without.
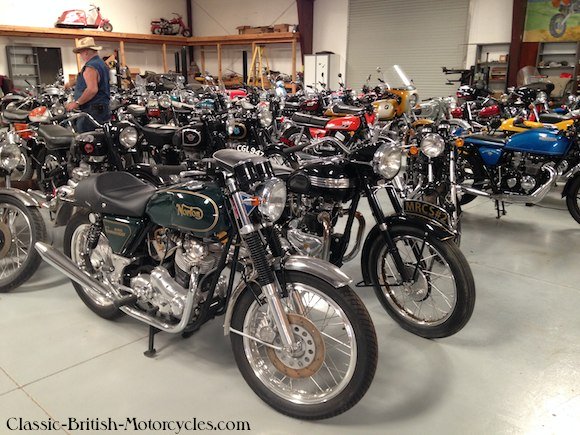
BELOW: Some of the bikes in Carey’s collection. He’s selling some of them. Check out his website at www.DiamondCSMotorcycles.com.
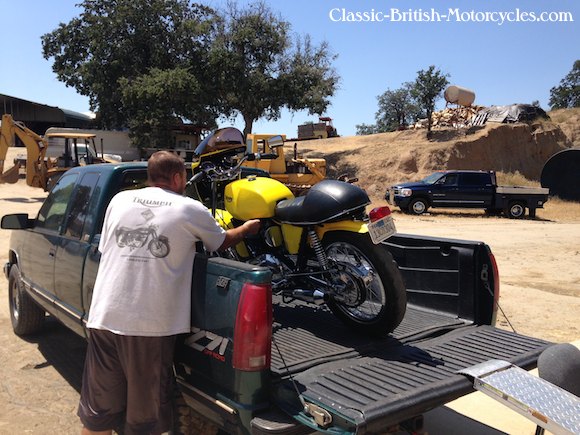
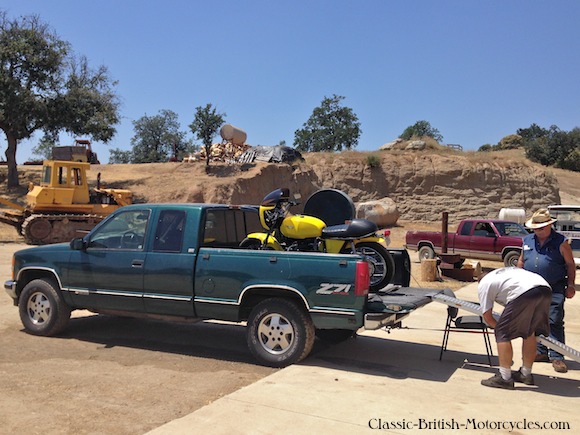
ABOVE & BELOW: After the negotiations, they helped me load the Yellow Bike into the back of my truck for the long journey home. It was way the hell up in the mountains, east of Fresno CA, nearly Squaw Valley.
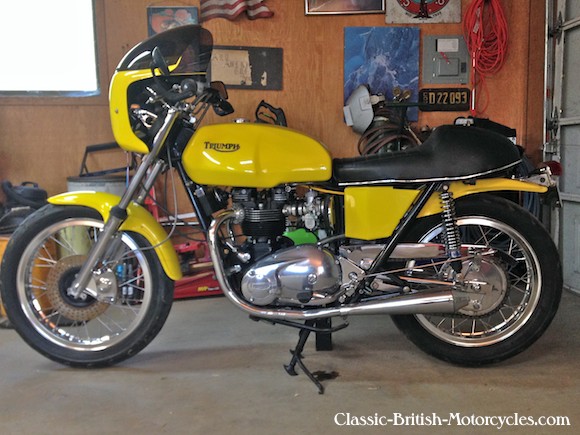
ABOVE: The Yellow Bike back in my shop at home. Ahhh, that feels good! But it needs a lot of stuff to be roadworthy again. The tires were cracked, and all the fuel lines and other soft rubber parts need replacing. I’ll remove and strip the carburetors to get rid of that 7-year-old gas now turned to gunk, not to mention having the old tank liner removed and a new one installed that works with the new gas. And lets not forget about that old battery.
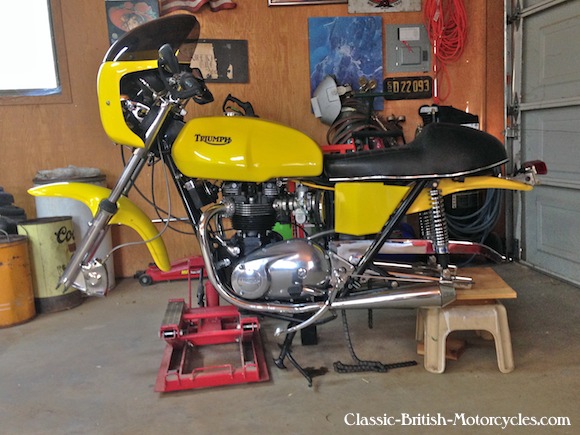
BELOW: Up on jacks, the first step was removing the wheels for their trip to Rabers for new tires, tubes, a balance & truing.
RETURN OF THE YELLOW BIKE – GETTING READY
I’ve been gathering bits and pieces since the bike arrived. The entire fuel system was gunked up with 7-year-old gas. The carbs were stripped and rebuilt, all new fuel lines and filter, and I had the gas tank professionally stripped. In the process, they found a crack in one of the seams, so the tank had to be welded, ruining my gorgeous Yellow Bike paintjob! Oh well, maybe the new paintjob will be an improvement. I have some ideas…
Now it’s time to start putting all the pieces back together. Lucky thing I have a good garage heater!
PROJECT STALLS THEN SPRINGS TO LIFE
I’m sure I don’t have to tell you how life can get ahold of your plans. So, the Yellow Bike sat, languishing in its hiberative state. It took my good friend Andy Mattos to get things rolling again. Andy is one of my old Hanford buddies, but back in my car days. He and I didn’t do bikes together at all back then. Fast forward to now, I moved from Pleasanton CA to Sonora CA in 2015 and Andy moved from Hanford CA to Sonora last year. We ran into each other after many years at the 2011 Clubmans Show when I had my photo studio set up taking pics of Brit bikes. Turns out, after a stint in the Coast Guard, he got into old British bikes also, and even worked for the legendary restorer Don Harrell. Now he’s my Brit bike go-to guy up here. So, he called me up and razzed me about my bike not running yet. He wants to start doing some BSA Club rides starting with the Rio Vista-Delta Ride on Saturday, Feb 24, 2018. That was just a couple months off at the time, and I was making no progress at all at that point (holidays and all). Andy had already set up shop in his new garage and he had a lift. He made the very compelling offer of helping me get my bike running, so I trucked it over and in a couple of fairly short sessions we had it fired up and running.
JANUARY 7, 2018
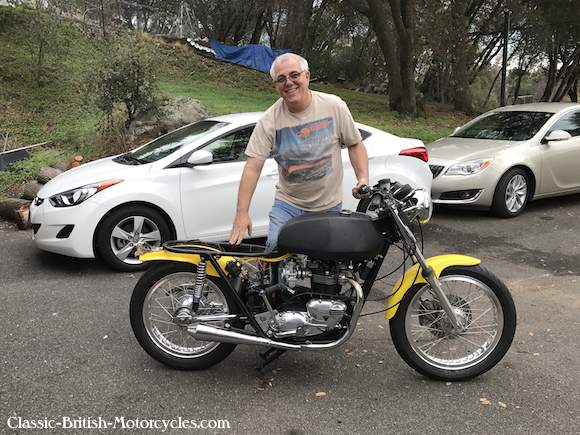
BELOW: My good friend Andy Mattos and Yellow Bike, running but not nearly done.
RETURN OF THE YELLOW BIKE-3 GENERATIONS?
Now that it was running, there was still much to do. I consider this round of wrenching to be the 3rd-iteration of the Yellow Bike, the First being its first build in about 2000-2003. Then I took it on that first Cachuma Run in 2004 down to the All-British Bike Rally there at Cachuma Lake CA. I rode with the crew from Rabers (which is nice because they can fix you bike if it breaks) on this 350-miles-of-backroads-each-way sojourn and what a ride! But it exposed several flaws in the design. And I didn’t when a trophy in the bike show there. So, next I tidied up all the mechanical details as indicated, and cleaned up the cosmetics, with mostly with more chrome. I made a new set of side covers, crudely formed by me with even cruder tools, out of aluminum sheet. They came out okay but clearly look home made. This became the Second-gen bike which I rode to the next Cachuma All-British Rally in 2006 again with the Rabers bunch, and the bike performed flawlessly, rode well, and even won the modified class at the show. Mission accomplished. Then I sold it in 2009, and 7 years later I bought it back again, and here we are working on Generation 3 of the Yellow Bike.
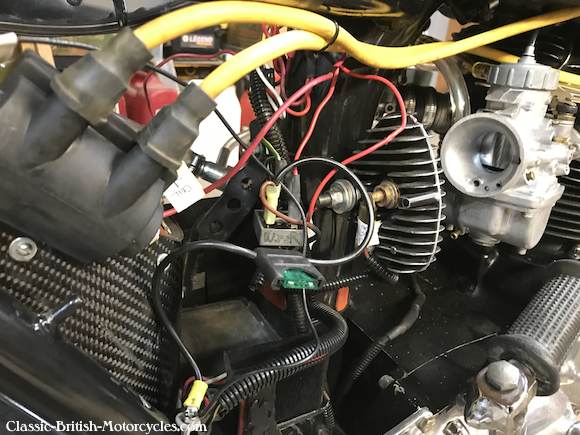
ABOVE: The old wiring was a mess, including that big Zener diode.
THE NEXT ROUND OF IMPROVEMENTS-THE WIRING
It’s funny, what motivated me to sell Yellow Bike back in ’09 was that I felt like it was done, that there was nothing more to do on it, and I wanted another project. But upon getting it back, I looked at the rat’s nest of wiring under the seat and realized instantly that this could not stand. There were 3 main areas that I wanted to concentrate on:
1.) The paint job, obviously. That’s coming soon.
2.) The side covers. I wanted them to look more factory & less hand-made.
3.) Repackaging the wiring to make it much neater.
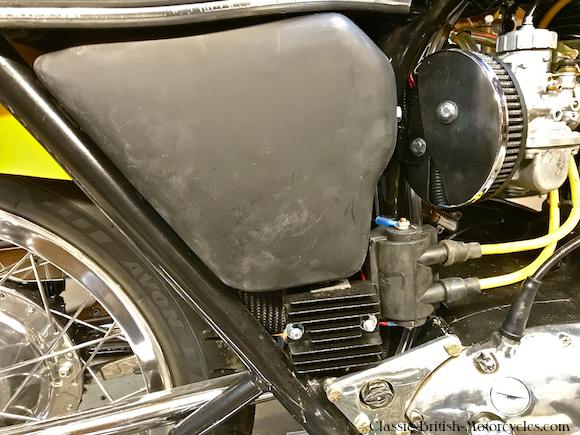
My goal with Yellow Bike has always been to create a huge space under the seat to carry stuff when I ride. The old wiring setup ate into that space, with the coil mounted on the back fender as it was. So this round, I moved the coil forward and out into the open just about the gearbox cover on the right. It’s a neat spot for hit, there’s just enough room, and since I have yellow spark plug wires, it actually becomes a styling statement. I made a custom bracket to mount it which also mounts the right side cover. Andy Mattos convinced me to get a solid state rectifier to replace my old-school rectifier and Zener diode. I made the switch, which was very simple (just 4 wires), and mounted the black finned unit just underneath the newly-fabricated right side cover for a very neat appearance. Then, I rerouted all the wiring as needed to open up the space under the seat. As before, I used Velcro to attach the ‘brain box’ for the Boyer electronic ignition to the inside of the right side cover, out of the way. I bought a new Lithium Ion Battery that weighs only a few ounces (WOW!!!) and yet packs more power and holds a charge longer than conventional lead-acid batteries. What a product! All in all, the underseat-area has opened up considerably, and the wiring looks much, much nicer.
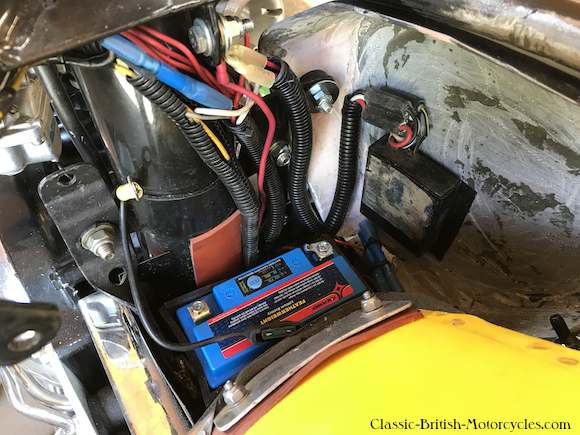
FEBRUARY 1, 2018
ABOVE: Much neater than before with lots more room under the seat. Relocating the coil helped. There’s that super-lightweight Lithium Ion Battery.
BELOW: My newly-fabricated side covers came out pretty well, I’m happy with them. This shot shows the finned solid-state rectifier below the cover, and the coil mounted just ahead of that. Together they give the bike a ‘mechanical/functional’-look that I like, almost like a piece of military equipment, or a NASA vehicle. Every nut on the bike is a self-locker, by the way.
RETURN OF THE YELLOW BIKE: NEW SIDE COVERS
With the wiring tidied up, I set to fabricating the new side covers that I wanted. As you can see from the earlier pictures, the old ones did the job, but looked home made. I wanted something that looked more ‘factory’, but yet not stock for a ’73 Bonneville. What I decided on was modifying a set of covers off a ’79 Bonneville Special. 2 reasons for my choice of donor bikes:
1.) I own a ’79 T140D (my ‘Royal Clone’ and so had some side covers on hand for comparison. I wasn’t going to use them, they’ve already been painted and are ready to install on the Royal Clone. But it allowed me to size them up to see if they’d work, and I thought they would, with some mods.
2.) My good friend Bob Raber of Raber’s Parts Mart in San Jose CA, the best darned Brit bike shop around, dug around his back room and found an old, beat-up used set of 1979 T140D side covers, just like the doctor ordered. Used is better because I was just going to cut them up anyway, and these were cheap…actually, they were free. Bob was in a generous mood that day and I thank him for it.
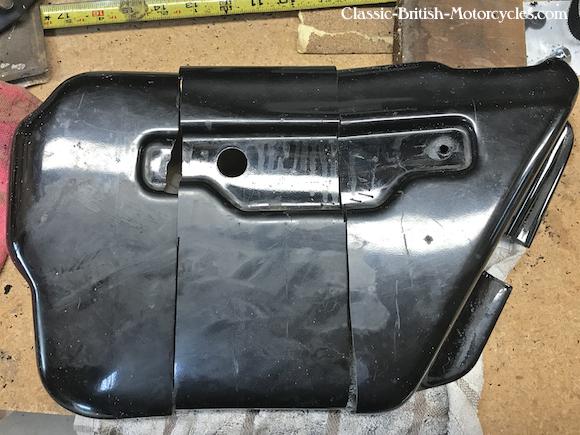
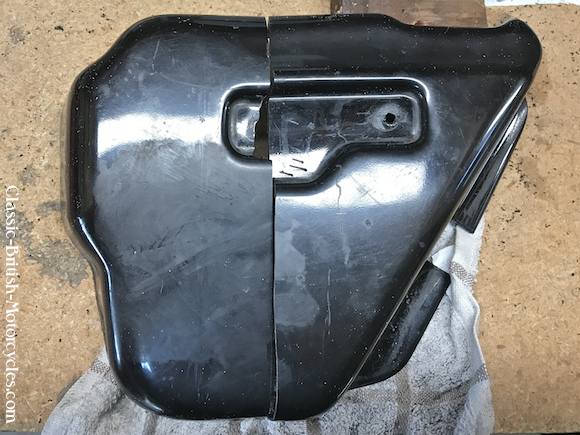
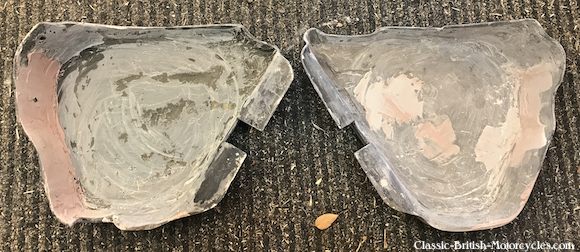
The ’79 side covers were designed to reach far enough forward to nearly touch the carburetors. Starting in 1978 with the T140E, the carbs were no longer splayed out at angle like in all previous Bonnevilles. Now they were parallel and close together, and the plumbing between carbs and air cleaner was unsightly, so they extended the side covers enough to mask all that. I, however, was running the traditional splayed-carb Bonneville head with two pancake air filters, so I had to shorten the ’79 covers by 4 inches to get them right. I cut the 4-inch section out of the center, then carefully matched the two end pieces back together and fiberglassed them from the inside. Then, I applied bondo and shaped the outsides until they looked right. They came out great. I’ll have the body man who will paint them do the final finishing on my crude bodywork.
FEBRUARY 10, 2018
ABOVE & BELOW: It worked out to exactly 4 inches that had to be removed. I tried to choose the best spot to make the cuts because the shape of the side covers changed from front-to-back, so the new end pieces weren’t going to fit back together perfectly. But after enough cajoling, I got them close enough. I fiberglassed them from behind with 2 lavers of cloth and the resin gel. I tried to make it thin to keep the weight down, and they’re incredibly strong.
FEBRUARY 13, 2018
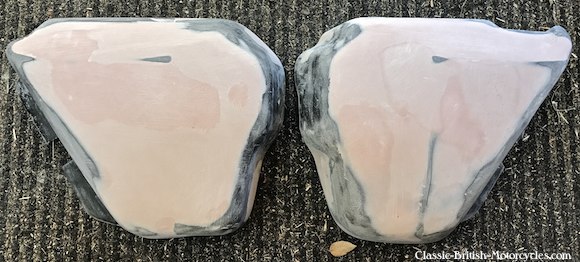
ABOVE: I used a rasp, hand files, sanding blocks and sandpaper to first work the surface of the old side covers, smoothing out the transition (seam) between the two halves. Then I applied just enough bondo to smooth them all out and give it just the right shape.
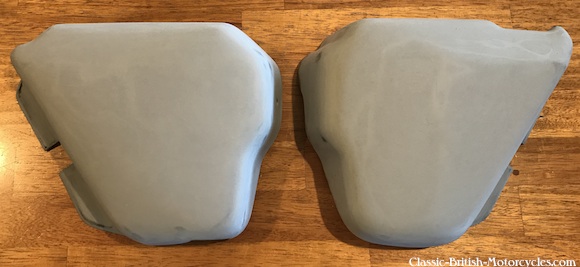
BELOW: After much wet-sanding and prep, I shot them with primer out of a shaker can. This is not the final finish, because I’m not good at that part. I gave them life and their shape, and soon I will hand all the bodywork off to the right body & paint person to finish it properly and turn it into the work of art it deserves to be.
FEBRUARY 24, 2018
RETURN OF THE YELLOW BIKE – THE MAIDEN VOYAGE
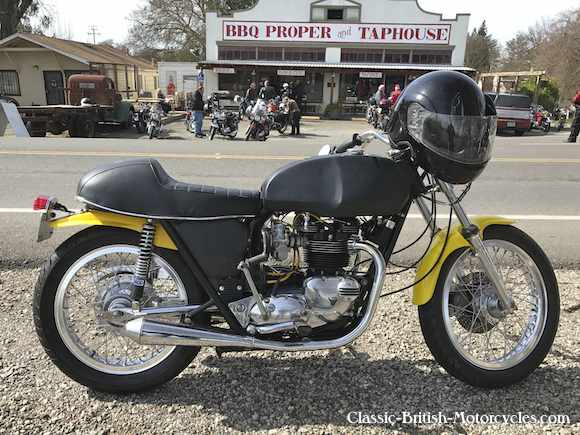
By the time the Rio Vista-Delta Ride had arrived, my buddy Andy Mattos who was going to ride this one with me, had a change of plans and couldn’t make it. But I knew I was ready, and so was Yellow Bike. I trucked it to Rio Vista (about 2 hours) then rode it all day with the BSA Club. It was a great test of the bike, and it performed brilliantly. There’s a slight stumble at midrange which I assume is carburation. The gasoline has all changed since I set the carbs up in 2005, I may have to re-jet it. But other than that, I couldn’t have asked for more. I loved riding it, and everyone around me seemed to admire its mechanical purity. I can’t believe I ever sold it. What was I thinking?
BELOW: The new, 3rd-gen Yellow Bike at one of our stops along the way on the Rio Vista-Delta Ride. This was Yellow Bike’s maiden voyage since getting it back, and the first time I’ve ridden it since 2008.
RETURN OF THE YELLOW BIKE – WHAT’S NEXT?
The main thing left now is cosmetic. Obviously it needs to be painted. But what to do about the “Triumph” logo on the tank? The old one is not available anymore, it had black letters lined in chrome and it looked fantastic. I can’t find them anymore, so I may just go with plain black logos, or something else altogether. Maybe I can have a pinstriper do a custom job of it. I’m also thinking about having the Classic-British-Motorcycles.com logo onto decals and put them onto the side covers. Whatever I do, if it’s stickers or decals, it will be cleared over enough so that you won’t be able to feel the edges. So, I’ve got some decisions to make. For now I’m going to remove all the bodywork and find someone to do the finish bodywork and paint it. I’m also thinking of taking my seat to Corbin to do a leather cover for it with an embroidered “Triumph” on the rear hump (it’s just painted on now, and fading). It’s vinyl now and there’s nothing wrong with it, but the leather would look and feel better. I also have a few minor tweaks to do after the ride, lessons learned and all that. More to come. Stay tuned…


