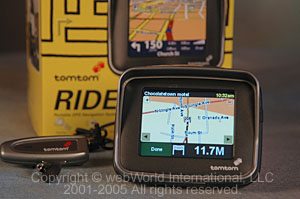
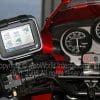
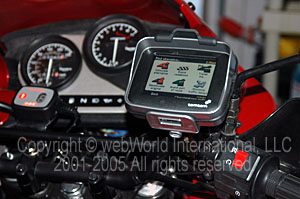
The TomTom Rider is the first GPS designed for use on motorcycles and has just been released in the U.S.A. after its European debut.
The TomTom Rider was developed from the successful TomTom GO line of automobile GPS units. The Rider features a hooded LCD display with an 89 mm (3.5″), 320 x 240 full color TFT touch screen and a built-in Bluetooth communication capability.
The Rider is claimed to be water resistant only. Note that some other GPS units, such as the Garmin 2720, meet IPX-7 waterproof specifications (protected against water immersion for 30 minutes at a depth of 1 meter), but apparently TomTom has not tested the Rider to these specs.
Our GPS experience is limited to the Garmin i5, which we will use for comparison purposes. The two units are very similar in form and function. There are two major differences between the two units. The Garmin i5 has a built-in speaker which provides turn-by-turn instructions, while the Rider uses its Bluetooth capability to do the same.
The i5 stores its maps and information on an internal hard disk, while the Rider comes with a 1GB Secure Digital (SD) flash memory disk that holds its maps. Both use the NAVTEQ map system when purchased in North America, although we found that the units will occasionally provide very different routing instructions, probably due to the processing software (more on this later).
Exact specifications for the Rider are hard to find on the TomTom website, in the owner’s manual or on the CD-ROM that is provided with the unit, and these sources also have conflicting information.
For example, the TomTom website claims that the Rider uses TeleAtlas maps (in the North American version of the Rider). However, the “Show Version” selection in the Rider’s preferences section has a copyright indicating that NAVTEQ maps are installed.
Also, as of this writing, the TomTom website claims that the maps are stored on a 2.5GB internal hard disk. The owner’s manual mentions nothing about an internal hard disk, implying that all of the maps are stored on the SD flash memory. Indeed, a Windows Explorer file listing of the SD memory card indicates that it does include all of the North American maps.
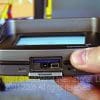
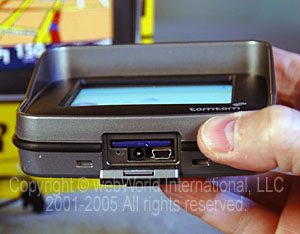
The SD flash memory must be installed in a slot in the bottom of the unit prior to first use. It is very important to make sure the door that covers the SD memory (and the USB and charging connectors) is closed and locked. The Rider will work even if the door is left open, and although it’s unlikely (because the Rider would normally be mounted in its bracket), there is a chance that the SD flash memory could come out of the unit or that moisture could intrude. We’re surprised that there isn’t an interlock feature that prevents the unit from operating if the door is not closed.
The owner’s manual that comes with the Rider seems to us to provide very limited information on the device, which is disappointing for owners desiring to learn about its technical details. It’s our opinion that the TomTom marketing types probably want to maintain the “ease of use” image associated with TomTom products and they deliberately left out any of the technical details that might confuse a first-time GPS owner. We think they should have at least provided a more thorough and detailed manual on the CD-ROM for those who might be interested.
The lack of information means that some important details about the unit are missing. For example, the unit must be charged before first use with the supplied converter, but the only instructions we found regarding this were buried in a section entitled “Battery Notes” near the end of the manual, which states “We recommend that you fully charge your TomTom RIDER the first time that you plug it in. It takes about 2 hours to charge the battery completely.”
The Rider does not have an external battery charging light that would indicate whether the unit is actually accepting the charge when connected to 110V power. The Rider has an internal lithium-ion battery with a claimed 5 hours of life when fully charged, but a battery life meter is displayed only on the route summary screen, which is displayed after a route has been calcuated. There is no battery life indicator displayed while the unit is in use, which we think is an oversight.
The portable Bluetooth earpiece also has an internal battery and it also must be charged before first use, but it also does not have an indication that it is being charged. The instructions simply state “Before you can use your Bluetooth headset module with the helmet headset, you must charge the headset module using the home charger.”
If the Rider’s battery life is exceeded, the unit will not activate, but because there is no external indication that the battery needs charging, and the owner can easily assume that the unit has failed. We discovered this because the battery in our unit lasted only about 1.5 hours after the first 3 hour charge; when we could not activate it again, we thought the Rider had malfunctioned until we realized that the battery needed recharging. There is no warning of this in the owner’s manual.
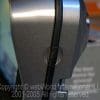
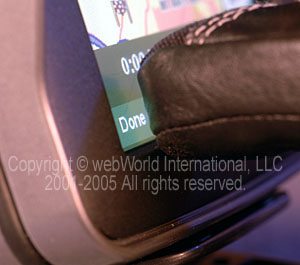
While we’re complaining, there are two more issues that we have with the TomTom Rider. The first is the design of the on/off switch, which on our unit is incredibly frustrating and an unacceptable design. The switch is located on the right side of the GPS as part of the rubber grommet or “bumper” that forms the perimeter of the device.
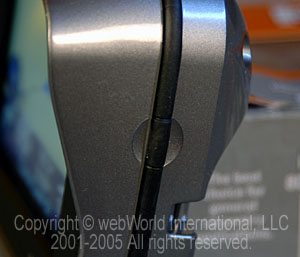
The switch does not work like a traditional, sliding, on/off switch. Apparently, the owner is supposed to press the rubber with a fingernail to turn it on or off, but ours is extremely difficult to use; it involves a huge struggle every time we try it. There seems to be no consistent method of pressure or location to get it to work. It takes an extraordinary amount of fingernail pressure, poking and prodding to turn the unit on or off. Broken fingernails and lots of frustration are the result.
It can literally take us over 30 seconds of pressing, prodding and cursing whenever we want to turn the Rider on or off. We have not been able to turn the unit on or off when wearing motorcycle gloves, and we tried several different styles of gloves. Since our unit was one of the first sold in the U.S.A., it’s possible that the problem will be resolved during a later production run, but until then, we consider this to be a serious flaw.
The other problem is with the touch screen. TomTom claims that the Rider has a “drive mode tailored for simple touch-screen operation with gloves on [sic].” Although we found some of the menu choices are relatively easy to make when wearing motorcycle gloves (specifically the ones that use large icons), the more detailed screens, such as the data entry for choosing a “Navigate to” address, are virtually impossible because the choices are too close together for accurate selection when wearing thick motorcycle gloves. Therefore, we recommend setting up the unit with bare fingers prior to riding and minimizing the selection of any menu choices during the ride.
What’s In the Box
The TomTom Rider is provided with the following:
-
A memory card (SD card) containing the application and maps
-
Mounting kit: Holder, Handlebar Mount, Handlebar Adaptor, Mirror Mount, Adhesive Mount and adhesive pad
-
Screws and Allen wrenches for the mounting kit
-
Battery cable
-
Home charger, with international adaptors (See note below)
-
TomTom RIDER case
-
USB cable
-
CD-ROM with full manual as well as a tool for backing up the memory card.
-
Bluetooth headset module and headset cable
-
Helmet headset
-
Standard headset
-
Screen cloth (See note below)
-
Documentation pack
-
Product code card
Note: The international adaptors and the screen cloth where missing from our unit, which was purchased anonymously directly from the TomTom website.
Navigating With the TomTom Rider
Hopefully, TomTom will address some of these issues in future revisions. Because other than those complaints, the unit is about as user friendly as the Garmin i5, which to our admittedly novice eyes is the benchmark for GPS ease of use.
Once the finicky switch can finally be coaxed to turn the unit on, our Rider finds its position and the navigating satellites very quickly. The unit must have a very powerful antenna; no external antenna is offered and apparently it doesn’t need one (an external antenna is available for the Garmin i5). It’s our understanding that the Rider is designed to track up to 12 satellites simultaneously.
The Rider has a satellite tracking indicator, again on the route summary screen that’s displayed after a route is developed. It shows how many satellites are being used. We found that the Rider will track 5-6 satellites even when it’s located in the center of a house, as far away from the windows as possible, which is excellent.
The first time the Rider is started when new, it goes through an initial setup. Then it will start at a map screen showing its current location during each subsequent startup. The screen can show a 3D or flat version of the map, with a choice of either routing or north “up”.
A compass rose, distance to next turn (in feet/yards or meters), time and distance to destination, current time and satellite tracking indicator are displayed. The map can be zoomed in or out by tapping the screen in the upper right or left hand corners, on the “+” or “-” signs. Some of the information on the display bar can be customized via the preferences.
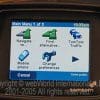
Tap anywhere on the screen to bring up the various menu choices as follows:
| Choices | Sub Categories and Descriptions |
| Navigate to | Home, Favorite, Address, Recent Destination, Point of Interest, Zip Code, Point on Map, Center of Town, GPS Position, POI in City. |
| Find Alternative | Calculate Alternative, Avoid Roadblock, Travel Via, Recalculate Original, Avoid Part of a Route, Minimize Traffic Delays |
| TomTom Traffic | A service called TomTom Plus that can be accessed with a Bluetooth phone to provide weather and alternate route information. |
| Mobile Phone | The TomTom Rider’s Bluetooth capability can be used with a Bluetooth compatible mobile phone to make or receive calls. |
| Change Preferences | Day/Night Colors and contrast, 3D display on/off, map display on/off, sound on/off, volume, favorites, home location, manage maps, manage POI, change status bar, set clock, connect to headset, change map colors, change brightness, planning preferences, toll road preferences, compass preferences, change voice, switch language, set units, operate right handed, keyboard preferences, name preferences, hide tips, disable Bluetooth, show version, docking preferences, disable ASN, reset factory settings. |
| Advanced Planning | Depart from: Home, Favorite, Address, Recent Destination, POI, Zip Code, Point on Map, Center of Town, GPS Position, POI in City. |
| Browse Map | Interesting feature that allows zooming in and out and around on a map; can tap portion of map and identify address, road, location or navigate to that point; can display Points of Interest (e.g., fuel, food, lodging, etc.) |
| View Route | Can view route by text, images, browse a map of the route, show a route demo at up to 500% speed and show the route summary screen. |
| Add Favorite | Can store information on home address, other addresses, recent destinations (whether planned or actual, POI, zip code, point on map, center of town, GPS position, POI in city. |
| Itinerary Planning | Start Navigation, New Itinerary, Guided Tour (of the Rider), Save Itinerary, Load Itinerary, Delete Itinerary. |
| TomTom Weather and TomTom Plus Services | Another service of the TomTom Plus feature; requires Bluetooth compatible phone. |
| Guided Tour | Of the Rider unit. |
| Configure GPS | Displays a screen showing current GPS coordinates, speed, compass heading, graphic with location of satellites in sky, UTC time and bar graph with satellite strength. |
Probably the most frequently used choice will be to navigate to an address, and in this regard, the TomTom Rider is similar in ease of use to the Garmin i5.
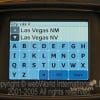
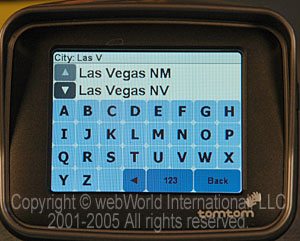
Select “Navigate To” and select Home, Favorite, Address, Recent Destination, Point of Interest, Zip Code, Point on Map, Center of Town, GPS Position or POI in City. Selecting “Address” brings up a touch screen keyboard, which can be configured to display either as “ABC” or “QWERTY” in the preferences section.
The Rider first asks for the destination city. As the destination is spelled out, suggested cities are displayed, but like the Garmin i5, they are not displayed in order of the closest city to the current destination, but in alphabetical order. This means that the city must either be nearly completely spelled out, or the scroll feature can be used to scroll down through numerous cities until the choice is found. I would think that the software should start with the closest city with a similar name, rather than bring up every similar-sounding city in North America for the owner to scroll through.
After the city is identified, the Rider asks for the street name, again using the touch screen keyboard. Finally, a “House Number” screen is displayed with a touch screen numerical entry. The system will recognize if an invalid house number is entered for the chosen road.
After the house number is entered, the user has a choice of “Fastest Route, Shortest Route, Avoid Highways, Walking Route, Bicycle Route or Limited Speed” for the routing calculation. After “Done” is pressed, the route summary map is displayed.
There is a choice for “Route” on the route summary screen, which allows the user to view the route in text format, or by scrolling through the individual maps showing each turn, or by running through a route demo at up to 500% speed (which seems fast but isn’t if the route is over about 30 miles or so).
Most of the screens that are displayed in the route planning process have a “Back” button, but the screens that are displayed in the “Change Preferences” selections do not. This can be frustrating, because if a mistake is made or the screen is cancelled, the user is brought back to the original map and the entire selection must be started over, and there are 6 preferences screens, each with the potential of multiple sub-selections, which means multiple keystrokes to get back to your choice.
Once a route is established, it can be saved as a Favorite and it will also be recorded in the “Recent Destination” section. Selecting a Favorite or Recent Destination is as easy as selecting it from the list.
Bluetooth Connection
The TomTom Rider does not have a speaker. The unit can be used without the Bluetooth earpiece, but the voice instructions are only provided via a Bluetooth device. The volume can be controlled either by the earpiece or the preferences screen. The Rider comes with a single Bluetooth earpiece that is slightly bulkier than a standard MP3 style earbud. I’ve found that it’s easiest to first put on my full-face helmet and then slide the earphone up between the helmet and my head and place it in my ear by poking around with a finger.
The Rider also comes with a thin speaker and microphone kit that can be installed in a helmet. The Rider is adaptable for use in an automobile, but I have not been able to locate a Bluetooth to FM transmitter that could be used to broadcast the directions through the vehicle’s radio, so the Bluetooth earpiece must be worn to hear the instructions.
Mounting the TomTom Rider on a Motorcycle
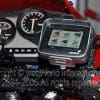
The unit comes with four different motorcycle mounting brackets: a handlebar mount; a mount that can be used under the rear-view mirror; a special mount that will fit under the bolts of most handlebar switches; and an adhesive mount. A special bracket is provided that allows the Rider to attach to any of the mounts.
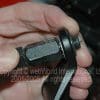
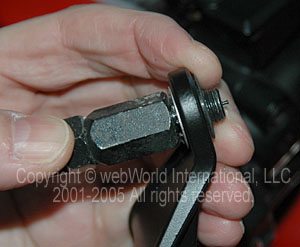
We assumed that the handlebar mount would be the most successful, but this did not prove to be the case. The handlebar mount is a pressed steel clamshell-like device that uses a single screw and square nut to clamp it on to the handlebar. The nut is very thin, which means that the entire device is held to the handlebar with only a couple of threads, which did not feel secure enough on our Tiger’s handlebar.
We were not able to get the handlebar mount tight enough on the handlebar of the Triumph Tiger test bike. The handlebar mount includes a rotating plate on a ball socket that is supposed to be used to mount the Rider on its adaptor bracket, but this plate has only limited travel and we were not able to tilt it far enough back for a comfortable view of the screen due to the cross bar on the Tiger’s handlebar.
The rear view mirror mount seems to be the most robust. Once the mirror is removed, a bracket is placed between the mirror mounting screw and the mirror’s threaded receiver on the handlebar. This left about 1/4″ of threads sticking out the bottom, which, when used with some thread locker, seems to be enough to hold both the GPS and the mirror in place. Another bracket is screwed to the mounting plate and the Rider can be screwed to this bracket, but there is no capability to tilt the screen.
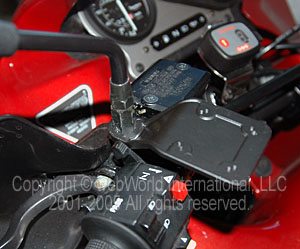
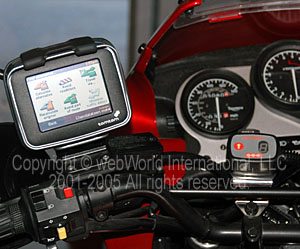
We did not try the adapter that mounts on the handlebar switch because it would interfere with the fuel tank on the Tiger. We also did not try the adhesive mounting plate.
Using the TomTom Rider
Although TomTom claims that the Rider is designed to be used when wearing motorcycle gloves, we found it very difficult to use the touch screen when wearing either summer or winter gloves. Some of the menu choices are too close together, making them too difficult to select with bulky gloves.
The only solution is to completely plan out the route before putting on the gloves. Once the route is started, the instructions are provided through the Bluetooth earpiece. Although somewhat difficult to locate under a full-face helmet, we found the volume to be satisfactory to follow the instructions.
As mentioned previously, the routing types on the TomTom Rider can be changed from Fastest Route to Shortest Route, Avoid Highways, Walking Route, Bicycle Route and Limited Speed. There are some differences in the way the routes are developed when comparing the Garmin i5 and the TomTom Rider. The Rider seems to have a very strong tendency to routing on Interstates, even when a much shorter route exists on a state highway. This could possibly be a local idiosyncrasy due to our rural location.
For example, when routing from Mount Airy to Gaithersburg in Maryland using “Fastest Route”, the Rider has a strong tendency to route first on I-70 to Frederick, Maryland and then south on I-70 to Gaithersburg. This is about 17 miles out of the way and disregards the more direct routing on Maryland state road 27 south directly from Mount Airy to Gaithersburg, which is both quicker and more direct.
The Rider also has some routing display quirks. It doesn’t always display the next road in the routing sequence, instead displaying two or three roads ahead, which isn’t as useful.
It also has a habit of displaying different street names at the bottom of the screen for some reason; my assumption is that it is supposed to display the name of the road that it being taken, but it seems to display the names of cross roads or other roads that aren’t on the route. It also occasionally uses non-common names for roads; for example, it calls Maryland state road 27 “High Corner Street” rather than “27” or Ridge Road, as it is commonly known.
Conclusion
The TomTom Rider has several quirks that need to be considered prior to purchase. The fussy switch is the most serious problem, one that we hope will be addressed in a future revision.
When comparing the Rider to the Garmin i5, we’d say that the i5 is easier to use, and although the i5 is missing some of the more advanced routing features of the TomTom Rider, it also doesn’t really seem to be lacking in comparison.
The Rider provides some level of water resistance, the Bluetooth voice capability and a selection of mounting devices for the motorcycle, but it’s also more than twice the price, at $1,199.95, compared to $535.70 for the i5. “If only” Garmin provided a single speaker output on the i5 and made the unit water resistant, it would be an strong competitor as a motorcycle GPS.
Our initial hope when we first tried motorcycle GPS was that it would help us record the routes and roads that we stumbled upon during our casual touring. Apparently, GPS units are not designed to do this. I’m not convinced that a GPS on a motorcycle is anything more than a curiosity. After all, you can buy a nice tank bag and a whole bunch of paper maps for $1200.00.
|
Product Review: TomTom Rider Motorcycle GPS
|
|
| Available From: TomTom | Suggested Retail Price: $1,199.95 |
| Colors: Dark Gray. Weight: 10.75 oz. (305 g) | Made In: Taiwan |
| Dimensions: 4.5″ x 3.6″ x 2.3″ | |
| Product Comments: Easy to use. Switch is problematic. No external battery charging indicator. | |
Note: For informational use only. All material and photographs are Copyright © webWorld International, LLC – 2000-2013. All rights reserved. See the webBikeWorld® Site Info page. NOTE: Product specifications, features and details may change or differ from our descriptions. Always check before
Owner Comments and Feedback
See details on submitting comments.
From “V”: “I saw your story about the TomTom Rider and thought I’d throw this at you. Having just purchased this GPS last week I noticed right away that none of the category POI’s give any clue as to motorcycle dealers, motorcycle repair or motorcycle anything!
Nice section to find auto dealers and auto repair though. Better do your homework on Google Maps before going on a tour. Since this GPS was designed for use on a motorcycle I am offended of this careless oversight or whatever it is.”
Editor’s Reply: Brilliant idea and observation, now that I think of it — a definite oversight by TomTom!
Follow-up from “V”: “Since I emailed you I did some research and I hope the following will help TomTom Rider (and other GPS owners).
First I found Motorcycle points of interest from Sunday Morning Rides (left top of page). After downloading the desired file it will have a *.asc extension that must be converted to *.ov2.
Then, this free POI/Route/Track conversion utility will convert the *.asc extension to a *.ov2 extension for use in the TomTom GPS.
For my own purposes I downloaded a Honda BMP from Google Images and changed the size to 22×22. Then I named the 2 files needed as: Motorcycles.ov2 and Motorcycles.bmp
Now I have a Motorcycle Category in my TomTom Rider with all the motorcycle dealers I needed! (By the way) the TomTom Rider has POI management that allows working with a Category. The procedure for adding the 2 files to the TomTom via USB cable I mentioned is well documented.”
From “M.F.”: “I’d suggest looking beyond the TomTom Rider and the Garmin i5, as neither is a particularly good unit for use on a motorcycle.
Garmin is pretty much the 800-pound gorilla of the field, and you’ll find lots of 2600- and 2700-series owners who are very happy with them on their bikes. They’re very capable units and have loads of support in the aftermarket. The mid-priced 60 series units aren’t bad either if you want one with maps.
For my ST1300, I selected the Lowrance iWay 500c, which is a full-featured, waterproof unit like the Rider but with a better, larger display and at about half the price. One of the big reasons I bought it is the ability to customize the user interface through the use of “skins.” Lowrance makes a number of skins available, and I’ve developed one of my own that’s designed specifically for use on motorcycles.
This one has large buttons suitable for use with heavy gloves, makes it easy to do a lot of the things I use frequently (find gas, find food, adjust volume on the MP3 player, etc.) and is designed to be used left-handed so I can pull over and use it with both feet on the ground and the front brake pulled in. You’ll find a description and some pictures here.
GPS may seem like a curiosity at first, but once you have a full understanding of what it can do, it becomes a useful addition to almost any activity that requires navigation (driving, motorcycling, snowmobiling, hiking). I can function just fine without it, but it opens up a number of options that either don’t exist or are much more difficult with paper maps.
As an example, I have a Garmin eTrex (the “plain” version with no maps that can be had for around $100) that goes with me on business trips. If I can get latitude and longitude of the office and hotel, I’ll pre-load them onto the unit before I leave or add them as waypoints when I get there. I like to go out exploring, and while I’m doing that, I add more waypoints at good restaurants and other places worth remembering. When it’s time to head to the the hotel, I tell it “go to the hotel” and it shows me which direction it is from where I am. I don’t get turn-by-turn directions, but you’d be amazed at how easy it is to get somewhere just by following the arrow and not worrying about the names of the streets. Sometimes it’s not the most efficient way to get there, but it works reliably and allows me to see things off the beaten path.
On the motorcycle, it has the same benefit: drop a waypoint before exploring that side road that’s been beckoning, and once you’ve got yourself thoroughly lost, you can find your way back. Most basic units can keep track of where you’ve been, and that data can be downloaded and overlaid on a map after you get home. It’s a great planning tool for integrating those little side trips into your rides.
The bottom line for me is this: Most of my riding is commuting, and the time I get for recreational riding is limited and therefore very valuable. Having GPS aboard the bike can be a big help in getting the most value out of that time: I spend less time stopped in the middle of the boondocks figuring out where I might find a gas station and more time converting fuel into fun.”
From “G.C.”: “OK, so I’m not the only one that thinks it’s an expensive cheap piece of [expletive deleted!]. I knew it was a warning signal when I couldn’t find out any technical details about it. You know they’ve got something to hide.
I returned my unit after a week of hassling with it.
So you say “I’m not convinced that a GPS on a motorcycle is anything more than a curiosity. After all, you can buy a nice tank bag and a whole bunch of paper maps for $1200.00.”
Well, I have a Garmin eTrex Legend that I bought for about $170 and it does help a lot. It has the moving map display, and the only thing is you’ve got to remember to download the map for the area you’re going to be in. Even if you screw this up, it’s still got a base map for the US with stuff like major highways, so it’s not totally useless.
It doesn’t plot routes, but I don’t care because I have yet to see anything that does a decent job of that. Neither MS Streets & Trips nor TeleAtlas know that I-4 and the Orlando Expressway are connected, and they do some sort of bizarre wander through downtown Orlando trying to get from one to the other.
Garmin has a bicycle handlebar mount for it that works just peachy on my SV-650 and DL-650, as well as my bicycle.
My usual navigation problem is “ok, I’ve got this map, but where the hell am I on it? There are either no street signs or the streets aren’t on the map”
There’s been times when I’ve gotten home and none of my maps had any clue where I’d been, and the trail wanders across a totally blank map area. In my area of Florida on the east side of Orlando, NAVTEQ and TeleAtlas are out of date by 6 to 11 years. Pretty damn sad, especially for the $250 for the Garmin mapping CDs. I got my money back when I bitched bitterly and listed all the problems that the CDs had.
My best uses have been in Washington DC, on the Blue Ridge Parkway, and in Daytona during Bike Week. It was useful just walking around DC, as that’s a very packed and confusing place.
You say “Our initial hope when we first tried motorcycle GPS was that it would help us record the routes and roads that we stumbled upon during our casual touring.”
My Legend does this. It’s got a “record trail” function which does sort of a breadcrumb trail that you can view on the screen and download to your computer. I wrote code that extracted this and plotted it on MS Streets & Trips or Google Maps. I had screen shots of my trip to work on my website but I got short on space. It was interesting to see it match the expressway to within the width of a lane, even on the interchanges and ramps. I think it records up to 4,000 points in as many trails as you want. When it hits the limit, it starts deleting the oldest points. You can turn it on and off, creating a new trail each time. You can set it to drop a point every X seconds or every X meters.
You can also click the thumbstick twice to record where you are as a named “waypoint” and either quickly accept a default name to be set later, or toggle in the name. This is all in a totally waterproof unit about the size of your fist. The only drawback is the small screen size which makes you need to constantly zoom in and out, and means you can’t read it while driving. Another good thing is since it doesn’t have a color screen, the Legend can make 2 AA batteries last nearly a week, if you don’t want to bother hooking up to your bike.
Plus when you want to find something, you can do it the old “sorted alphabetic” way, or scroll through the nearest city/street/point of interest. The user interface is awesome for something that just has a couple of buttons and a thumbstick. For what it’s worth, I’ve dropped it at 65mph on a highway and it’s survived just fine.
Sorry… I’ve rambled on, but my point is “yes Virginia, there are decent GPS units out there, they’re just hard to find.”
In my opinion, GPS manufacturers have no clue what they’re doing or what their customers want, and their marketing departments need a severe beating.”


