The INNOVV K1 front and rear onboard video recording camera system is an outstanding example of the technologies and capabilities available to motorcyclists today.
It is a complete front- and rear-facing video camera and recording system (aka “dash cam”), featuring well-made components.
The K1 on-board camera recording system can be used for personal video recording and/or traffic monitoring
While we may not want to accept the need for this technology, it is a fact of life for many of us, unfortunately.
The INNOVV K1 motorcycle kit contains almost everything needed to get up and running in short order and the installation should be relatively easy.
The only things missing from the kit are flat or U-bracket mounts for the cameras (accessory mounts are listed on the website) or a handlebar bracket to go along with the included holder for the K1’s DVR control module.
There is a lot of flexibility in where and how the front and rear cameras are mounted and everyone seems to have a different approach ranging from the simple to the complex — the choice is yours.
One or both camera lens modules can be used with the system and aiming is up to you, but the most effective setup is a wide-angle front and rear configuration, with video recording loops set for short or longer segments.
The default mode on the K1 is an automatic start for recording as soon as the ignition is turned on.
But the system also has motion activation and G-sensor or shock-based modes and both of these provide automatic file locking or saving of what could be critical video and audio files.
As an operational system that I use on a daily basis, the INNOVV K1 is proving to be ultra-reliable and extremely valuable.
The system is also designed for “set and forget” operations, but there are many other options and it’s important to review the recorded video once in a while, if only to learn more about defensive strategies in traffic situations you might have missed.
So no matter what it is used for — fun video recording or serious “dash cam” video monitoring — the K1 is an excellent investment with the potential of a significant return.
Introduction
It sure isn’t getting any easier on the highways and byways these days and without being alarmist (well maybe a little), it can be downright dangerous out there.
We need to be alert, on guard and use all the tools we have at our disposal. “The best defence is a good offense” is appropriate at times while out riding; that is just the way it unfolds on the roads.
Fortunately, we do have the means, for the most part, to keep not just ourselves safe, but other road users as well.
The All-The-Gear-All-The-Time (ATGATT) approach isn’t an option, but a requirement. It includes personal protective gear and lots of reflective pieces.
Active measures can be as simple as making sure all the lights are working, along with any front and rear facing auxiliary lights.
And now dynamic braking and deceleration-based products can add even more as early warning indicators to following traffic.
Many of us also use a motorcycle, helmet or body mounted camera or video device of some sort in a desire to record the ride, but cameras can now be also used to monitor and record the traffic environment around us.
Between technology, consumer demand and the realities of the global marketplace, finding, installing and using an on-board “dash cam” type video monitoring and recording system is easier than ever and the INNOVV K1 is a good example.
It has both front and rear cameras for dual recording coming and going.
INNOVV K1 System Overview
The INNOVV K1 system comes in two configurations, one for four wheelers and the other for motorcycles. The biggest differences are the lens or camera modules and the length of the data cables.
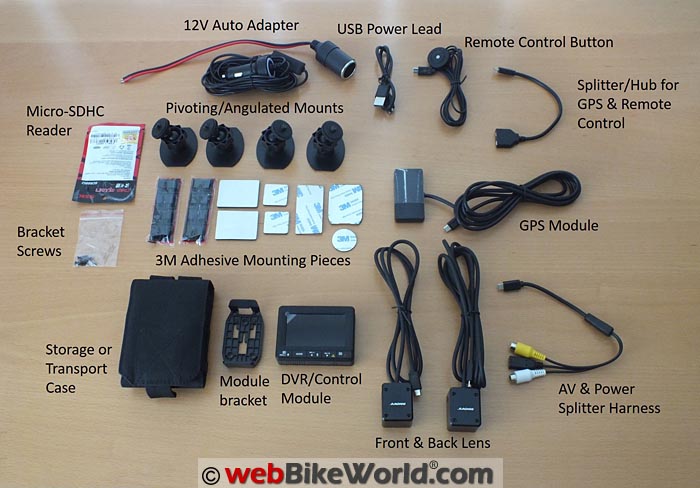
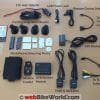
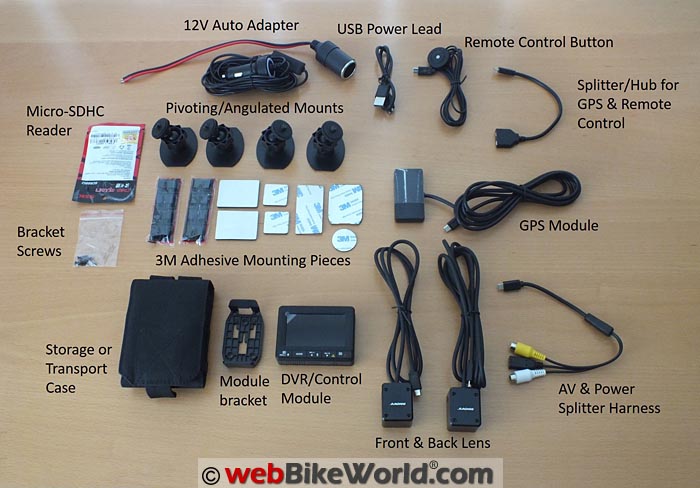
The K1 motorcycle kit includes:
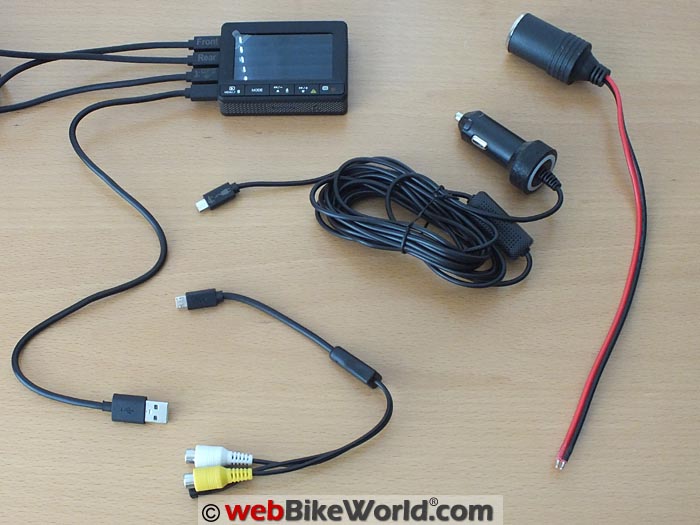
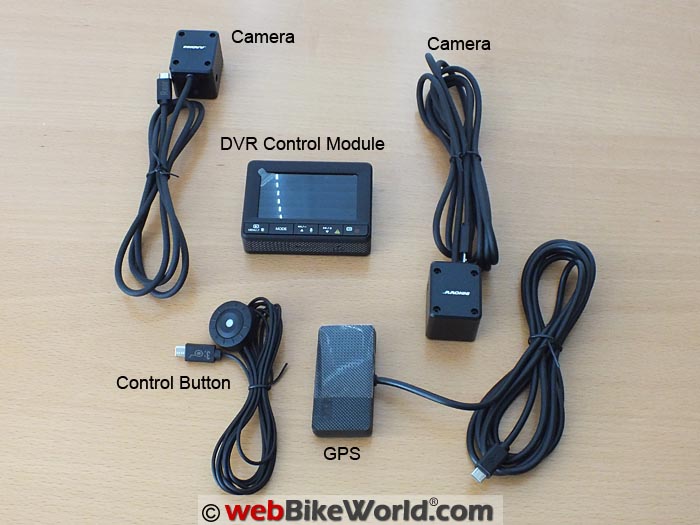
- The DVR (Digital Video Recording) Unit and control module that measures 7.8 x 5.7 x 2.2 cm (3.0 x 2.24 x 0.86 inches).
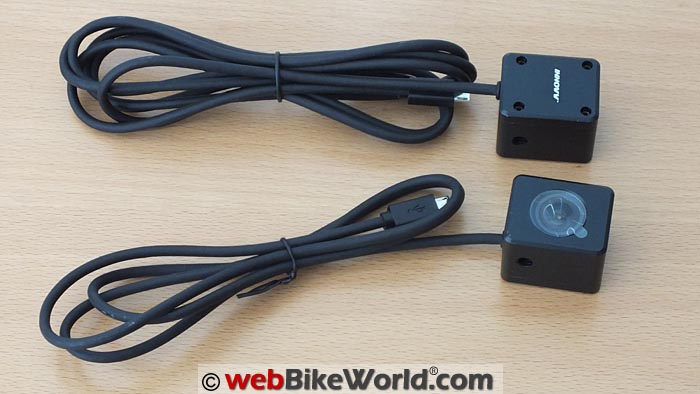
- Front and rear cameras, made from aluminum billet with three standard ¼-20 mounts.
- A GIS/GPS module, measuring 6.4 x 3.3 cm (2.5 x 1.25 inches) with a 200 cm (79 inch) cable.
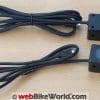
- Remote control button with a 200 cm (79 inch) cable.
- In North America, a 12V DC socket with 25 cm (10 inch) lead set and 12V DC plug on 400 cm or 159 in lead with micro-USB connector.
- Audio-Visual harness with two RCA sockets for video/audio and a micro-USB power connector.
- Four 360-degree pivoting adhesive mounts with standard ¼-20 camera tripod mounts.
- Mounting kit with various sized 3M double-sided cushion pad mounts.
- Installation manual (.pdf) and user manual (.pdf).
The military grade pouch included in the K1 kit is a nice functional solution and should be used to protect the module once installed (with flap space for the cables) or while being transported or stored.
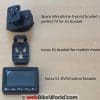
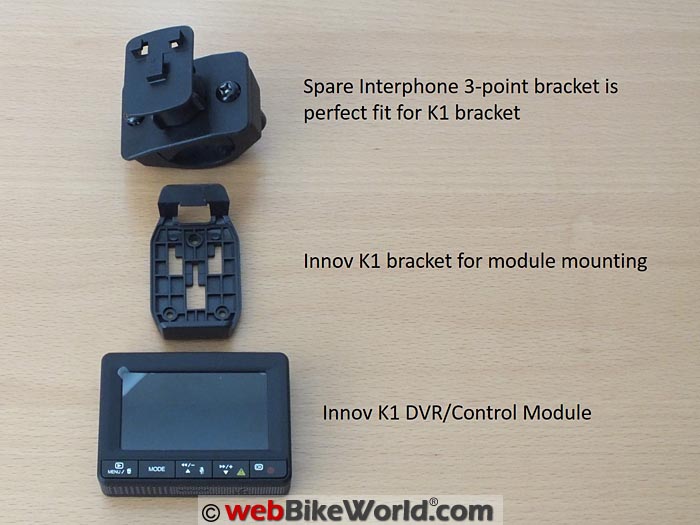
And as expected, the small snap-on bracket also found in the kit has proven itself no matter where the control module is located.
Although for some applications a compatible three-point mount is needed. This is something that might have been hard to source, but wasn’t.
Key Features
Here is a summary of what we see as the key features and functions of the INNOVV K1:
- Automatic, motion-detection or G-Sensor recording.
- User configuration with a menu and mode settings.
- Controls allow manual intervention and review of recorded video files.
- Remote control button provides locking and video stop/start functionality.
- A GPS module provides real-time locational data with video data and time correlation for locations around the world and your travels can be viewed with the bundled Registrator Viewer open-source app.
- AV output, with use of the provided harness, automatically sent to an external device for recording/monitoring/storage.
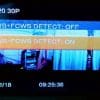
- Lane Departure Warning System (LDWS) based on detected departure from defined parameters that can be set by the user.
- Forward Collision Warning System (FCWS), proximity activated audio and LCD alerts.
- Park Mode Setting provides up to one hour of recording time after the power is turned off, runs off the internal (replaceable) battery.
- 140-degree lens, wide-angle fixed focus (F2.0, f=2.8mm) from 1.5 meters to infinity, in whatever direction they are pointed, particularly valuable in multi-lane fast or slow moving traffic environments.
- 1/2.7” 2M CMOS Sensor for camera.
- The dual channel system streams front and rear views to the palm-sized water resistant DVR/Control Module that is the hub of the system with its LCD screen.
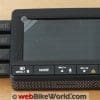
- Five input buttons and I/O ports.
- The LCD screen provides the means to browse through stored videos enabling clean-up or saving of specific files and of course for viewing system menu options when reviewing or making changes using the function keys.
Audio and Video Specifications
The K1 will record 1080p/30fps or 720p at 30fps. Our K1 samples are 720p/30fps (1280×720) in .mp4 format.
Our samples had an average bitrate of 7990kbps. Audio bitrate from the single microphone in the front camera module is 128kbps at a 48kHz sample rate.
NOTE: The K1 is designed to be used with high-speed, high-quality SDHC or SXDC memory cards with the UHS-1 specification, like this one. UHS-I has a bus interface speed of up to 104 Mbps.
Power Requirements
The camera requires 5V at 2a for a 10W total when recording video.
Loop Recording
Loop recording times can be set for 1, 2, 5 or 10 minute clips. Recorded files are saved to the memory card (up to 64GB cards).
If the memory card is full, the oldest file is overwritten. Total recording times are 8 to 9 hours at 720p or 5 to 6 hours at 1080p/30fps.

Inputs and Outputs
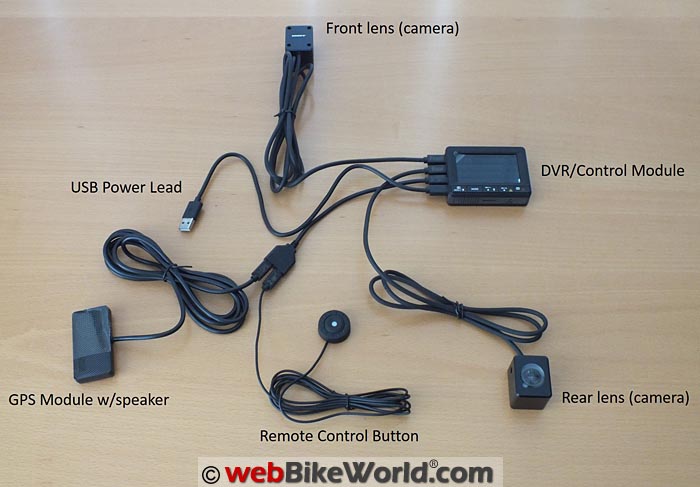
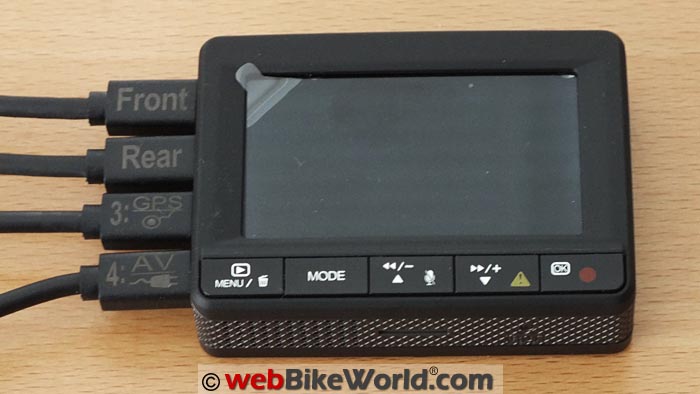
All I/O ports on the K1 control box are clearly marked, making it a simple task to get everything where it should be.
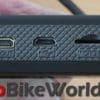
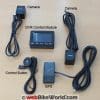
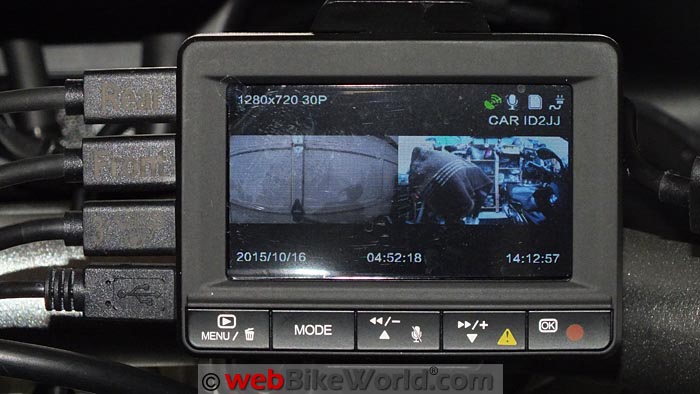
Four micro-USB ports occupy the left side, for front lens and rear lens inputs; GPS and the remote control button (using the 2-into-1 splitter) and power input or multi-function AV harness with integrated power connector.
The right side has three clearly marked ports: micro-HDMI and micro-USB outputs for direct A/V use and a micro-SD storage card slot (accepts up to 64GB cards).
The top houses a speaker, a detent for the bracket and the power button, while the bottom hosts another speaker, another bracket detent and the reset button.
Each aluminum billet lens housing has three industry-standard ¼-20 threaded holes on the top, left and right sides and 3M VHB fastening strips are provided as alternatives for mounting. The front module houses a tiny microphone as well.
For the motorcycle version, the lens comes with a 2 meter long lead for the front and 1 meter long lead for the rear.
While the K1 is meant to be a “set-and-forget” system with automatic or motion-initiated recording, users do have some control (thankfully) in the form of the right side button on the control module or the wired remote control button.
Voice status announcements from the very clear speaker integrated into the control module and the GPS module (which becomes the default output when connected) are helpful.
But they can’t always be heard due to ambient noise on the motorcycle.
The five front mounted bottom row function keys provide the means to step through, change and save system settings with everything presented visually on the LCD (covered in the following section).
The five input controls, left to right, provide the following:
- Menu/Play/Discard (basic settings for video review).
- Mode (detailed configuration settings).
- Rewind or Scroll Down (video review/menu scrolling) with the minus button.
- Forward or Scroll Up (video review/menu scrolling) with the plus button.
- OK and Record Start/Stop (accept input/start or stop recording).
The Information Display
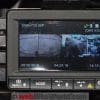
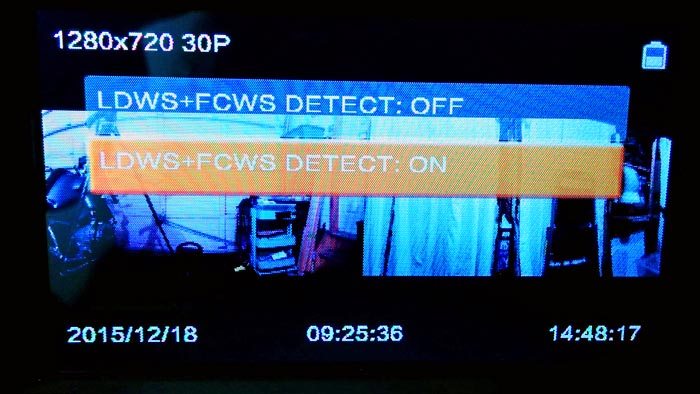
The 2.7″ LCD screen provides a wealth of information in a small area.
Top and bottom segments provide setting and function information while the centre area is normally a live stream from the front, back or a both cameras as a split-screen view.
Default information fields on the top and bottom of the recording screen are textual and graphical.
They include video resolution (Cam1), motion detection graphic, GPS status, audio, micro-SD card, battery status, date, remaining recording time, current time, recording time (segment) and, vehicle ID.
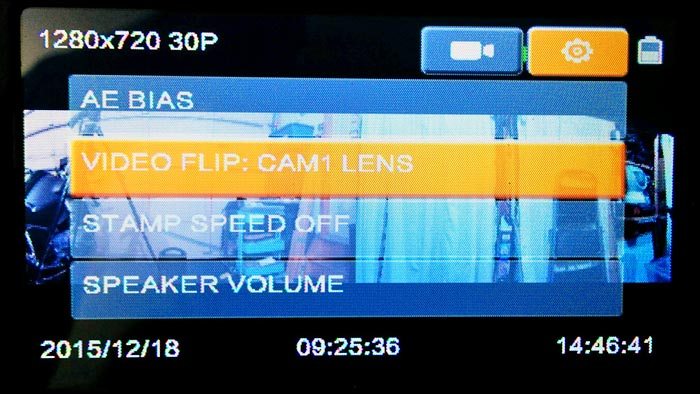
As could be expected with a sophisticated system like the K1, there are a lot of configurable settings available under the Menu and Mode sections of the software and spending the time to go through all the documentation and then again as a practical exercise really works.
Also as could be expected, many of the settings are video oriented.
For example, resolution of both Cam1 and Cam2, video quality, WDR (software video boost), information stamp settings and more.
Many other system settings are well detailed in the documentation with explanations, including date and time, vehicle ID, storage card formatting, LCD control, motion detection and lots more.
Mounting the K1 DVR Control Module
After some of the usual figuring on where to locate the INNOVV K1 DVR control module, I decided to go for an external handlebar mounting on the 2016 BMW S1000XR (Blog), although a spot in the back under-seat area was reserved as a more permanent home.
Remember the earlier comment about finding the proper mounting bracket?
Well, it turns out that tucked away in a storage box, I had an unused Interphone intercom handlebar clamp mount utilizing the same three-point pattern.
Having the module in plain view on the handlebar does expose it to scrutiny from others, lessens its security and of course, exposes it to the elements.
But that’s offset by the ability to directly view the LCD screen (no distracted riding, of course) and its use as a conversation piece.
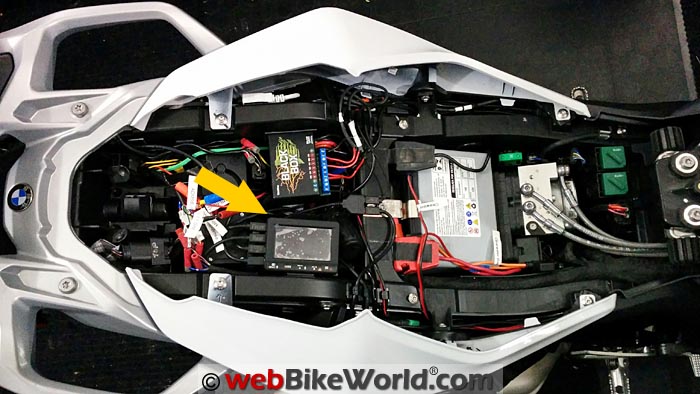
Then when cooler and wetter weather hit (no snow though, yet) and while doing other accessory work on the XR, it seemed prudent to move the module to a more protected spot, the one reserved in the rear housing box under the seat.
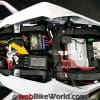
Initially I tried mounting the control module on the left wall of the box, but it now resides on the right side about 10 mm down from the top edge and just behind the curve of the side walls.
I cut a section of 3M VHB to match the base of the snap-in bracket and that is more than sufficient to hold the assembly solidly, with additional support from the connected leads as well.
I swapped the lens modules so that front = Cam1 (flipped) and rear = Cam2.
Then, the 2 meter long front lead again runs under the bottom channel on the front fairing, up along the right side inside all the plastic and then over to the frame for continuance to the rear under seat area.
Strategically placed adhesive cable holders and zip ties keep this lead, along with the GPS cable and the thin remote control wire held in place and completely hidden, but accessible.
With relocation to this more permanent home, the small dual input micro-USB splitter (hub) hosting the GPS and Remote Control connections sits secured to the front wall of the housing box with its lead plugged into the No. 3 left-side port on the module.
I only use the fourth left side micro-USB port for power right now, supplied by the accessory USB outlet part of the Y-cable adapter harness fitted to my Neutrino Black Box V2 (review).
This resides on the left inside wall of the back box.
All of these renovations result in better utilization of space especially with the new Clearwater Lights CANopener V5 harness for the S1000XR now installed; its in-line interface harness uses the connector of the nearby OE Alarm module.
So what was once an open area is now crowded. And although permanency is a fleeting thing for many products on the S1000XR test mule, wire routing and management remains important.
Mounting the Front and Rear Camera Lenses
To facilitate this temporary first installation, I swapped the front and rear camera modules.
They have different lead lengths (2 meters and 1 meter respectively), which isn’t a problem when the K1 control module is installed in the centre or rear area of the motorcycle.
The handlebar layout does immediately highlight a shortfall, however.
The leads should both be at least 2 meters long to facilitate placement of the modules almost anywhere on the bike.
Default positioning for the camera modules has the connection cable at the top, but for the S1000XR front mount the lens is upside down while the rear camera is not.
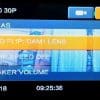
But it is a simple matter to flip one or both of the units under the firmware settings in the menu system.
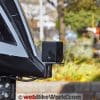
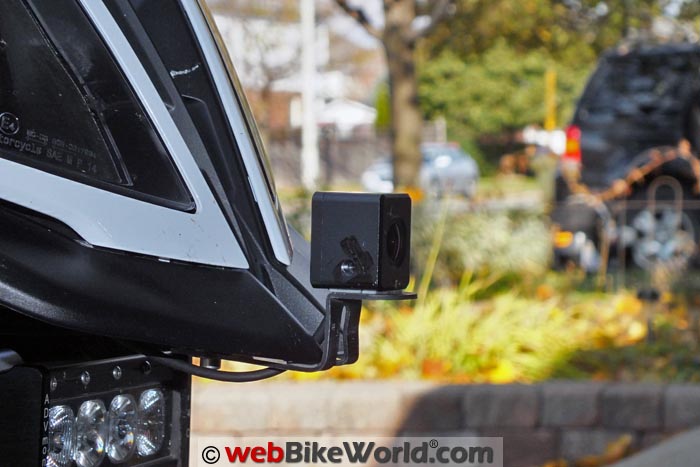
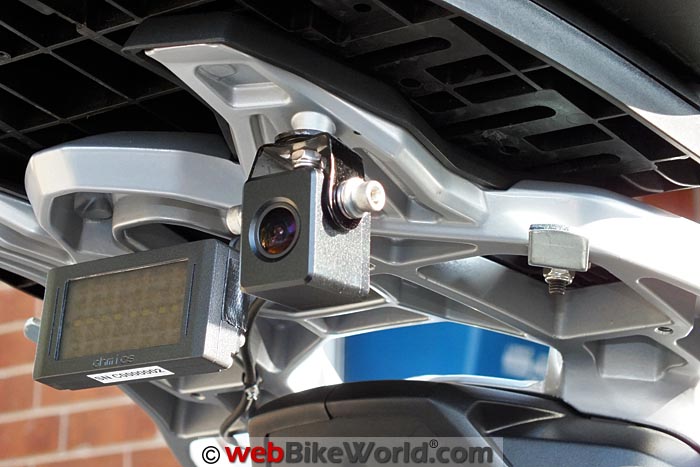
Mounting in the front and rear will, of course, vary for each motorcycle type. On the S1000XR, the front lens fits nicely between the “V” right in the center. In the rear, I bolted the camera lens using a “U” shaped bracket to the underside of the luggage rack.
Mounting Bracket Notes
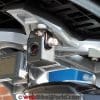
The front camera mount I used was custom shaped from a small section of a modular adjustable license plate bracket (from Oxford I believe).
The more robust rear mount is actually a leftover M6/M8 U-bracket from a Denali LED kit I had that also received a bit of “shaping” to allow the lens module to slip between the sides.
It’s a perfect solution, cushioned with a vibration washer between the top and the luggage grid mounting point.
Other lightweight aluminum brackets can be found in many cycling outlets or aluminum hobby brackets from craft stores work well to mount/secure the lightweight K1 camera modules. Now if only INNOVV would provide some similar pieces…
UPDATE: Be sure to read the extensive comments in the Owner Comments section below from INNOVV regarding the installation.
Mounting the GPS Module
The K1 also includes the GPS module with speaker. I fastened that to the top of the locking BMW Navigator V cradle (see the webBikeWorld review “Mounting a GPS on the BMW S1000XR“).
This makes for a high open point for signal reception from the satellites and output from the speaker is audible, at least at the around-town lower speeds.
The K1 Remote Control Button
This control is on an approximately 2 meter long thin wire lead.
And in reality the small round button can go almost anywhere on the motorcycle, as long as the rider has easy and safe access to it. And everyone does indeed seem to have their own preference.
The left control nacelle on the XR is (over) crowded, so I ended up peeling the backing off the adhesive pad on the bottom of the button and stuck it on the inside front of the left hand guard for easy finger access and unobstructed viewing of the status LED.
INNOVV K1 Function and Performance
In no particular order, this section will cover some usage notes and observations about the INNOVV K1.
INNOVV K1 Startup
Turn on the ignition and the Neutrino Black Box completes its self and power-good checks in 3 to 4 seconds, at which time the K1 starts recording automatically, which is both a pro and a con.
Automatic recording is fine when the wheels are turning, as is using the motion detection mode for continued monitoring when parked, particularly in public parking facilities.
And activating the G-Sensor mode is a no-brainer; the 3-axis sensor located on Cam1 detects dramatic acceleration shifts or even sudden braking that can indicate an incident or accident; with immediate and automatic “locking” (saving) of video.
But for just about any other activity, having to deal with the camera as soon as the ignition is turned on is a pain. Pressing the right most control button or the remote button becomes almost a reflex.
Having other user-controlled options for flexibility in the K1 system is something that really needs to be addressed by INNOVV. In the meantime, I’ll continue to put up with the inconvenience or just unplug the USB power connection when needed.
Configuring and adjusting the system is easy.
Use the menu offerings to adjust Recorded Settings (Menu button) and System Settings (Mode button). The “Up” and “Down” and “OK” buttons are the enablers to explore and use all of the available features — and there are many.
GPS Notes
In going back to recording modes and related to “evidence”, don’t forget to install and activate the GPS.
And once activated, make sure the correct GPS time zone for your area is set. If you don’t synchronize time data sets, the video files can or will be out of order.
And there is another GPS and time related issue noted by both me and other users: no accommodation if living in an area where a plus or minus (30 minute) time zone exists and I can think of a few examples. A software fix is needed for this.
Criticisms aside, the control button serves an important function.
A quick momentary push of the button serves to “lock” the current recording so it cannot be recorded over if storage capacity is exceeded. A longer two-second push stops or starts recording.
This is why it’s important to have the control button mounted in an easy-to-access location on the bike.
DVR Control Module LCD Notes
With the LCD tucked away out of sight under the seat, determining what the system is doing is difficult. Why? Well, when the system starts or stops the red LED is on or off and the appropriate voice announcement is made.
This output is fine in light traffic and at low speed but in broad daylight, on busy noisy roads or at speed neither indicator is of much use.
A much larger, brighter and perhaps flashing LED would be a good simple improvement, as would a smaller LED on the GPS module, which might be positioned within line of sight.
But really needed is a wired audio or wireless Bluetooth audio link capability for the K1.
An audio port on the control or GPS module would allow users to add a Bluetooth dongle for pairing with or an audio cable connection to a headset or to a navigation device for pass-through audio.
Thinking that perhaps the AV cable with its RCA video and audio leads might provide a solution, I tried a simple 3.5 mm audio adapter.
But when the harness is connected to Port 4, the system starts recording automatically, shuts down local control and streams video and audio to any externally connected device…not the desired result, at least not yet, but there are other things to try.
Video Recording Notes
But back to the positive things, like the recorded video file. It could, at some point, become a valuable piece of evidence, especially where a situation develops over some time.
If the current loop recording has been going for less than one minute and something happens that absolutely positively needs to be saved with a quick push of the button to lock and save the recording, both the current file and the file before it is saved (as two files).
This feature is similar to the past, present and future loop feature found on some other monitoring systems, including the Sena 10C (review).
Audio Recording Notes
I’ve seen more than a few comments from other K1 users about playback audio quality. Admittedly I have not turned on the audio much, but in activating it and checking the recordings, the audio was OK, but not very high quality and the output was low.
Now it might be that audio isn’t seen as a critical requirement for a video-based system, but in reality it is, or could be as important as video.
And in knowing how good some systems are regarding audio and video, this is a shortfall in the K1, although its not alone.
Notes on Battery Life
And my last observation regarding function and performance of the K1 focuses on what I feel is or could be a battery issue.
When operating temperatures are around 5 to 10C (41 to 50F), the system shuts down or locks up, necessitating a reset.
This was most acute when I had the DVR control module mounted on the handlebar, where it is more directly at the mercy of the elements.
UPDATE: See the Owner Comments section below for feedback from INNOVV on this issue. UHS-1 memory cards should be used and the CPU should be stored in the pouch.
With the module mounted under the seat and better protected, the issue isn’t seen as often.
But when lock-up does occur and the module is subsequently warmed up, functionality is restored, often without a reset. As temperatures fall the system is again exhibiting the issue, and this is frustrating.
View the INNOVV K1 1080p Samples Video on the webBikeWorld Vimeo Pro channel.
View the INNOVV K1 On-Road Samples Video on the webBikeWorld Vimeo Pro channel.
▪ Download a 1080p Front/Rear Camera Sample
Media Management
I know users of “dash cam” onboard video recording systems that never look at the recorded video, even if only to see whatever loop video is saved. However, trusting a system is good, but verification is better.
Reviewing the recorded loop timings and then examining what is on the storage card from time to time is a good way to review what happened during travels.
And even better, to update your own personal riding strategy “playbook” to hopefully decrease the chances of becoming a statistic.
The 64GB storage card in use has the usual DCIM media storage folder and two K1 specific sub-folders named “100Media” for protected videos and “101Media” for cycled videos (normal timed looped video that is kept until space is needed and then overwritten).
Video from both the front and rear cameras are in the same folder, so its easy to look at the basic file naming structure and find the associated Cam1 or Cam2 files by the time stamp.
As with any file naming and time stamp structure, there are both conventions and formats followed for standardization and consistency. In reality, it is all quite easy to understand and provides key information at a glance.
On playback, the L to R time stamp string used for K1 video comprises camera (C1 or C2), coordinates, speed, direction, date, time, mic on/off and ID (platform, plate, tag, etc.).
There are alternatives for viewing and managing files from the K1.
They can be brought up and reviewed, protected or deleted directly using the LCD and controls, by connecting an HDMI or USB cable for wired access or, by removing the storage card and reading it on another platform.
Apps for Video Playback
Listed in the system documentation as the “GPS Player”, the bundled or preloaded open source “Registrator Viewer” app for the K1 is a pretty good playback application. It was and is developed in Russia, where dash cams are a way of life.
For initial forays in exploring and exploiting the video and associated data on the K1 files, this app is a good place to start.
And to say there are a lot of other applications available for use would be an understatement. Some are bundled with other camera systems, some are available for purchase and some are just available.
A current and growing interest is the ability to record and playback video.
That includes not only positional data but a host of other correlated data from other sensors, typically wireless, to generate some amazing videos, testament to the interest in and capabilities being evolved.
Conclusion
This review of a front and rear onboard video recording system has been a most positive experience and hopefully it won’t be the last.
In using the INNOVV K1 as an operational system on a daily basis, I can say that it is easy to use, ultra reliable and it is also proving to be a valuable asset.
The lack of better brackets for mounting, the module lead length issue and the poor LED output issues are minor and could easily be addressed.
Providing more user control options and adding a direct audio output connection may be more complex to resolve, but should be done by INNOVV.
Granted, adding more user control options and a wired or wireless capability to monitor audio and/or to interact with the system dynamically would increase system complexity and probably cost.
But it would also serve to set the K1 apart from market competition and set the stage for its continued evolution, something we would really like to see.
More webBikeWorld:
▪ Video Action Camera Reviews
▪ Intercom and Radio Reviews
Owner Comments and Feedback
See details on submitting comments.
From “M.N.” (May 2016): “Great article and agree with all comments.
One thing that should be pointed out is that the cameras are unshielded and bleed interference.
My front camera is located about 3 inches from my bike track unit and it completely jams the satellite acquisition.
If I move the camera further away — say 12 inches — which is the furthest I can get away from the tracking unit and still mount the camera, there are some satellites locked but the performance is compromised considerably.
I have wrapped the camera completely in aluminium foil (including the lens) and this blocks the interference and the tracker then works correctly.
The cameras and camera leads really need to be shielded when being used on bikes with any GPS equipment.”
From “G.H.” (March 2016): “I see people are complaining about the cables being to short for Gold Wings.
I wrote to the manufacture about that and they said they could increase the front cable to 3 meters and rear cable to 2 meters, all you had to do was ask them.”
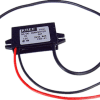
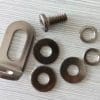
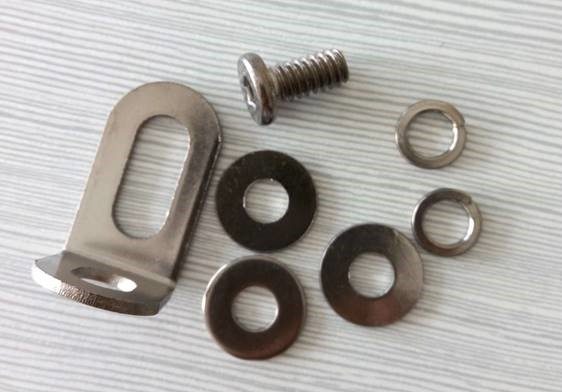
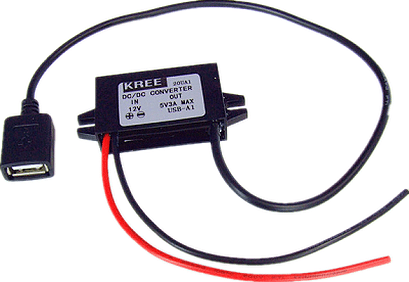
UPDATE From INNOVV (February 2016): “We have now added new stainless steel brackets to the kit for easy installation and will replace the current cigarette-type accessory plug with this 12V to 5V converter for an easy connection to the bike’s switched power.”
From “D.L.” (January 2016): “I purchased the Innovv K1 but when it arrived I was amazed that it only had 1 meter of cable for the rear camera and 2 meters of cable for the front camera. Definitely not enough cable to mount a camera on the front and rear of my Goldwing GL1800.
Seems like all the reviews I’ve seen were for smaller bikes. Innovv needs to provide more camera cable lengths. Shame because it looks like it would be a nice dual camera system.”
From “W” (January 2016): “I was reading your remarks on your site about the INNOW K1 cameras. I have had them fitted to my 2012 BMW for some time now and I think they are great.
The only frustrating problem that I have is with the Register viewer when viewing the files. Firstly I can’t view both front and rear camera files simultaneously as shown with your video samples.
Often when viewing the forward camera files and it arrives at the end of a file, instead of continuing with the following forward camera file it switches to the rear camera for the next leg of the journey and at the end of that file it switches back to the front camera file for the following leg of the journey.
Maybe it has something to do with the way I have the Register Viewer settings configured. Are there any instructions on the use of the Register Viewer in English?
On other occasions it will play the video of the front camera, then switch to the rear camera for the same leg of the journey before switching back to the front camera for the second leg of the journey.
At least that way I can view both the front and rear recordings for the same leg of the journey, one after the other for the same segments.
Are you able to tell me what program you used to play both front and rear camera recording simultaneously on your site?”
Editor’s Reply: We didn’t use the INNOVV system to view the files on a split screen. The viewer that comes with the INNOVV camera is pretty basic actually.
Instead, we downloaded the files to view on the computer.
To create the combined view, I used Adobe Premiere Elements 14 ($89.95 list), the video post-processing software, to create the screen-within-the-screen. Then I saved the new video that I created to display on Vimeo and YouTube.
If you’re going to do any type of editing to the video at all, then you really need to get a video editing app like Premiere Elements, which is very easy to use once you figure it out and pretty inexpensive.
Otherwise, you have huge video files and no way to cut out the boring parts. So you do need an editor.
However, you can view the two files together without editing, by finding a video player app that allows split screens, like the excellent open-source VLC Player (free download). It’s the only player I use to view any videos and it does a lot more than just playing video or music files.
Here’s a blog post on how to use VLC in split screen mode. I haven’t tried this method but if this doesn’t work, there are other players and apps that will do split screen, run a Google search for “split screen video player“.
From “S.M.” (December 2015): “Can you tell me where you managed to get the “U” mount for the rear camera? I would rather use this system than any “Velcro” set-up.
I haven’t experienced the “lock-up” you refer to however; I keep the DVR unit under the seat rather than having it exposed to outside elements. This way I feel it truly will be a “set and forget” operation, at least it has for me to date.”
Rick’s Reply: I just added more info from H.B.C. on this, see “Mounting Bracket Notes” above.
From “K.S.” (December 2015): “Thanks for this review. A very complete system, noting the improvements you called out.
A couple questions and thoughts:
1. Can you provide an estimate of recording time before the loop recording overwrites (say a 64GB memory card @ 720p)?
2. Did you resolve the 1080P vs. 720P video recording spec vs. experience issue?
3. The cool weather system crash issue is a showstopper. This will primarily be a set and forget ‘black box’. Having to be aware of and perform a manual reset at any time can’t be tolerated. Given this issue, why is it recommended?
4. I assume the power draw is minimal, do you have average and peak wattage for a bike power budget?
5. You mentioned that the improvements you noted would elevate it above the competition. Can you name a few otherwise equivalent competitors?”
H.B.C. and Editor’s Reply:
1. See the Loop Recording section above. 1, 2, 5 or 10 minute loops can be set, it records until the card is filled then starts recording over the oldest file.
2. See the Audio and Video Specifications section above. Corrected, camera records at 720p 30 or 60fps or 1080p/30.
3. You will note that I used the word ‘observation’ rather than ‘issue’ in identifying what has been observed from time to time (even though I used the term ‘frustrating’).
And I did not state it stopped all the time when temps are between 5-10C; this is just a range that seems to be its sensitive range. But there haven’t been enough instances to prove this yet, so longer term use and tracking is needed.
If I recorded the number of use instances where the system is started, stopped, etc., vis-à-vislockup instances, the fault percentage would be very small, but admittedly it does and has happened.
But in general the system has continued recording based on the split timings, although the screen has frozen or the voice announcements have become stuck in a loop.
When this happens or is observed/found, a quick press of the reset button on the bottom of the module or by simply removing and reconnecting the power lead restores the system immediately.
As noted, the observation may or may not be related to temperature (system specs list minus 10C to plus 60C) and without more data, I can only log it as a possible factor.
And remember, this is our experience with one system.
If we had observed or heard of this with multiple systems and everything had been verified, then obviously it would be an ‘issue’, especially for something that is supposed to be a set and forget product (of sorts).
This might be conceived as copping out, but trust me, it isn’t my way or the way wBW does things. And again, referring to the somewhat limited time period (by my standards) the system has been used quite hard.
Overall, as a dual-channel turn-key system without much (any) head to head competition, it deserves the rating it got. If this observation becomes an issue or something else is found, trust me, you’ll hear about it from wBW.
And as a bit of a final comment: for those users who want a set and forget system that requires no monitoring of any sort over any period of time, then perhaps the argument can be made that the Innovv K1 isn’t the solution.
But I have used at least three other consumer-based traffic monitoring systems (single channel or split lens) with four wheelers and numerous stand-alone motorcycle, body or helmet mounted units.
Some of these have been reviewed on webBikeWorld (see the Motorcycle Action Camera Reviewslisting).
I can say that the Innovv K1 is well ahead of the pack. It’s not perfect (we didn’t say that) but it an industry-leading product now, with room for improvement and to evolve.
4. Power Requirements section added to the review after “Key Features”.
5. In reality my comment was directed at virtually anything else on the market intended for use in or on any type of motor vehicle, even some of the newer ones (I wont’ name names) that use a dual (adjustable) lenses, but are still meant for forward-facing monitoring.
Some of these use Bluetooth or a wireless link of some sort for monitoring or control. But, we haven’t yet found another dual channel front to back turn-key system like the K1, so in reality, it is in a class of one right now.
And our recommended improvements and enhancements could keep it ahead of the pack…but it is indeed a busy (busy) segment.
Update from INNOVV: Regarding the “lockup” issue: always use high-speed, high-quality SDHC or SXDC memory cards with the UHS-1 specification. UHS-I has a bus interface speed of up to 104 MB/s.
The processing chip in the K1 is also used in GoPro cameras and it should work with temperatures of 5 to 10 C. When a trusted brand of UHS-1 card is used, such as this one, the problem is gone.
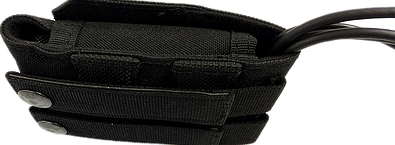
Also: be sure to use the pouch that came with the K1 kit. Put recording unit into the pouch and be sure to protect the connections to avoid moving and shaking between the cables and DVR:
Regarding the question about competitors, until now, no other motorcycle-specific onboard recording system has front and rear cameras recording in 1080p/30fps with a GPS module and wired control button.
We had the first motorcycle dashcam on the market, then listen to people and developed the K1, but for sure, we keep improving and new development that is right for riding.
We are talking with people about our products, the C3 and K1, on motorcycle forums every day, so we do understand the questions and the doubt, because we are new brand from China, and made products no other company have done.
We always take time to answers the questions and encourage people to try. After they try, they will see the effort we have put on the development, and how the products is right for riding.
We are selling the K1 to people around the world every day, tracking the customers’ installation and use. I would say customers are very happy with the system and happy to share their installation, encourage us to focus on motorcycle cameras and keep new development.
Please let us know the questions you do have, I would like to do support!!
From “S.M.” (December 2015): “Your review is spot on. I have installed this system on my 2014 R1200RT and although it took some “thought” to cable routing of the front camera, the system works wonderfully.
Instead of trying to wire it directly into the ignition, I plugged the 12v adapter directly into the extra plug at the rear seat.
I swapped the 64G SD card for a 128GB SD and today, works the same. Time will tell how much extra files I can store.
Video plays better with Quicktime. Did not receive pivot / angulated mounts. Used 3M Dual Lock to attach the cameras front and rear. Easy to remove and they will not come off when riding.”


