Background
I got back from my trip to California not long ago and deployed the children to the neighbor’s house the following morning to collect our mail.
As hoped, they came back bearing the New for 2006 Autocom “Active-PLUS” motorcycle intercom I had been waiting for. I dealt directly with Scott at Autocom USA both via email and finally telephone because I had many questions regarding their new kit, then ordered it from him before I left for my trip.
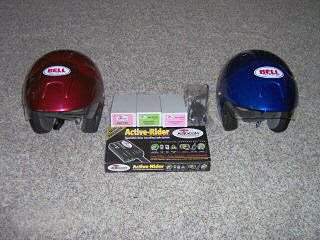
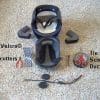
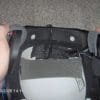
I had a very positive experience with him. The part numbers get a little confusing, so for clarity I am including the “old” and “new” part number for the accessories where applicable (see photo at top of page):
Editor’s Note: This is a two-part article on installing an Autocom Active-PLUS motorcycle intercom system.
Part I: Motorcycle Helmet Installation (This page)
Part II: Installing the Autocom Active-PLUS on a 2006 Yamaha Silverado
See Also: wBW review of the Bell Mag-8 helmet
From Autocom USA: (1) Active-PLUS Rider Base Kit (Kit 200); (1) Straight headset extension for 7-series headsets (P/N 1179/24); (1) Transceiver extension lead (P/N 1512/168).
Purchased elsewhere: (1) 7-series Super B headset (P/N 1153); (1) Motorola single-pin transceiver interface lead (P/N 113).
I had to get the passenger headset and FRS radio lead at a local BMW dealership because Scott was out of them (backorder) and I didn’t want to run the risk of not getting them in time for my order to be shipped. It was a nice excuse to get out for a cross-town ride on the bike and I ended up spending an additional chunk of money on a pair of nice touring boots and some eyewear as well.
In the Box
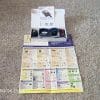
Inside the box I found everything laid out in it’s own little cubby, as well as some cool documentation on how to do what I was fixin’ to do. Good pictures, great tips, overall pretty darned good instructions. Nice big fold-out color brochure on system configurations and Autocom products as well.

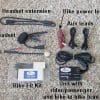
Contained in the box is the unit, a headset and extension, bike fitting kit (in the plastic bag), bike power lead and two aux leads for MP3 and cell phone. Documentation included was a nice manual, warranty information and a flier for “Prexport Technical Motorcycle Apparel (2005 collection)”. I had a look at their website, nice gear; wish I had found them before I got my boots at that dealership.

I have to admit that while I did skim through the instructions I chose not to follow them exactly. The 7-page black/white manual that came with the headset I bought at the BMW dealership has some great diagrams for Arai, Shoei and BMW System 4 helmets.
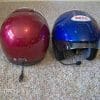
It also has very clear instructions on how to install the loom into these helmets, and the color manual that came with the Active-PLUS kit had some very good information as well. My helmets are Bell Mag-8’s (see the webBikeWorld review of the Bell Mag-8) so the installation went a bit differently. I’m a dude, I don’t need no stinkin’ instructions, right?
The FIRST thing I did (and I stress FIRST) was to put a battery in the unit, connect BOTH headsets plus my Motorola radio and test the entire system. I am a big fan of testing things before installing them – I’ve been down the dark and ugly road spending considerable time installing something only to find out it didn’t work. It’s a bad road fraught with danger, wailing and gnashing of teeth. Sometimes there’s a few dirty words mixed in, depends on the person; with me, there’s LOTS of dirty words. I don’t suggest you travel this road.
Helmet Installation
I actually did my helmet first since my wife was out and wasn’t available to fit-test. I made my mistakes there, then when it was time to do hers I took the pictures. I was surprised at how easily the system laid into the helmets – the Bell Mag-8 has a removable liner and ear pockets so it made installation a breeze.
Tools Needed
Sidecutters, Duct tape (or “100-mph tape”), scissors, two inch wide adhesive backed heavy duty Velcro, Zip-ties.

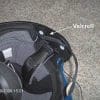
The first step was to decide where to put the speakers. The manual clearly states how the speaker should be oriented in the helmet, and there is a raised 3-point star you can feel through the foam to determine where the center of the speaker is located. It also states you might want to move the speaker around until you find the solution that works for you so using Velcro is a good idea to affix it to the inside of your helmet.
The speakers already have the “hook” portion of Velcro on the back and I supplied the “loop” from the roll I had (cheap at a home improvement store). I put the ear pieces back in and saw what portion of the inside shell was visible, then took them back out and applied Velcro in that area.
It should be noted that some helmets may require a foam pad to bring the speakers closer to your ears – Autocom sells these in 1/4 and 1/2 inch. I didn’t order them because I wasn’t sure which set I’d need, and figured if it came to it I could engineer something that’d work for cheap.
The next step is to decide which side you want the boom mike to be on, since this will determine which speaker goes where. One speaker has a longer wire from the “root” (where all the wires join to the pigtail/connector) – this will be the opposite speaker.
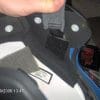
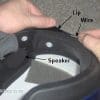
I chose to have my mike coming out of the right side of the helmet, so I stuck the left speaker on the Velcro inside the helmet, left a bit of slack, then started running the wire around the back. The Mag-8 has a plastic lip that folds over the bottom rim of the helmet and by simply prying it up with your finger you can run your speaker wire pretty far down in there – I am confident it will require nothing further to keep it in place. I reckon you could seal it in there with RTV or some such, but then you’d be in a bind if you had to replace the headset for some reason.

Once both speakers are temporarily in place you can square away your extra wire and attach the root to the inside of the shell – I chose to have ours come out the back to keep it out of our way, but since it’s taped it can be moved at any time.
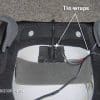
I used small tie-wraps at the point where the wires from the speakers and mic join on the way to the root, then one near the root itself. Be sure to leave a little slack at both speakers; you may want to adjust them in the future.
It is also a good idea at this point to get an eyeball on where you are going to be attaching your mic so you can leave the appropriate amount of slack on that wire as well. I used a piece of duct tape to keep it from moving, then started anchoring it with more duct tape.
As a former U.S. Marine grunt and current offshore oil rigger I can assure you I know my way around a roll of 100-mph tape, and I’m not afraid to use it. You may not want to cover up the little quick-disconnect for the mic if you plan on removing it when not in use.
I didn’t illustrate that here, but I am thinking of doing it later if I find that the mic is a bother for day-to-day single rider cruising. The little plug and wiring will be non-intrusive because it’ll be behind the liner.


Once the root was attached to my satisfaction I put the liner back in and gave it a “tug test”, which it passed. I wouldn’t suggest hanging your brain bucket up by the plug, but I’m confident the tape and liner will keep it in place. I left a little more of a pig-tail than some folks I’ve seen, mostly because I don’t want to stress the cable when I lay the helmet down.
The last big decision is to determine where the mic is going to be placed. I put the ear pieces back in and slid the mic between the right earpiece and the shell (wiring is between this padding and the shell), then put the helmet on.
I adjusted it around a bit until I was happy, then removed the helmet and noted the location and angle of the base of the boom. I put “loop” in this general area to allow for future adjustment, then applied a thin strip of “hook” to the boom base and stuck it on. I pulled the speakers out, put the ear pieces back in and then laid the speakers in pressing firmly – in theory this is where they will live from here on out.

With the ear piece re-installed it is a very secure mount and allows for bending of the mic to your heart’s desire. When my wife made her triumphant return from the grocery store I drug her upstairs for a period of instruction on how to position the mic and essentially how the whole rig works.
She was suitably pleased with the entire operation, although she said she felt like a dork sitting there on the deck with her helmet on talking to me. She refused my suggestion that she pose for a picture with her newly wired helmet. I thought it was a good idea…

Next: Part II – Installing the Autocom Active-PLUS on a 2006 Road Star Silverado
Owner Comments and Feedback
See details on submitting comments.


