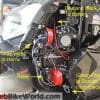
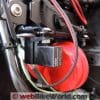
For some reason, dual horn relay wiring harness kits are difficult to find lately.
The Eastern Beaver dual horn relay harness (review) that I’ve used before is no longer being made, unfortunately.
But I found a new source and added one to the BMW C 650 GT scooter.
Rolling your own harness isn’t very difficult, but I’m pretty lazy, so I’d rather pay someone else to do it for me.
Besides, the connectors and the connections on the “professional” harnesses are better than I can do myself.
Installing the harness is the easy part, compared to installing the two horns. Basically a properly designed harness is a plug-and-play proposition.
I described the dual horn installation for the BMW scooter in a separate review.
I’ve installed a pair of upgraded horns on almost every bike I’ve owned; here’s a list of webBikeWorld motorcycle horn reviews and comparisons.
The BMW scooter came with a small, weak bleater — one of those “Meeeeep-meeep” horns that nobody hears and even if they did, they wouldn’t pay attention.
I had a set of nice red Hella Trumpet Horns leftover from a review, but they can be found priced very reasonably at about $24.00 for the pair.
I wanted to use the trumpet type on the scooter because the open end of the horns can be pointed out the front when they’re mounted in the wheel well, for the optimal max directional sound.
The difference on the scooter is amazing and dramatic, and — pardon the pun — it blows away the stock “Meeeeper”:
- Here’s the .mp3 sound file of the stock BMW horn.
- Here’s the .mp3 sound file of the dual Hella trumpet horns.
Sources for a Dual Horn Relay Wiring Harness?
When I first connected the Hella trumpets, I simply spliced into the existing wiring harness to power the pair, without a relay. That worked fine, but it is best to use a relay when adding either a more powerful horn or a pair of ’em.
Eastern Beaver used to be my retailer of choice for high-quality dual horn relays and wiring harnesses, but for some reason, the owner has stopped making them.
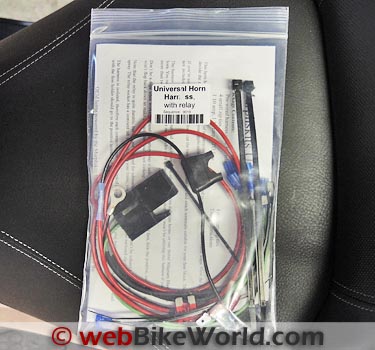
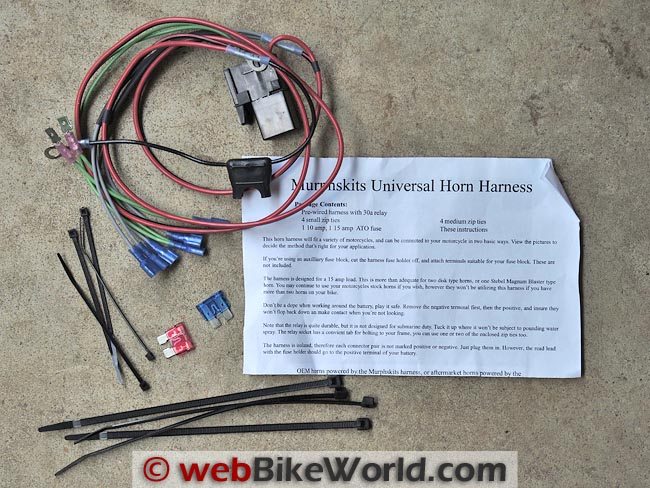
So I searched high and low (another pun!) and finally found a dual horn relay wiring harness at a place called Murph’s Kits. It’s the Stebel HF80 Wiring Harness, part number MU-166. This is shown in the photo above.
Be sure you check with Murph first, because the photo on his website shows a single horn harness, although the text describes a dual horn harness. It currently has a list price of $33.00. I emailed him recently to ask if he still carries the dual horn harness and he said yes.
The only other source I’ve found was Cycle Terminal, who lists a single and dual horn relay wiring harness kits starting at a pretty stiff list of $41.95. The harnesses are available in three different lengths.
If anyone knows of other source for dual horn wiring harness kits, please let me know and I’ll add the links here. Maybe one day I’ll rig up my own and post an article…
The Basics
I’ve installed many dual horn relay wiring harnesses before on various motorcycles and it’s usually a pretty straightforward project.
The basic idea is you unplug the electrical connectors that lead to the stock horn, then connect them to the harness, then connect the two sets of dual leads to your new horns.
Connect the fused end of the harness to the battery power and the other lead to the ground and you’re all set.
That is a very simple overview of the procedure, which is usually described in more detail in the instructions that come with the harness. Of course, all of the usual and obvious cautions should be adhered to.
Be careful when working around a battery and remember that it’s pretty easy to short out a connection by accident, with a screwdriver or other tool, so be careful.
Every harness kit worth its salt will come with good quality wiring and connectors, ready to plug directly to the horn terminals. The kits usually come with a fused power lead and sometimes a spare fuse or two and some cable ties to make things nice and neat.
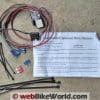
The Murph’s Kit came with both a 10 Amp and 15 Amp blade-type fuse; I used the 15A job.
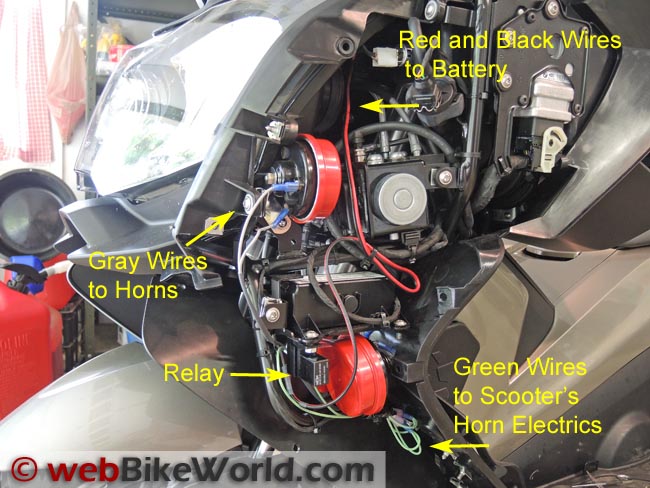
For the BMW scooter, you’ll have to remove the side panels to access the battery on the right and the horns on the left. You’ve already installed the horns, right?
If not, read my dual horn installation for the BMW scooter article, which contains info on removing the side panels on the BMW C 650 GT. For other bikes or scoots, you’re on your own, but the basics are identical.
By the way, BMW uses Torx fasteners for almost everything on the C scooters, so if you’re buying a scooter, make sure you get a nice set of Torx bits and screwdrivers (review) from about size T15 to T50.
The Dual Horn Relay Wiring Harness
All of the dual horn relay wiring harnesses I’ve seen are identical in layout, with minor differences in the type of relay used, connectors and connections and length of wire.
The Murph’s kit harness is just about the perfect size and length for the BMW scooter, but I’ve cut and spliced wires on other kits to avoid having too much spaghetti leftovers bouncing around under the bike’s covers, fuel tank or seat.
I like to leave a little bit of wire, just in case, and I usually cable-tie it together in a loop to keep it from fouling any moving parts.
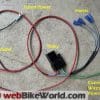
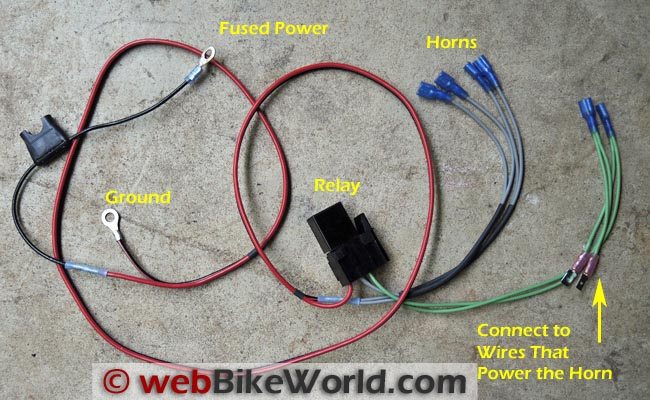
The photo above shows the connections, from left side to right: Fused power, ground, the relay, then the pair of dual connectors that go to the horns (the gray wires), then the pair that goes to the existing horn trigger wires that are already on the bike.
One of the good things about using a harness like the one shown above is that you don’t have to fish around in the left handlebar grip wiring harness to find the wire that powers the horn and then splice into it. You’re using the existing harness that already triggers the horn and connecting to that.
Then when you press the horn button, it triggers the relay instead, which then sounds the horns.
Note that the green wires have both male and female connectors, because some bikes have one and some the other. You can clip off whichever pair you don’t need, or leave them just in case.
Mounting the Relay on the BMW Scooter
Since I already had the dual Hella horns installed and powered using a “cheater” splice into the system to convert one horn to two, all I needed to do was rip out the mess I made before and replace it with the dual harness.
It’s all pretty simple, as described above and I threaded the fused power and ground wires across the top of the scooter’s “snout” and over to the battery on the other side.
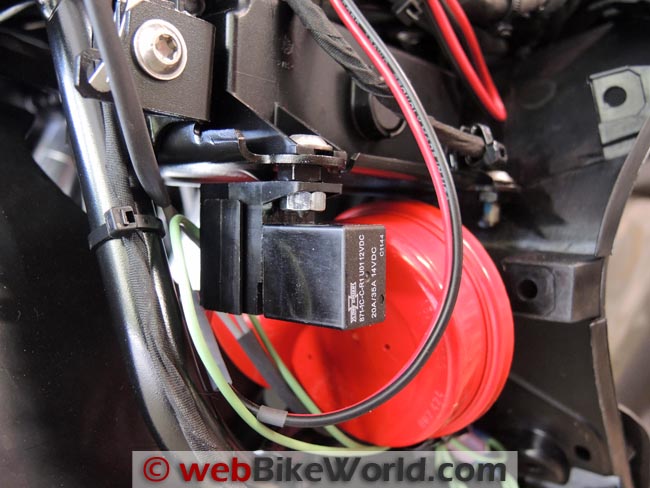
The only thing left was to find a place to mount the relay, and this is something that will vary from bike-to-bike. You may not be able to mount the relay to a secure surface; this has happened to me on other bikes and I could have just left it floating somewhere or cable-tied it to a frame member on the scooter.
I ended up using a bolt that holds part of the bodywork to the frame skeleton in the “snout” of the scooter, as shown in the photo directly above.
I had to replace the bolt with a linger version but it works and holds the relay securely in place and out of the way.
Conclusion
One more job done on the scooter. Using a dual horn relay wiring harness makes the job cleaner and possibly neater.
Most importantly, it ensures good, strong, clean power to the horns so they can give it all they have when you press the button, without worrying that you’re going to blow a fuse on the OE electrics.
Some bikes — and most BMW motorcycles — already have the horn wired into a relay, so check your electrical wiring diagram.
There is literally zero information on the BMW scooters yet — i.e., no shop manuals available to owners — and I didn’t find a relay in the rat’s nest of wires, so to be on the safe side, I installed this one.
It also ensures that the horns are completely separate from the rest of the electrics, so as long as the battery has juice, they should be good to blow.
More: BMW C 650 GT Review | The wBW BMW C 650 GT Blog
Publication Date: July 2013
Owner Comments and Feedback
See details on submitting comments.
From “V.L.” (July 2013): “I too was looking for a dual horn relay kit since Eastern Beaver no longer sells them and when I laid out all the wiring and connectors I figures I wanted something cleaner and more professionally assembled that I could do on my own.
After a little online searching I found Joe Scavone and after a few emails he’s fabricating the same type of harness you showed to my measurements for my ’10 Speed Triple.
Here’s an example of what he shows in his online store (Editor’s Note: It’s the Cycle Terminal harness referenced above in the review), from which we worked. Joe’s very responsive, I look forward to connecting in my Fiamm Freeway Blasters (review) soon.”


