Here we are headed for summer 2021 but still coping with our pandemic world, although one that is being overcome on many fronts thanks to ongoing health and safety protocols, vaccines, and the continuing tireless efforts of health care workers.
With a new riding season (wherever you are), new and updated motorcycles and, a whole lot of new products, the motorcycle market is hopping; now if we could only get the demand and supply issues balanced…patience is needed.
And in reflecting back on all things safety-related (a lifelong principle) and with Makenzie’s “Why Today Should Be The Day You Get A Dashcam” posting still fresh in the memory bank, one of these new products is the INNOVV K3 Dual Channel 1080P (Dash Cam), released earlier this year as a timely follow-on to the excellent INNOVV K5 system reviewed December 2020.
Over the years wBW has reviewed many INNOVV products including the original C1, the C3, the first dual-channel K1, its replacement the K2, along with the single-channel C5 (available in motorcycle or helmet mount variants), the Power Hub 1 and 2 systems, and most recently the K5 system.
So mid-February of this year a package from INNOVV arrived containing one of the first INNOVV K3 Dash Cam systems along with some additional updated components and hardware mounts for testing and use with the K5 system currently installed on the 2020 F 850 GSA moto.
As late winter morphed into early spring but with snow, ice and salt-layered roads still intruding into riding time and before INNOVV officially launched the K3, we contented ourselves by exploring the ins and outs of the new K3 Dual-Channel system on the bench and then during a leisurely first installation.
With the K3 officially launched 9 March 2021 the newest addition to the INNOVV camera line is officially here and whether you’re well into your riding season or looking forward to (gradually) getting back on the road, this new-for-2021 product is another great offering from INNOVV to visually capture the way ahead and behind while riding.
INNOVV and the K3 System
INNOVV remains focused on bringing innovative and safety-oriented products to market and continues to evolve and expand their powersports-capable, but motorcycle-focused, camera systems.
Now that the innovative INNOVV K5 4K UltraHD system is well and truly launched, the INNOVV K3 Dual Channel Action Cam system becomes the second in a series of (planned) releases reflecting a new design, performance standards, and quality approach.
First Impressions
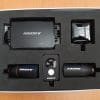
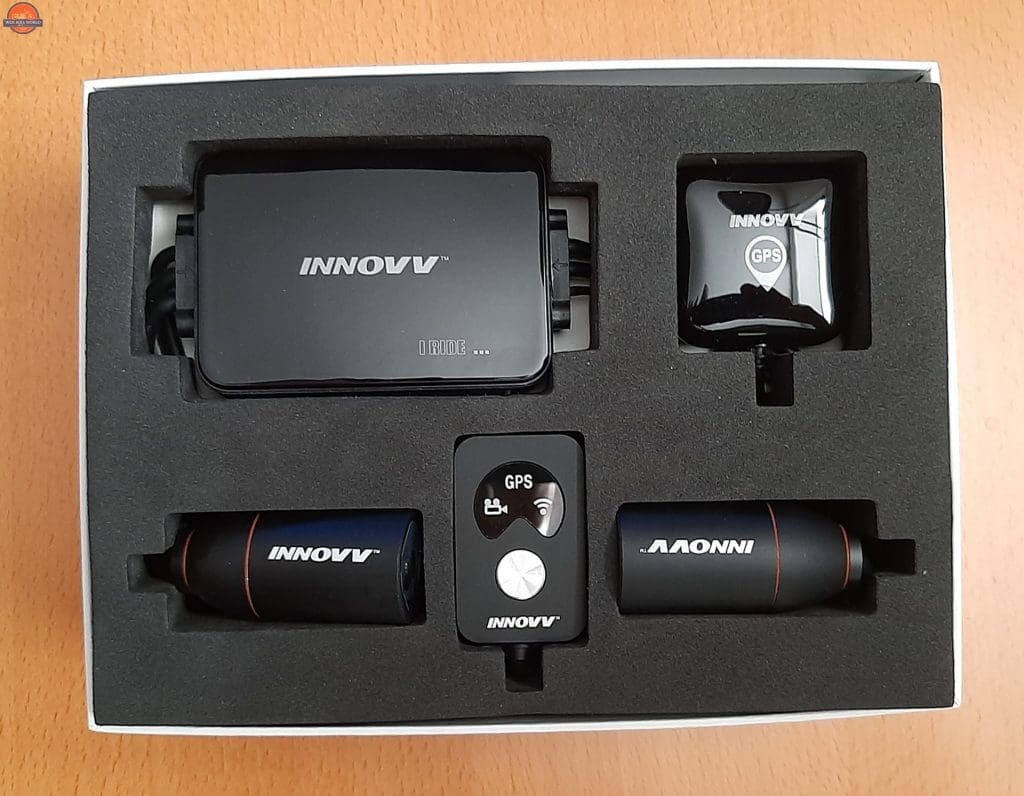
The presentation and packaging of INNOVV products is always first-rate and the first visual after removing the lid section of the K3’s well-packed box, revealing a (familiar) layout of the components securely nestled into the foam layer cutout, is a good one.
Lifting the foam layer out along with the well-bundled cables reveals the remaining kit components including a small box packed with a comprehensive multi-bag assortment of hardware pieces and a similar box protectively housing the power supply and its harness; well done.
The INNOVV K3 system components reveal the same detailed high-design approach first observed with the INNOVV K5 kit – everything is well-formed and well-sealed including the access port on the DVR module with strength and robustness evident – important qualities for long term functionality on motorcycles.
Overview
As the replacement for the venerable INNOVV K2 dual-channel system, the new K3 dual-channel 1080P system is not just newer but also better.
The K3 features dual-core processing for substantial processing enhancements, a higher performance GPS receiver usable with multiple GNSS systems, an intelligent DC converter with voltage monitoring, form factor upgrades and, new remote control and external microphone components first seen on the K5 system.
Like the original K2 system, the new K3 still features a dual-channel dual-camera layout with a DVR-based G-sensor for motion/impact detection, while adding an intelligent DC converter for a protected power supply, an external microphone, and handlebar mountable remote-control components – all very welcome additions.
As with the up-scale K5, this new K3 system further builds on the design and standardization approaches taken for the new products including upgraded form factor components, upgraded processing capabilities, heavy-duty cables, and waterproof connectors along with durable aluminum alloys used for strength and looks, and an IP67 (dust/water) rating.
Also, like both the original K2 and the K5, the new INNOVV K3 product is designed and packaged to be a complete turn-key system regarding installation and use, for virtually any moto-machine or other powersport platforms. And from experience, this design, packaging, standardization, and ease of use approach, really works.
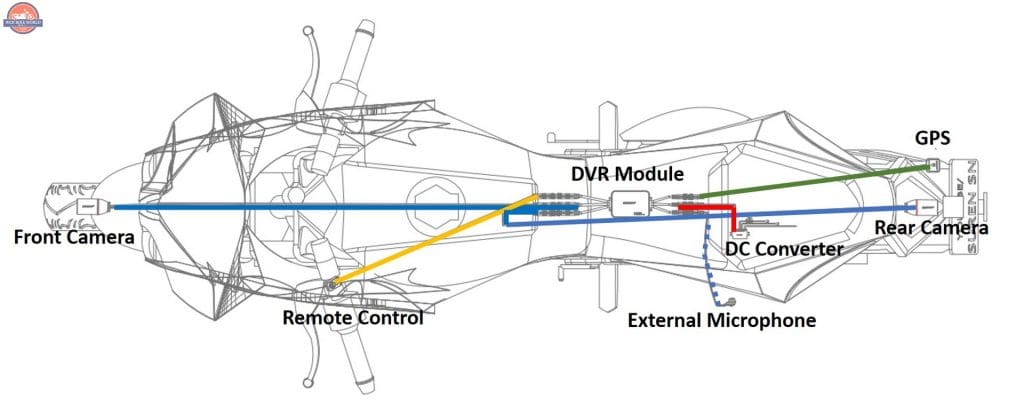
The small front and back lens or camera modules, with long, easy-to-use connection cables, compact DVR module, and small power supply module, all provide lots of installation flexibility. Some great examples of very discrete (hidden) low-profile installations can be viewed on the INNOVV Blog pages or from online searches.
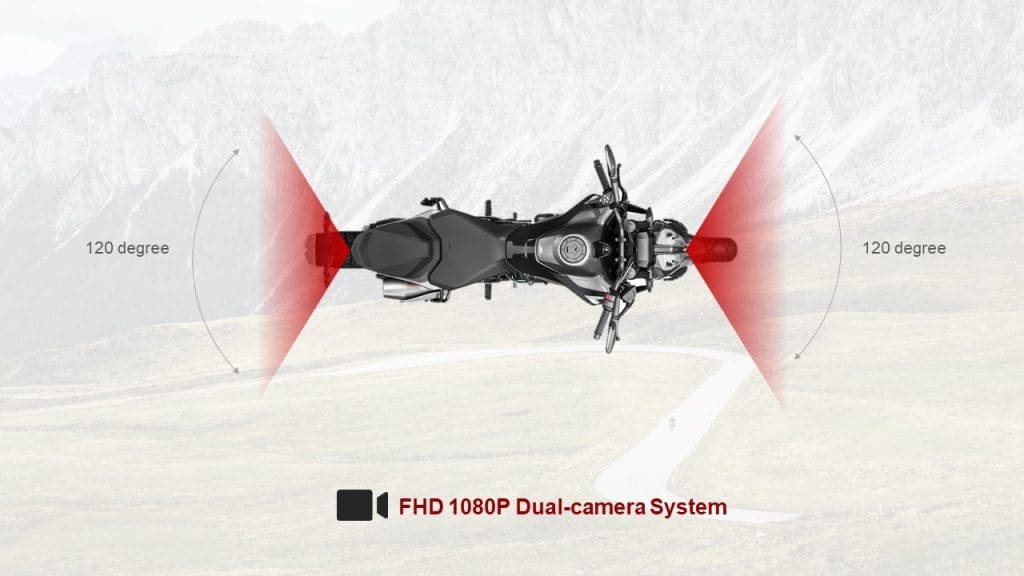
Front and back cameras provide a 120-degree Field of View (FoV) for excellent coverage albeit with some distortion evident depending on the depth of the view. The Sony IMX sensor feature along with WDR (wide dynamic range) compensation results in high-quality media under any lighting (or lack of) conditions.
Resolution settings for the front and rear cameras are 1080P at 30FPS or 720P at 60FPS (there are no individual settings for the front and rear cameras). The video compression mode is H.264 and video media can be saved as either MP4 or TS files.
All initial configuration settings and ongoing user interactions are provided by the INNOVV App (iOS and Android) that also reflects a greater degree of standardization in providing support for all the INNOVV camera systems and (overall) much-improved reliability.
Features & Specifications
Features (Compilation)
- A ruggedized dual-channel two-camera system
- 120-degree wide-angle field of view from each camera
- WDR or wide (high) dynamic range feature – optimal lighting under all conditions
- Sony Image Sensor on both cameras for excellent low light/night-time features
- Built-in G-Sensor for motion/impact detection
- Resolution settings of 1080p at 30fps or 720p at 60fps for the front/back cameras
- MP4 or TS video support
- Wired Remote Control for visual status monitoring and Emergency video capture
- Wired high-performance omnidirectional microphone
- 2.4Ghz WiFi (local connection) support
- INNOVV App for system interaction, media setup, viewing, and downloading
- Working Temperature: -30C to 70C (-22F to 158F)
- IP67 rated – dust-tight and waterproof (immersion up to 1m)
Specifications – detailed specifications for the INNOVV K3 system can be found here.
INNOVV K3 System Components
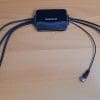
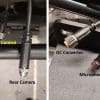
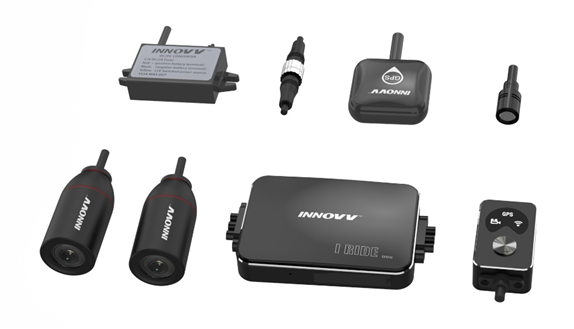
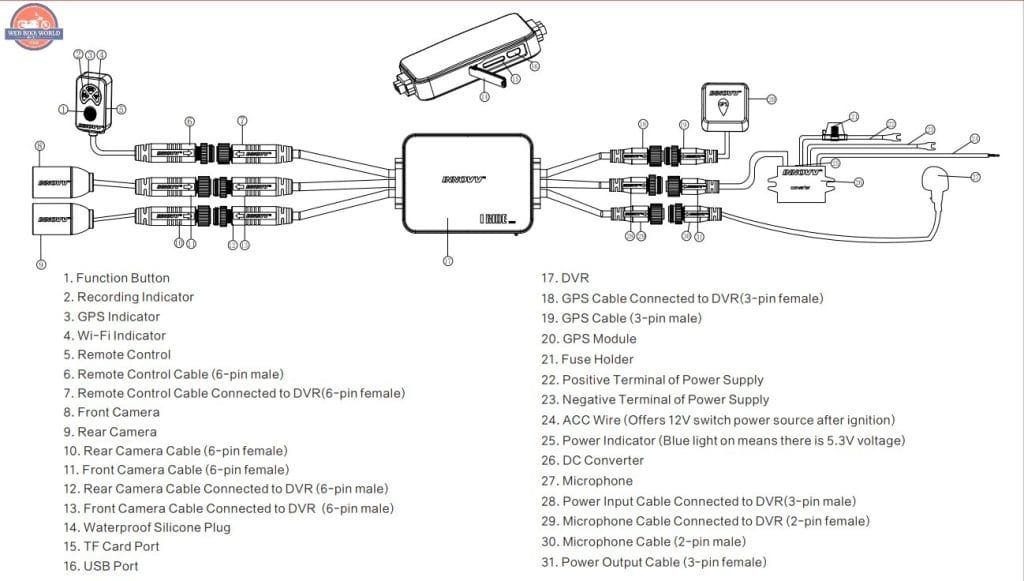
Intelligent DC Converter Module – a small, sealed power management module (12V/5V DC) as also used for other INNOVV systems. The input harness consists of a red (2A in-line fused) and black power connection lead set with ring terminals and a yellow wire for the ACC or ignition switched (SW) source.
The output side harness is a sturdy shielded cable terminated with a 3-pin (F) waterproof connector that connects to its 3-pin (M) (colored) DVR lead counterpart.
This small lightweight module is easily mounted with the adhesive pad in the kit, or alternatively, with the use of 3M Dual Lock or hook-n-loop pads working as well and with far more ability to remove or adjust if/when needed.
Note – a small Blue LED provides an “always-on” indication that the 5.3V supply is good. As this power module is switched, the parasitic drain should not and has not been an issue; INNOVV would have a minimum voltage shutoff threshold as well – it’s just not identified.
Front & Back Lens (Camera) Modules – small round totally sealed housings with integrated cables measuring 2m for the front and 1.5m for the back, with color-coded keyed waterproof connectors – as used for all the K3 DVR/component connections.
The camera lenses provide a 120-degree field of view with a 6-G +1IR structure and an F1.8 aperture. System resolution settings for the front/rear camera pair are: 1080P @ 30FPS or 720p at 60fps.
The 25mm diameter modules are mounted using the included diameter clamps, cushion spacers, mounting blocks, brackets, and 6mm hardware supplied in the mounting kits (see Installation Section); all well done and complete.
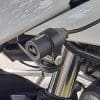
External Microphone – an omnidirectional mini-microphone with a small removable clip on a long 2m (6.5ft) cable and waterproof connector. The whole assembly is right-sized for tank bag, collar, or helmet strap use or for securing inside the helmet (chin guard area).
An open foam cover is identified in the K3 media but the microphone in the kit does not have one. A foam cover or windsock is effective in minimizing ambient noise (when desired) and can help protect the microphone from moisture ingress (as needed). An on-hand surplus foam cover is now in place as a functional add-on.
Remote Control (RC) – first seen with the INNOVV K5 the RC is a small, sealed housing with integrated cable and a 6-pin (M) waterproof connector. The face of the RC features a stylized semi-circular layout of three (left/upper/right) LED icons for Camera, GPS, and WiFi status indicators. A Function Button sits below the visual layout.
A 6mm threaded insert on the back of the housing is the mounting point for any of the placement solutions like the supplied handlebar clamp mount if space and safe access allow or using the included hardware-adaptive brackets for left mirror (or right mirror) mounting – the left mirror being the recommended side for access and of course safety factors.
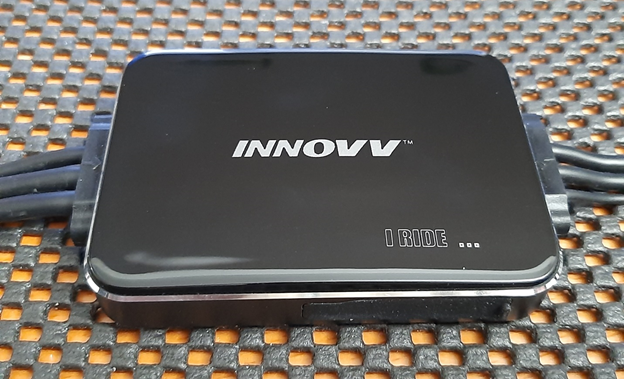
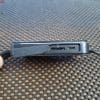
DVR Module – measuring 80.5 x 56.3 x 15mm (1.16 x 2.21 x 0.59in) the module has a plastic upper cover sealed to an aluminum alloy base providing strength and elemental integrity. The end-based three input and three output cables are completely sealed, their connectors color-coded and pin-keyed (M/F), and completely waterproof.
With the module held logo side up, the only opening or access is the slot on the bottom edge sealed with a silicone insert. This recessed area houses the difficult-to-access TF/SD card media slot and micro-USB port. With no functional controls or visual displays, no other access to the DVR module is needed.
INNOVV App – if used as a true set and forget capability, system interaction can be limited to visual monitoring of the Remote-Control LEDs and interaction via the Function Button. But if ongoing dynamic management of the system is to be done the INNOVV App is needed – this ‘component’ is discussed fully in a later section.
K3 Recording Modes
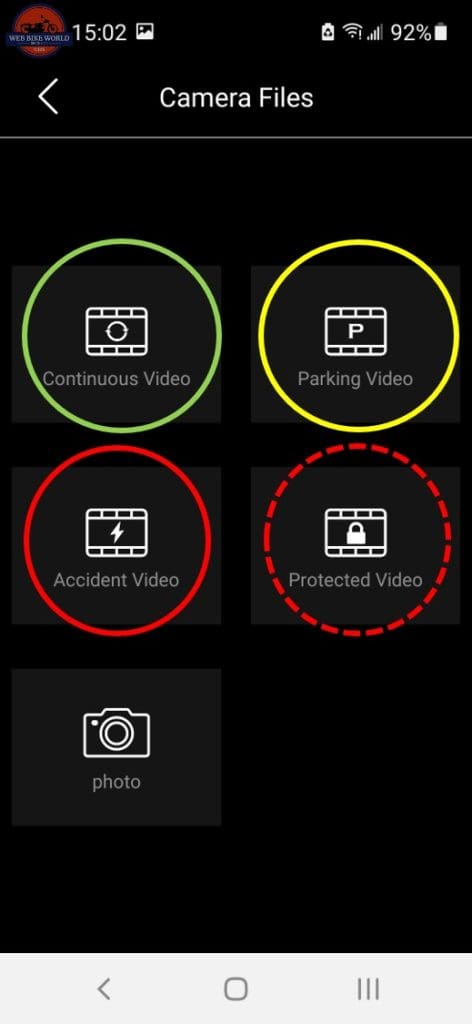
Continuous – this is the normal or default recording mode activated when the system is powered up with simultaneous front and back video recorded per the default or user-selected resolution combination and selected time loop.
This video is saved to the DCIM/Movie folder with the letters ‘F’ and ‘R’ used in the file name to identify front or rear media. Media stored in this folder is not protected meaning that the oldest files will be overwritten as space is required for ongoing video recordings.
Parking – if the power and SW ACC leads are connected properly, if the motorcycle is stationary and not running, and if the Parking Mode feature is ‘ON’ under the Settings/Advanced Settings with a median setting along the G-Sensor sliding scale done, any motion or force falling within the sensitivity parameters activates the system with ten (10) seconds of front/back video recorded and saved to the Parking Video folder.
Media in this folder is protected and identifiable by a ‘P’ added to the ‘F’ or ‘R’ identifier in the file name. This tagged media is not overwritten by any continuous loop recording.
Accident – during normal use of the K3 system and if a median setting for the G-Sensor sliding scale has been done, a significant fall or impact as might occur during an accident of some sort activates this mode with ongoing loop video saved to the Accident Videos Folder.
This media is protected and identifiable by the letter ‘G’ added to the ‘F’ and ‘R’ identifier in the file name. This tagged media is not overwritten by any Continuous loop recording.
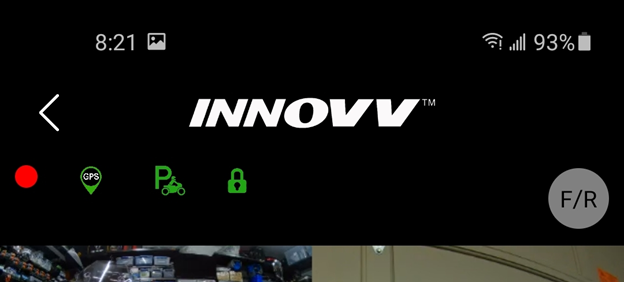
Protected (User Intervention) – if the user pushes the Function Button on the remote control during normal use of the K3 system, the ongoing loop video (loop-time contingent) is saved to the Protected Folder and a small Green ‘P’ icon appears on the live view screen to show that this mode is active and, the Camera LED on the remote control goes into a double-flash mode.
As this (protected) media is saved, a small Green ‘Lock’ icon appears on the live view screen to identify that this is Locked Media. Media in this folder is identified by the letter ‘K’ added to the ‘F’ and ‘R’ identifier in the file name. Media in this folder is not overwritten by any continuous loop recording.
INNOVV K3 Installation Notes
As is the norm for INNOVV products everything needed for the average installation is included with lightweight bracketry and quality hardware. INNOVV does update or add new mounting pieces in their kits in response to feedback from users and the K3 packaging is a beneficiary of this ongoing activity with some appreciated and useful new pieces included.
In the Box:
- K3 DVR module with six flying lead input/output cables with waterproof connectors
- Front and Back camera modules with DVR interface cables (6-pin F-connectors)
- Remote Control module with DVR interface cable (6-pin M-connector)
- GPS module with DVR interface cable (3-pin M-connector)
- Intelligent DC Converter module with red/black terminal connectors, 2A fuse module and yellow ignition (SW) lead, and DVR interface cable (3-pin F-connector)
- Microphone with small clip and DVR interface cable (2-pin M-connector)
- Bracketry and hardware kits for mounting components
- Storage Card Holder/Reader
- Fold-out User Guide
Initial bench testing did not bring any surprises but did generate positive observations regarding how well fits as a system and works as a system including the almost seamless 2.4Ghz local WiFi connection between the camera and smart device. With this connection made and the INNOVV App launched it makes for a good start.
Camera Installation Options – the mounting pieces are intended to provide at least three different options (among many) for securely mounting the front and back camera modules.
- Option 1 – a direct fit approach using the module fitted into the diameter clamp that is then itself secured to one of the small mounting blocks (with logo) with this assembly then mounted to the desired point,
- Option 2 – uses the small, slotted L-brackets fitted to the Option 1 assembly; the lightweight pieces are well supported with this bracket and provide multiple vertical and horizontal placement and orientation layout,
- Option 3 – uses the thin deformable plates (which many users still ponder over) that are easily shaped for mounting against a non-flat surface (curved, tubular, etc.) and along with the 3M double-side tape pieces, they work very well as adaptive mounts.
And of course, for the totally custom installation, some or none of the supplied installation components may be needed. Some installations, revealed on the INNOVV Blog and other online sources, identify some very ingenious layouts where the lens modules literally disappear into the motorcycle lines.
A Sample Installation
Depending on the point or points of view desired, front/rear or otherwise, many users will go for a more central mounting point (low-profile or otherwise), and all good if the motorcycle components allow.
But in preferring to keep front and back cameras side-oriented (left and/or right) and readily accessed most single or dual-channel systems installed around here are “in the clear” so to speak. Some would say it adds to “the look”.
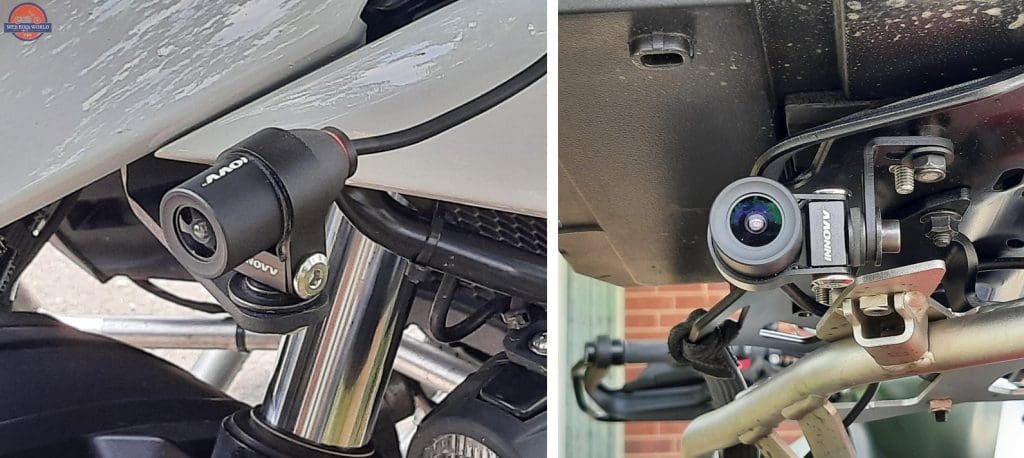
Front Camera – an online sourced GS-stamped mounting piece, fitted around and to the left signal light is the first non-kit bracket used. Once in place, its platform sits below and ahead of the signal light. With the camera mounted per Option 1 in a drop-down position and the lens oriented to put the INNOVV marking on top of a clear field of view option.
Next up, still, on the left side, is the use of a kit L-bracket or Option 2 layout mounted to the lower front mounting point of the OE side plate hosting the signal light assembly. This layout moves the camera closer to the motorcycle but also results in a BIG chunk of the field of view obscured by the headlight guard and beak – stable but not optimal visually.
Although a more centric mounting is in the cards for assessment the current positioning sees the front camera mounted to the left side arm of the 3-piece SW-Motech light bar mount (specifically installed for this review) and it is by far the most stable platform and only a bit of the front corner of the beak is in the view – acceptable as a point of motorcycle reference.
Back Camera – multiple back mounting points are to be had on the F750GS particularly given the fitment of the BMW Adventure Pannier frame kit and the SW-Motech Adventure rack installed on top of the OE tubular luggage grid. An L-bracket from the kit secured to a convenient 6mm threaded hole on the left top of the rack had this piece drop-mounted in short order.
This layout is stable and well-protected placement-wise, with a great field of view to the rear. A small plastic day-box that is sometimes used on the rack does intrude into the upper right corner of the field of view although it is not an issue for the user.
GPS Module – the GPS module found with earlier INNOVV systems tended to be a bit weak receiver-wise and clear line of sight positioning worked best when mounted to the windscreen or another high point on the motorcycle.
The newer GP receiver is more sensitive, and placement is far less of an issue. Placing the module under the seat or stuck to the inside of the front mount plastic did not raise a major synchronization issue but overall, its performance is still best when mounted out in the open with a clear unobstructed overhead view (electrically or otherwise).
With small pieces of 3M Dual Lock used for mount/remove flexibility, the module is mounted to the left side of the windscreen, and once connected and the system powered up, the GPS syncs up within seconds, even in the garage with the small GPS icon on the live view App screen transitioning from flashing to solid Green.
Remote Control (RC) – changes to the lightweight brackets in the mounting kit bags are evident and some early versions of the pieces were already on hand for testing using the existing INNOVV K5 installation. One of the new L-brackets has a hardware-adaptive elongated ‘V’ cutout that provides mounting flexibility of up to and including 8 or 10mm mirror mounts.
After removing the left mirror and BMW adapter piece the OE flat washer is put aside and replaced with the adaptive L-bracket to which the remote control is now securely fastened to with a short M6 flat-head screw from the kit. With the BMW adapter piece fitted through the L-bracket, orient the module as desired and tighten the adapter up; then replace the mirror.
Intelligent DC Converter – this small module with its input & output connections is mounted to the left wall of the under-seat deck area, a location well suited for expedient routing of the input leads to the battery housing area and connection of the yellow trigger wire to an existing and nearby ignition SW source.
It is important to correctly connect the DC converter/smart power supply so that when the Parking Mode feature under the INNOVV App is enabled the system provides 24/7 protection even when the motorcycle is not running. The smart power supply triggers parking mode automatically, with the K3 ‘waking up’ and recording when an impact or motion is detected by the (activated) G-sensor.
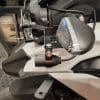
DVR Module – the small K3 Intelligent DC converter module secures to the left wall of the deck area next to the INNOVV PowerHub2 module while the HEX ezCAN Gen II module sits in place along the right wall, all courtesy of 3M Dual Lock. As the large cutout in the rear deck provides good access, once the seat is removed, the module is placed here.
To add some convenience in getting the storage media out of its recessed spring-loaded slot, the module is positioned so it sits off the floor of the under-deck area but still below the shaped cutout of the OE deck component – protected but easy to access.
This elevated positioning is courtesy of a small unused electronics hobby box and (yep, you guessed it) 3M Dual Lock pieces secure the module to the top of a box and the box to the floor; easy access and easy repositioning as needed.
Making the K3 Connections – all the component cables are pretty much out of sight once any removed plastic is reinstalled or low-profile in being routed along and secured to the frame so there is no chance of anything being caught up in anything else or impacted by heat, etc.
With all the cables routed into the under-deck area, components to DVR connections get made. Between the color-coded and M/F connectors it is all easy, as designed; just don’t lose the small sealing O-rings (spares are packed in the kit). And yes, the two cameras use identical connection layouts (they get marked F or R). And don’t forget to replace the 2A inline fuse.
Using the INNOVV K3 System
With the installation completed and a compatible SD media storage card inserted into the DVR slot and formatted (externally or via the App), once the ignition is turned on and the K3 powers up, the system is “hands-off’ with system monitoring provided by the Camera, GPS, and WiFi indicators and any input via the Function Button.
DVR Module Access
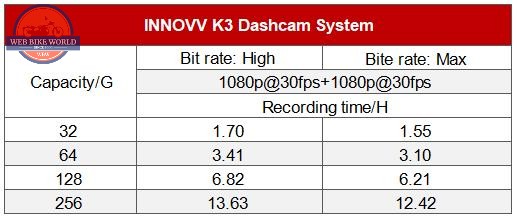
Either TF or microSD card media is usable as removable external storage. INNOVV recommends that the media be at least U1 (UHS Speed Class 1) and V10 (Video Speed Class 10) rated or faster. Media capacity of up to 256GB is supported by the INNOVV K3. More details on storage card media are found in the Video Performance section.
The system is designed to minimize access to the DVR module and storage media. But this user regularly accesses the media for test and the usual vetting to see what is retained or what is deleted and as such, moving files off en-mass is more expedient than the multi-step process needed between the camera and the host device.
And although a micro-USB interface sits to the left of the media card storage slot and this interface is supposed to be used for data transfer purposes, making a connection to it using a low or high-speed USB interface is seldom successful, and if the connection is recognized it drops after a few seconds or cycles on/off – not usable. INNOVV is looking into this issue.
While entertaining a hope that media card access would be easier than on the original K2 and more like the media slot on the K5; it is not to be. Like the K2, the K3’s media slot is well recessed (to provide space for the sealing cap) but the media itself is only ejected by a couple of millimeters when pushed in slightly to activate the release mechanism.
This combination of design and function makes accessing and gripping the media card a wee bit difficult along with the risk of it being dropped into a hard-to-access spot or onto the floor. A small set of tweezers with filed down and taped ends is kept at hand – but this approach should not be needed. Points get deducted for design and function here.
The Remote Control
With the ignition turned on and power supplied to the K3 system there is a programmed delay after which the Camera icon comes alive, and after some flashes go solid indicating that recording is underway – it’s that simple and all within ten seconds or so.
One may not always know where one is going, but it’s (typically) good to know where one has been. As such, the GPS tracking feature can, if connected, be a good thing. The green GPS icon starts flashing while awaiting the acquisition of a stable signal from the prerequisite number of satellites and once ready to go, the icon glows a steady green.
If no other interaction with the system is to be done, then the flashing blue of the WiFi indicator can be ignored, otherwise, it’s time to bring the INNOVV App into play (see below).
Function Button is used to:
- save the current video by pressing the button once which tags the video as protected and subsequently saves it to the Protected Folder on the storage media,
- take a photo by pressing the button twice quickly, and
- initiate a reset to factory settings by pressing the button for ten (10) seconds.
The INNOVV App
So, where system interaction, other than just monitoring the visual communications provided by the remote-control visuals or activating the Function Button, is desired or required, the INNOVV App becomes a key system component.
Preparation-wise, the iOS or Android version of the INNOVV App needs to be downloaded and installed on the device to be used with the K3 system. With this done and while the K3 system goes through its ignition-on start-up sequence the WiFi connection on the smart device is activated (as needed) and the WiFi connection listings screen opened.
Note – iOS users with other devices, like the iPad Mini 4 used here, may need to select the ‘iPhone’ compatible category to get the INNOVV App listed and downloaded from the Apps Store.
Once the blue WiFi display is flashing on the K3 remote control wait for 10 to 15 seconds for the K3 WiFi to be detected and listed on the device; alternatively, turning the device’s WiFi OFF and ON often helps speed up the scan/search process, as does manually initiating a scan.
Even if other local (like home) networks automatically reconnect (this default can be changed) the “INNOVV_K3_xxxx” ID listing appears on the device. Select this and enter the default password ‘12345678’, after which the connection is (or should be) made.
Tip – if the device has difficulty discovering the K3 LAN, put the device into Airplane or Travel mode to restrict external or internet connectivity and then turn on (just) the WiFi, after which the K3 LAN ID should appear and be connectable as a ‘local only’ connection.
Note – some Android devices may present a message like, “This WLAN network has no internet access. Connect anyway?” Just select ‘connect’ and all should be good.
With the WiFi connection made, launch the INNOVV App. Current INNOVV users will see a familiar splash screen followed by the main interface or tile screen using another familiar layout. But from this point on, depending on the camera system in use, screen layout and sub-menus vary for the connected system – one-stop shopping as they say.
Getting to know any system is good (read the manual, use the features), especially with a product like the INNOVV K3 with its dual-camera layout, always-on recording mode (unless otherwise changed), motion detection features, and other available settings. One of the best ways to do this is to get comfortable with the App interface.
To keep this review from becoming even longer, a very abbreviated view of using the INNOVV App is provided below, with a focus on the centric Settings (gear wheel) tile and the Advanced Settings sub-section.
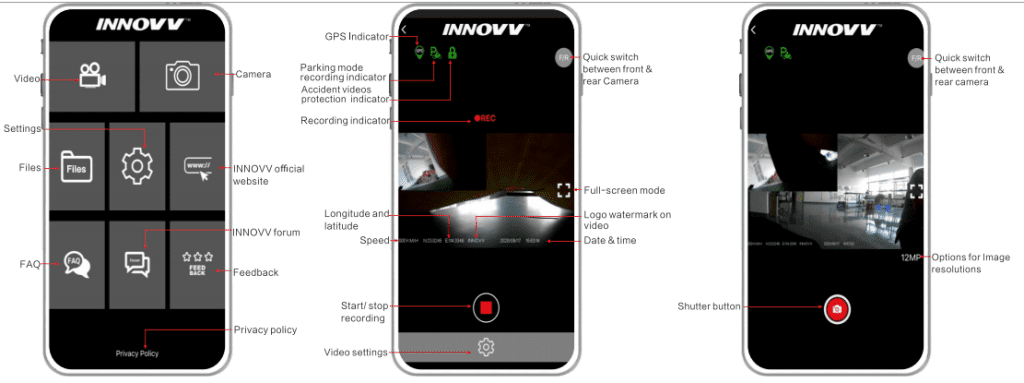
As shown in the screen snippet above taken from the INNOVV K3 Manual, the main screen of the INNOVV App has eight tiles identifying the functional groupings: Video, Camera, Files, Settings along with (if connected) links for the INNOVV website, FAQ, INNOVV forum, and Feedback.
Settings Tile – the central gear-wheel tile is indeed key in configuring the INNOVV camera systems. Scrolling through the listings reveals the following categories: WiFi, Camera Settings, Recording Settings, Storage, Advanced Settings, and System.
Note – some settings are dynamic (the wheel spins and the system updates immediately) whereas other changes do not take effect until the camera is restarted, usually identified by a pop-up message.
Advanced Settings:
- Parking Mode = On or Off
- G-Sensor Slider setting – five sensitivity steps, each with two options, the smaller/less the number of the setting the less sensitive the G-sensor is – this fine-grain adjustability is good for customizing system abilities under different riding/terrain conditions
- Acceleration of Gravity – On/Off (not used at this time)
- Frequency of Ambient Light – either 50Hz or 60Hz, a setting that can help reduce the flickering or strobe-like effects of lighting from road users or infrastructure lighting
- Time Calibration = ‘Cancel’ to leave the default system (GPS) synchronization or ‘Confirm’ to have the K5 system use smart device time
- Cached Data – shows the size and clears the cached data on the smart device, if applicable
- Factory Reset = returns all settings to factory defaults.
System – under this grouping is found the default File Path setting for files downloaded to the host device, along with the current Firmware and App versions.
K3 Firmware Updating
The download file is (usually) a single file with a .bin extension and is directly downloadable from the Downloads page. Copy the resultant .bin file to the root directory of a FAT32 formatted storage card – I keep a FAT32 formatted 32GB card on hand here specifically for doing system firmware updates…using exFAT formatted media isn’t typically a solution.
Make sure the file or files copied over have the original download name and no other extensions appended like (1) or (2) if downloaded or copied multiple times. Put this file under the root directory of the media to be used for updating and load the media into the system.
Once the system boots up, the Camera LED flashes then goes into one or two rapid-flash sequences (uploading/installing), and once done the system reboots and restarts in its normal sequence with Camera first, then the GPS, and finally the WiFi LED.
The new firmware should now be loaded; always verify this via the Settings/System section under the INNOVV App.
INNOVV K3 Performance
After three months of use, the NNOVV K3 is proving to be ultra-reliable, recording front and back video at the selected 1080p 30fps or 720p 60fps settings or photos – initiated either by a double push of the easily reached Function Button on the remote control (easy) or by activating the Photo screen on the App and using the displayed Shutter control (not as easy).
Video Quality
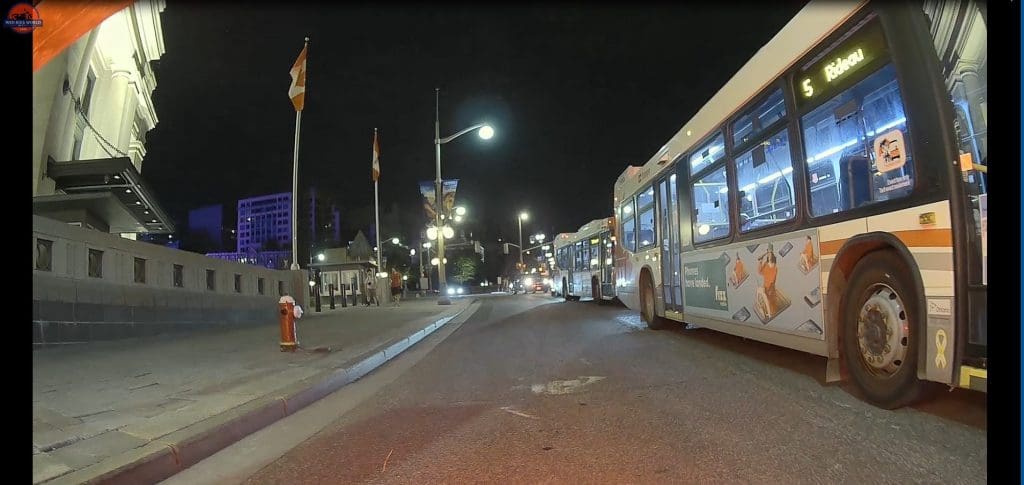
The 1080p at 30fps setting yields excellent video no matter the lighting conditions or time of day/night. At the 720p at 60fps setting the video is still (very) good, and visually smoother regarding motion and details, while allowing more editing/manipulation options.
While overall video quality ranges from excellent to very good under virtually any conditions (lighting, terrain, and weather) with few capture or, image issues seen, image stabilization of some sort would be a real bonus and a really good thing for INNOVV to implement; I suspect (hope) that it is indeed being worked on…
The 120-degree lenses do introduce some distortion, but it is less than experienced with the even-wider field of view systems; this is a good median setting. Overall distortion is minimal especially over the longer deeper views and the cameras provide outstanding focus regarding close-up or in-traffic coverage, no matter the lighting conditions.
A big contributor to the excellent coverage provided by the K3 system, no matter how much or how little light there is, goes to the Sony IMX sensors found in both camera lenses to provide high sensitivity, high-speed imaging, and high dynamic range performance for sustained image quality.
Audio Recording & Quality
The easily used microphone provided in the K3 kit is on a long 2m lead so it can be mounted, fitted, or secured almost anywhere. The default audio setting is: Off or 20/40/60/80/100% steps and having this one external microphone allowing tailored positioning is indeed better than the internal/external layout of the original K2.
The microphone is effective, especially in the 60 to 80% range, although it pays to experiment with motorcycle or rider placement to get the audio focus desired…and playback reveals that it is easy to overdrive input if the microphone is helmet-fitted for direct travelogue input.
Storage Media
Mixed brand SD card media of 64GB, 128GB, and 256GB capacity are in use with the INNOVV K3. These cards are microSDXC and rated as U1 (UHS Speed Class 1) and V10 (Video Speed Class 10) and without any ‘write’ or ‘read’ issues they make great storage media for the INNOVV K3.
Newer SanDisk Extreme PRO microSDXC UHS-I 128GB and 256GB pieces, U3 and V30 rated were tried, but neither would be detected by the system, even when formatted externally, whereas the lesser rated media works fine – more to follow if this one is sorted out.
And FWIW, these Extreme PRO pieces work fine in the INNOVV K5 systems and the SENA 10C EVO-01 that is under wBW review- go figure.
Photos
Press the Remote Control’s Function Button twice or by switching to the Photo Mode from the main Live View Screen if the INNOVV App is in use. Front/back photos are 2048 x 1536 or 3.1MP and stored under the Photo Folder, accessed from the Camera Files screen.
Media Viewing & Downloading
Recorded media on the K3 storage card is viewable by selecting the Camera Files screen and selecting the desired folder (Continuous Videos, Parking Videos, Accident Videos or Protected Videos or Photo)
To download files to the host device, the K3 needs to be powered up and the WiFi connection made. Go to the desired storage folder under the App, select the target subfolder and the file; a pop-up screen with Play, Download, Delete or Cancel options appears. For 1 or, 3 min loops (local riding) with the 2.4GHz WiFi connection, downloads take 30 to 50 seconds.
Files downloaded to the host device are stored under the default /storage/emulated/phone/DCIM/INNOVV ‘DCIM/INNOVV folder (rather than to the host device’s external (removable) storage media if present).
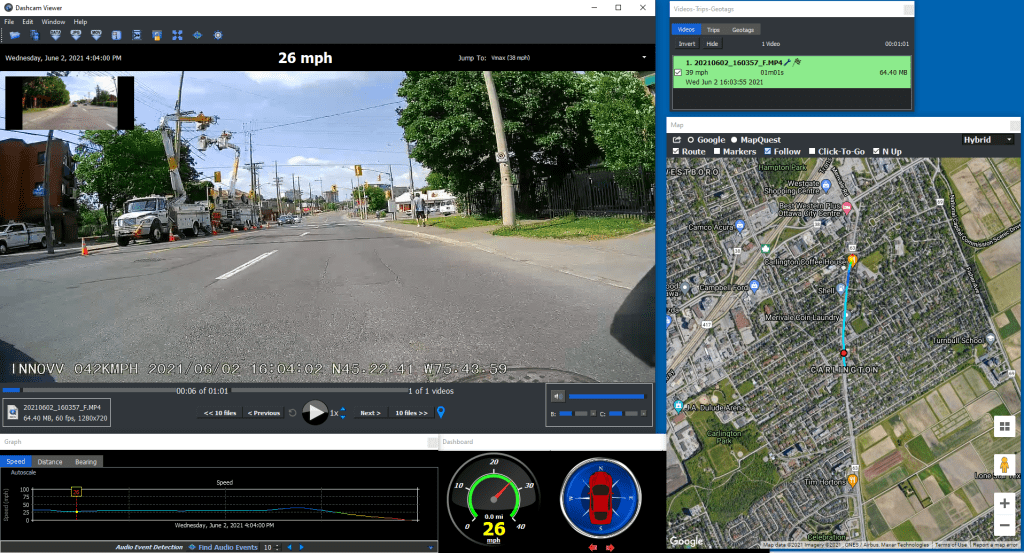
Media Playback – there is no shortage of playback applications available. But the list is a bit shorter regarding applications with the ability to play multi-channel video/audio recordings along with encoded data like speed, heading, position, etc. and, have everything presented on one or multiple displays.
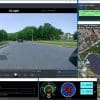
A long-term favorite is Dashcam Viewer by Earthshine Software, also accessible from this INNOVV/Dashcam-viewer link. Available in three flavors – Free, Standard, or Pro. The Free version provides a basic feature-set that is then built upon for the Standard and Pro versions.
The screen snippet below shows a standard Dashcam Viewer screen with both the front and rear (small upper left insert) camera views with mapping and other discrete displays for the decoded data. Recent enhancements to Dashcam Viewer provide direct support for the newest features including the 5Hz GPS (now) used with the K5.
INNOVV K3 System Observations
Documentation – is the usual INNOVV form and standard layout but cramming all the essential information and visuals onto a large double-sided sheet can make it hard to read. Thankfully, for those with access, the same document is available for download as a PDF file that can be enlarged quickly. More color detailing within the diagrams would be good as well.
Media Downloading – this observation is certainly not unique to INNOVV systems, but with the K3 on the market and as it does not sport the higher speed 5.8GHz WiFi connectivity of the K5 model, the need to keep downloading files to the host device, and then perhaps moving them again to a more permanent location for viewing or processing is time-consuming.
And while accessing the storage media is a pain of sorts, it is doable. But how about we get the micro-USB port on the K3, and the K5, fully enabled as a wired (relatively) high-speed data transfer capability? With or without the system being powered up – although the USB connection can provide the necessary system power as well…
Recording (Protected) Mode – and the question posted in the INNOVV K5 review regarding Protected Mode video capture related to ‘before-during-after’ remains one to be answered or resolved (local testing needed for that). An overlapping or bridging approach maintains the past-present-future timeline for what could be a critical event or series of events…
Image Stabilization – this observation is more a wish than anything, but in having seen a sustained steady positive evolution of the INNOVV camera products, it seems only natural (at least from my perspective) that at some point, INNOVV will implement some form of image stabilization across the board or for the top-tier camera products; I’m keeping my fingers crossed.
Conclusion
The INNOVV K3 Dash or Action Camera is a most worthy successor to the original K2 that while being a bit long in the tooth (a relative statement) has a large loyal following that includes this decades-long rider with one of them in use and the other currently far (far) away on a longer adventure but still doing what it is designed to do – work.
But in not dismissing what the K2 represents, I believe the new K3 is likely to quickly gain a loyal following and the many upgraded, updated, and additional bits-n-pieces do make the K3 a new and better product and, it retains the tried-and-true centralized approach (widely emulated) with small components easily fitted almost anywhere and long connection cables.
The INNOVV K5 with its higher resolution media capabilities and more extensive feature set is undoubtedly the upscale product but it is also 100.00 USD more than the K3 system.
There is (still) much to be said for the ‘standard’ UHD (1080p) dual-channel systems like the K3 with its center-hub layout providing a system easy to install, easy to configure, ultra-reliable and, more economically priced to boot.
And it truly is or can be a set-n-forget system; always on, always capturing, always adding to the safety and travelogue environs.
The Bottom Line – new for 2021, the INNOVV K3 Dash (Action) Cam is not just a replacement for the venerable K2 but a new product in its own right – building upon the proven K2 architecture while drawing from the upscale K5 resulting in a familiar form factor with more processing power, detail, and quality upgrades and new components for more functionality. The finished product is (very) good. I’ve said it before, but it needs saying again – the ruggedized waterproof K3 system is a most worthy successor for the K2 and worthy of a close look by anyone considering a dual channel system for their motorcycle. A highly recommended product.
Pros
- Ruggedized components with a proven layout solution
- Small light low-profile components
- The system facilitates custom installations
- 1080p @30fps and 720p@60fps resolutions for great baseline video performance
- G-Sensor provides movement & impact sensing
- Continuous or time-based video capture
- Protected storage folders for movement, impact, or manually tagged video
- IP67 (dust and waterproof) rating
- One App for all INNOVV camera systems
- Easy installation / Comprehensive mounting kits
- Design, quality, and functionality = a great investment
Cons
- Resolution settings could be seen as a limitation
- External microphone not as effective as it should be despite App settings
- Access to storage media difficult


