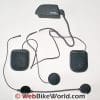
Part II: BTS 300 System Configuration Options
As stated in Part I, the original wBW IMC Camos BHS 600 review from September 2007 invoked a lot of comments and feedback.
Most of the comments involved issues related to configuration and interface issues.
Accordingly, some further technical insight into this new system, the BTS 300, will be provided in this section, along with all of the configurations activities conducted, and technical specifications of the BTS 300 itself.
The Insight
In comparing the information provided in the original article and subsequently posted by many in the Owner Comments section, conducting my own research and then reviewing the BTS 300, I think the experience that most people had regarding the BHS 600 was a lesson learned for everyone to varying degrees.
It is evident that IMC Camos has done some serious engineering in developing both the BHS and BTS series systems. Both systems represent a big step forward in moving the Bluetooth system market segment along, but by the same token, introduce some further complexities, which must be managed.
Both the BHS 600 and the BTS 300 offer up a multi-channel Bluetooth architecture, but while the BHS 600 had two discrete Bluetooth chips, one dedicated to Channel 2, the newer BTS 300 has a more advanced single chip that supports the Intercom profile (Channel 2).
This explains why the BHS 600 provides more flexibility in configuring and in the use of both discrete channels.
Even though later versions of Bluetooth are more adept at handling multiple device synchronization requirements, the fundamental one to one relationship must still be appreciated even in a multi-chip or multi-channel system. In any modern Bluetooth system, this condition must be understood in order understand just how multiple or ‘simultaneous’ connections are facilitated.
With the BTS 300 you can have two Bluetooth devices or profiles simultaneously but the fundamental condition still applies. One profile could be A2DP for a stereo music player connection, while the other can be a simpler profile, like the hands-free profile for connecting a cell phone or the head set profile as typically used with a GPS.
If the connectivity limitations are appreciated and if all the peripherals are functioning properly, the pairings made on Channel 1 will be reliably maintained. Of course the programmed priority will come in to play: if the A2DP player is in use, it will be pre-empted for any incoming activity via the headset or cell phone profile.
One situation that can cause problems is if the mobile device, such as the HTC Touch PDA is also connected to or supporting another device via its multiple profile support configuration menu. This can result in more than one device trying to connect under the same profile – this will cause problems in the overall mix.
System Configuration and Functionality
As noted earlier, it is obvious that a lot of thought went into the design of the BTS 300, especially regarding features and overall functionality. Based on the original BHS 600 article and resultant feedback, the BTS 300 system would seem to be much (much) simpler to configure, easier to use and extremely reliable.
Each channel is treated as a separate entity and both channels can be operated alone or in tandem. Setup, including peripheral pairing or intercom setup, channel use and volume adjustments can be done for each individual channel.
For more information on interfacing the following Bluetooth accessories with the BTS 300 Intercom, see Part III and Part IV of our report.
The following configurations, while not exhaustive, should provide a good insight into the how the BTS 300 is configured and what it can be interfaced with.
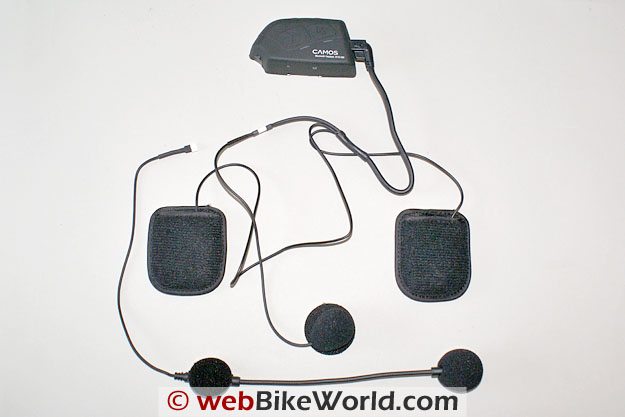
Configuration One – BTS 300 With HTC Touch PDA
The first configuration completed was to setup an initial pairing or partnership with the HTC Touch PDA that is Bluetooth 2.0 enabled and supports all current protocols.
The BTS 300 module is turned off and the HTC Touch is readied to look for a new Bluetooth device.
Holding down the ‘-‘ key for about six seconds will activate and put Channel 1 into its pairing mode indicated by the Red LED flashing quickly. Starting the PDA search resulted in the ‘BTS-300’ being offered up for a new partnership in about ten seconds.
In this instance, no other input was required, although depending on the security protocols implemented by the devices, a pass-code may be requested. If so the typical Bluetooth defaults used by industry are ‘0000’ or ‘1111’ or ‘1234’. If none of these sequences work, then the applicable device manual will need to be consulted.
With the HTC Touch, once the connection is made, the PDA partnership settings menu offers up both ‘Wireless Stereo’ and ‘Headset’ check boxes.
Checking both profiles and saving the partnership off results in a tone being generated in the headset, indicating an active link and successful pairing.
Starting the PDA MP3 player will result in stereo audio being streamed to the BTS 300 and great sound emanating from the stereo headset in the helmet. Either the PDA controls or the module
‘+’ or ‘-‘ keys can be used to adjust volume.
Pressing the ‘M’ key on the face of the module for about 3 to 5 seconds will mute the incoming audio stream without pausing the player. If the Intercom is active, it can also be muted by using the ‘M’ key, but a single quick push will suffice.
For phone activities, the default system setting is automatic, which means that if the mobile phone supports auto answering, incoming calls are automatically answered after two to three rings and the audio sent directly to the headset.
If the BTS 300 system settings are changed to manual mode, the ‘T’ key is used to accept, reject or end calls. If left in the automatic mode, pressing the ‘T’ key will also call the last number dialed. All the phone features detailed in the manual work well with the HTC Touch.
An incoming call has priority over everything else, so this will cause the stereo to be muted.
Typically if the call is terminated by the caller, the stereo stream will resume automatically within a few seconds. But if the rider ends the call by pressing the ‘T’ key, the stereo stream will likely have to be resumed manually, which was the case for this configuration.
Configuration Two – BTS 300 With HTC Touch PDA and Garmin zumo 550 GPS
To set up a second device on Channel 1, turn off the phone or disable its Bluetooth. Turn off Channel 1 of the BTS 300 and then put it into pairing mode as done previously. Initiate the zumo 550 Bluetooth ‘add device’ search.
After three passes the BTS-300 was found and a partnership established, again without having to enter a pass-code. With the ‘navigation, MP3 & phone’ option selected under the zumo Bluetooth headset audio menu, audio generated from the GPS was heard in the headset, in mono of course.
Enabling the Bluetooth on the HTC Touch and making sure the connection had refreshed allowed its MP3 player to send a stereo stream into the headset. If any audio was generated from the GPS, the music was muted instantly and then resumed once the audio session from the GPS had stopped.
What did get frustrating is that one or both of the two devices configured on Channel 1 would have to be restarted, the connection refreshed, or a new connection initiated in order to get both working with the headset again, even when all the pairing activity was done within a 15 to 30 minute window.
According to the manual, a pairing should automatically renew within a 30 minute window if the devices are within range, but the documentation is also quite clear in stating that re-initialization procedures might be necessary with the devices.
I just wasn’t expecting this amount of fiddling with some of the configurations.
For what its worth, I have pairings with the scala-rider Q2 and Midland BT2 systems that will initiate within seconds of the devices being turned on and brought within range, all after sitting for considerable periods of time.
Configuration Three – BTS 300 With Garmin zumo 550 With Mobile Phone
In what is pretty much a standard configuration for many users of Bluetooth systems, a mobile phone was added to the mix, with the zumo acting as host for the phone rather than the headset.
In order to minimize profile conflicts between the devices, the zumo and HTC are paired first by putting both into their respective pairing modes. The default pass-key to be entered on the phone for the zumo is ‘1234’ (the zumo will actually offer this information up during pairing). With this pairing done, the zumo’s phone menu plays host for phone duties.
The second pairing done is between the zumo and the BTS 300 on Channel 1 using the pairing procedure described previously. If the pairing is good (no pass-key needed), all audio from the zumo will be passed via the Bluetooth link, in mono, to the headset.
If a phone call comes in, the zumo will offer up the phone menu and with my configuration, pushing the ‘T’ button on the BTS 300 allowed me to manually answer, reject or end a call.
The zumo phone menu does not support all the features that the HTC device provides or supports, so the phone services are pretty basic compared to a direct BTS 300 and HTC pairing.
Configuration Four – BTS 300 With BMW Navigator III+ (Garmin 2820)
This configuration is basically a confirmation of the above arrangement but using the Garmin 2820 GPS device dismounted from the BMW Navigator III+ cradle. Unlike the pairing sequence above, adding a phone can be done at any time, just remember to turn off the BTS 300 or other Bluetooth devices that could end up being within range.
With the HTC Touch added to the 2820’s Bluetooth device listing, after having to enter the ‘1234’ pass-key, the BTS 300 was turned back on. The Auto Connect feature on the 2820 works really well – disconnecting all devices and then using this feature, even after an hour, resulted in both the HTC Touch and BTS 300 connecting to the Garmin and all functions resumed.
The auto-answer feature worked fine, but the ‘T’ button on the BTS 300 would not do anything to the phone but using the ‘hang up’ feature on the Garmin phone menu did the trick in ending a call. All the other features found on the 2820 phone menu worked fine with this configuration.
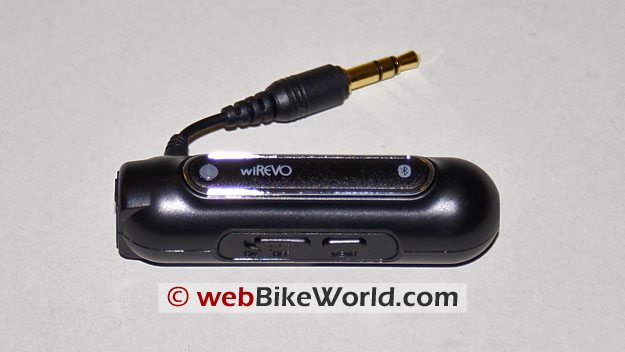
Configuration Five – BTS 300 With wiRevo D1000 BT Adapter
Of the two Bluetooth Adapters (BTAs) on hand, the wiREVO D1000 is the simplest to use (not that the other device isn’t as well). This handy little device comes bundled with a wiREVO S300 Bluetooth Stereo headset – more on this kit later in a companion article.
Put BTS 300 Channel 1 in pairing mode, then hold down the Menu button on the D1000 while turning its power switch on (these two controls are grouped together). This results in the BTA LEDs flashing for about two seconds, followed by a slow pulsing Blue LED which indicates that the pairing is completed – very fast and too easy.
Connect the 3.5mm audio jack plug of the D1000 into the audio output of a handy MP3 player, like the zumo 550 or any other device and enjoy the full stereo stream generated in the helmet headset. Sure beats the heck out of that dull standard mono stream via the Garmin Bluetooth connection!
Performance and reliability of this device has been outstanding. Over the course of two months, the D1000 only failed to sync up twice with either of the BTS 300 systems or its companion S300 headset. In both instances a quick re-pairing fixed the issue.
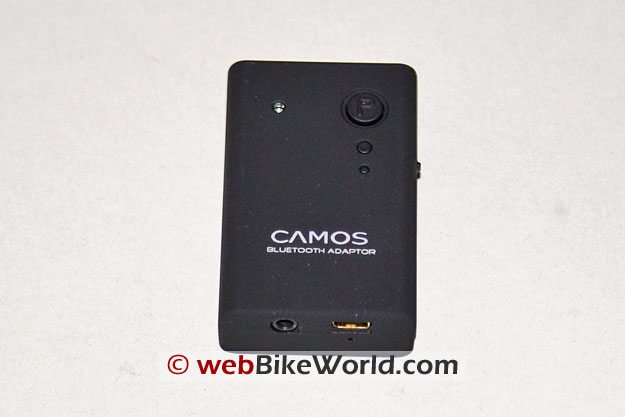
Configuration Six – BTS 300 With CAMOS Radio and Stereo Bluetooth Adapter
As noted earlier neither of the two BTAs used are very complex. Outside of understanding the LED sequences, the simple switches and charging them now and then, use and maintenance is straight forward.
The advantage the CAMOS BTA (BH-200M) brings to the table is that it can be switched between mono or stereo via a small dip-switch. For a single channel mono signal, like personal radios, the BTA is set to mono. When a stereo stream is needed, it’s a simple matter to turn the device off, change the switch and turn it back on to use with an appropriately paired device, like the zumo 550.
Pairing this adapter with the BTS 300 is the usual routine. Put Channel 1 in pairing mode and then hold the small power button on the BTA down for 7 to 8 seconds. Once its Red LED has started flashing rapidly, pairing is underway. After 5 seconds or so both device LEDs will stop flashing and settle into a double-flash-every-three seconds routine.
As identified above, another function of the stereo/mono BTA allows it to be the Bluetooth host for FRS/GMRS/PMR class radio devices. The kit I had came with two interface cables, one being the stereo interface cable (2.5mm 4-contact plug to a 3.5mm 3-contact stereo plug) and the second for use with Motorola radios (2.5mm 4-contact plug to a 2.5mm 3-contact plug).
This ability to use a common radio peripheral on Channel 1 adds further dimension to the BTS 300 system. If no other devices are needed on Channel 1, then the stereo/mono BTA and a paired radio, along with the supplied PTT switch can be used for longer range and group communications while still maintaining the Intercom on Channel 2.
This is most useful when riding in a group, and when there is a rider and passenger on the motorcycle as it allows both external and internal communication environments to be maintained. The passenger is still able to use their Channel 1 for connecting music and/or a phone.
With the adapter and BTS 300 paired via Channel 1, plug the 4-contact radio wire into the BTA and the other end into the radio and connect the PTT switch to the BTA via its mini-USB port. Turn the radio on, press the PTT switch and communicate.
The only real issue here is to make sure that all users are on the same channel and sub-channel as applicable (trust me it happens all the time…).
Configuration Seven – BTS 300 and wiREVO Bluetooth Adapter and CAMOS Bluetooth Adapter
The playing, er…testing continues. In this configuration the two Bluetooth Adapters provide the interfaces to the peripherals. The wiREVO device hosts the zumo 550 (with its Bluetooth disabled) for stereo music output and GPS audio, while the Camos BTA is set to mono for hosting the Motorola FRS/GMRS radio.
This is a good configuration for those who aren’t or don’t want to be tied to their phone and are more concerned with timely travel guidance in the form of the GPS (you know, that solution to the male trait of not wanting to ask for directions…) along with a longer range or group communications capability and finally, at the risk of dating myself, some Doobie Brothers and Santana tunes.
Intercom Setup – Channel 2
Setting up the Intercom feature is very simple – hold the ‘M’ and the ‘+’ keys for about six seconds on the first system to initiate pairing mode, indicated by the Green Led flashing rapidly.
Press the ‘+’ key on the second unit for six seconds to put it in pairing mode – after a very brief period, both sets will flash and sound a sequence in the headsets followed by the Green LEDs reverting to a slower sequence of flashes indicating link activity.
The Intercom is now configured. The first system is the Master headset and the second system is the Slave headset for link purposes. Speaking loudly into either of the headsets will typically activate the VOX and establish a connection within 2 or 3 seconds.
By the same token, if there is no activity and noise levels are low, the VOX is supposed to automatically mute after 30 seconds. The Master headset gets a warning set of tones five seconds before muting while the Slave headset gets another tone indicating that the session has been ended.
As noted in Part I, the VOX has an irritating tendency to mute from time to time, even in the middle of a conversation or when ambient noise levels are high. This was not a constant issue but it did make its presence felt more than once.
Setting microphone sensitivity higher helps in one way, but detracts in another, as it can keep the link open if ambient noise levels are high when no direct voice conversations are taking place.
System Specifications: Bluetooth Module – BTS 300 Series, Rev A, 080603
- Dimensions: 84 x 44.5 x 20.5mm or 3.30 x 1.75 x 0.80 inches.
- Bluetooth: Version 2.0 for enhanced data rates and stereo audio.
- Power: Dual channel Class A (100mW) for a nominal range of 100 metres.
- System Supports: A2DP (Advanced Audio Distribution Profile), AVRCP (Audio/Video Remote Control Profile), Hands-Free Profile (HFP) and Headset Profile (HSP).
- Stereo Headset: The speaker housings measure 6 x 7 cm with a brushed surface and the hook half of hook-n-loop material. The speakers are 6mm in depth and just under 4cm in circumference. They are marked as 32 Ohm impedance and nominal (listed) output of 0.1 watts.
- Headset Harness: A one piece harness, the common section (mini-USB plug to the microphone mini-connector) is 26cm or 10in long. The right speaker lead is 38cm or 15in long and the left speaker lead is 18cm or 7in long.
- Microphone: The boom microphone lead has a total length of 43cm or 17in (the boom itself is 20cm or 8 in long, including the globe-shaped sponge microphone sock). The thin wire microphone is 25cm or 10in in length including the half-moon sponge sock.
- Connectivity: Channel 1 can support two simultaneous connections – an A2DP (stereo audio) connection and a headset/hands-free (mobile phone, GPS, 2-way radio).
- Battery: Li-Polymer (Li-ion) 3.7v, 650 mAh cell.
- Standard Charging Time: Three (3) hours, slightly more for the initial charge.
- Usage Time: Standby of approximately 90 hours is identified and depending on the number of devices connected and actual use, approximately seven hours of use time is identified.
Also In This Series:
▪ Part I: Camos BTS 300 Review
▪ Part II: Camos BTS 300 Configuration and Specs
▪ Part III: wiREVO BT Stereo Headset & Adapter Q&A
▪ Part IV: IMC Camos Bluetooth Adapter
Owner Comments and Feedback
See details on submitting comments.


