You’ve probably seen them as an OE (original equipment) installation on your motorcycle.
But individual motorcyclists can also use these weatherproof and sturdy connectors.
Here’s an introduction to Deutsch connectors and a quick how-to on rolling your own.
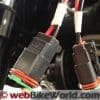
Look closely at the wiring on your motorcycle and chances are you will find a Deutsch connector used for one or more of the essential electrical connections.
Deutsch connectors may be a bit larger than other connector types, such as Posi-Locks.
But when you need multi-wire and multi-pin connectivity in an extremely ruggedized and weatherproof housing, they are hard to beat.
A Deutsch connector has more parts than most other connectors on the market.
But in this instance, the sum of the parts does equal a greater whole and this connector can be disassembled if necessary for repair or re-use; never a bad thing.
I’ve been using the Deutsch DT Series connectors for more than five years on every motorcycle that has been or is part of my home fleet and have experienced zero failures.
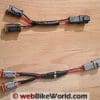
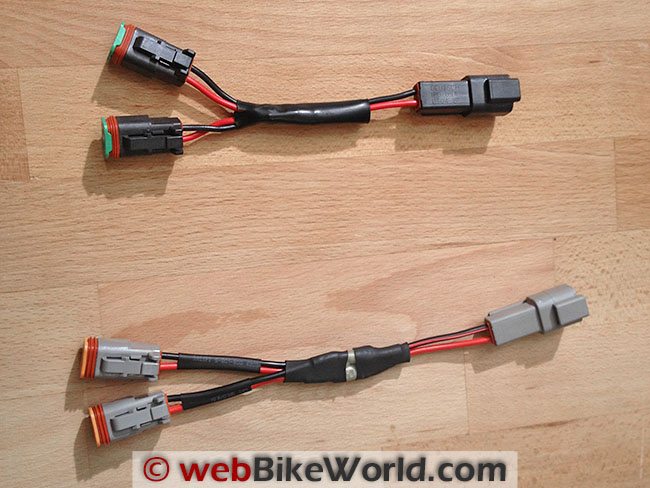
With a little bit of practice, creating your own professional-looking harness using a Deutsch connector is simple and — best of all — fun!
Background
I have done a fair bit of electrical work on motorcycles over the years, including rewiring harnesses and wiring power distribution systems.
And don’t forget all those electrical accessories that we can’t resist. This work has involved the use of most of the common wiring connector types; simple and complex, small and large.
I must admit that where simplicity and expediency is absolute, Posi-Tap and Posi-Lock productsremain my favourite solution.
But “the right tool for the right task” means there are times when a large wire harness needs a connector that can accept multiple wires while also providing a quick-disconnect capability.
Depending on the situation, this is where a Deutsch connector and related components come into play.
The Deutsch connectors are very easy to use and if assembled correctly, they provide years of trouble free weatherproof service.
The Deutsch Group, now part of TE Connectivity, Ltd., was founded in 1938 in California by a pioneer in the industrial connector industry, Alex Deutsch.
Since then the company has grown steadily into a global force and been instrumental in fielding innovative connector products for demanding environments such as space, aerospace, racing and defense, along with marketing their products to consumers.
More than a few riders have asked about the connectors I use when installing electrical components on the motorcycles I own and for others.
And because webBikeWorld provides insight into all things moto-related, hopefully this article will pique some interest.
Deutsch DT Series Connectors
Most of the electrical work on a motorcycle involves 14 to 22 gauge wiring with the odd requirement for 8-12 gauge leads.
As such, the Deutsch DT Series connectors are appropriate, with DTM (Miniature) and standard DT series components the norm along with DTHD (Heavy Duty) single-pin connectors used for high amperage requirements like battery leads.
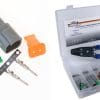
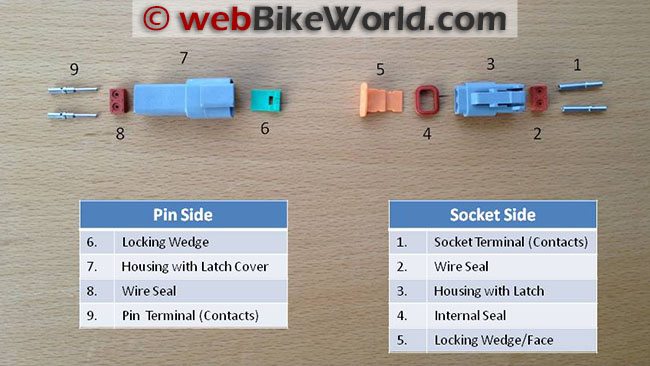
The connectors are built up from several modular components to form a ruggedized waterproof connector.
The main thermoplastic housing components have a -55 C to +125 C operating range, meaning they will withstand the temperatures encountered at or near most engines and surrounding components.
The most common connectors used for recreational vehicles and motorcycles are the two, three and four place (pin) connectors.
However, larger multi-pin and array connectors are used throughout many vehicle harnesses for efficiency in minimizing the number of harnesses used.
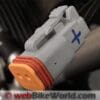
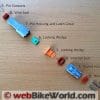
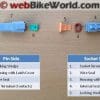
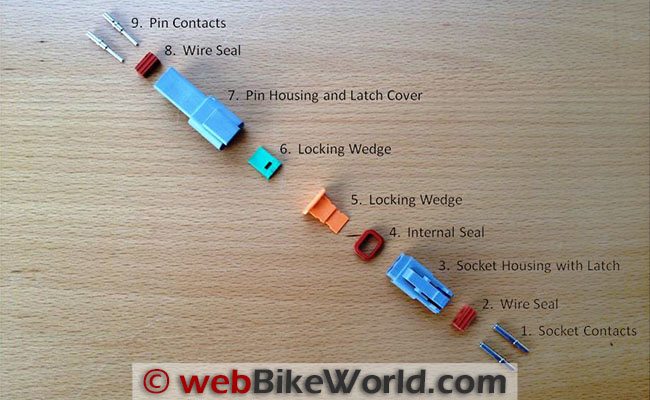
The two-piece connector uses keyed components for both the Socket and the Pin housings, with the Socket housing fitting tightly into the Pin housing and a top-latch securing the assembly together.
This component listing and photo reveals how the pieces fit together:
DT Series Connector Requirements
Getting the right tool for the right job means using the right Deutsch DT connector for a specific application, with placement, electrical load and thus wiring all important factors.
So time spent in getting to know the connectors and how most suppliers configure their ordering mechanisms is good.
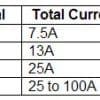
Here’s a general and unofficial guide I developed:
One of my favoured online sources is WireCare, which has information about the connectors and makes it quite easy to order the needed components.
Also, other specific options can be ordered as desired, such as cover boots, sealing plugs, contact removal tools, etc.
There is also a well-defined part number coding system that helps as well…
Tools and Accessories
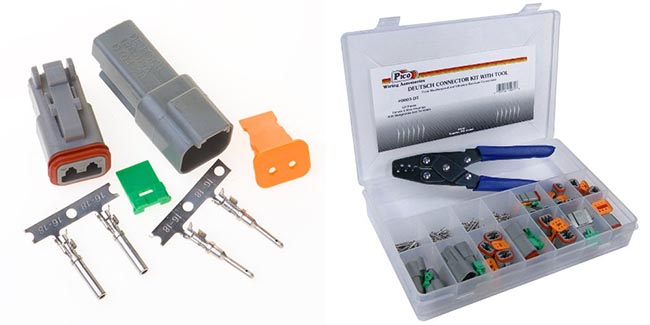
You do have the right crimping tool right? For any contact work, a round crimping tool that provides a multi-indent crimp is better, although for the light-weight contacts a good flat pressure crimper will work.
Just check the crimp carefully before inserting it into the connector.
If doing a fair amount of this work using round contact connectors (Deutsch or otherwise), it is far better get the right tool, although the really good ones aren’t cheap.
The upgrade model I finally ordered costs around $250.00 USD, although some variants that handle multiple types of contacts can be had for much less.
Another available (cheaper) aide are Contact Removal Tools.
These small plastic pieces make life easier (unless skilled with a small flathead screwdriver) in removing contacts from housings allowing repair or re-use of components, less the crimped contacts of course.
This ability to repair/reuse (and recycle) is a feature of the Deutsch connectors always appreciated.
Other components available for use with the connectors include boot covers for sealing connector halves when not in use and back-shells (straight or 90-degree) that provide installation and wire-strain protection.
And don’t forget to order some extra pin and socket contacts, especially if conducting some initial ‘familiarization’ activities.
Assembling and Wiring a Deutsch Connector
While there are two distinct halves of a Deutsch connector, assembling or building-up both of them is basically the same, with only minor finishing variances once the wires and contacts are secured inside the housings.
In preparing to use the connectors, a couple of conventions need to be kept in mind.
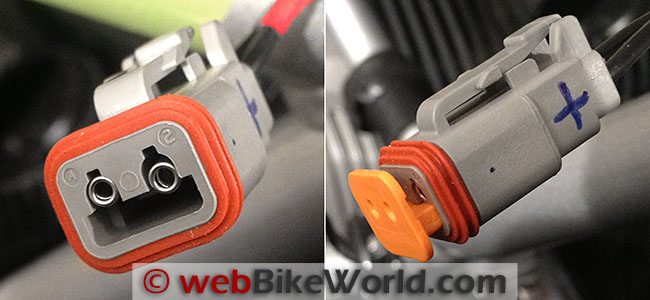
The first is simple and very important: keep the Positive and Negative orientations correct between the two halves of the connector!
I cheat by using a felt-tip permanent marker to identify the positive side (contact) with a “+”, along with a small red-colored band placed around the positive lead as close to the connector as possible.
The next consideration is deciding which half to use for the power side.
Most commercial harnesses use the pin side for the main (powered) leads and the socket side for the accessory.
Either can be used safely, unless a harness that has been provided with your accessory already uses Deutsch connectors (example, the Denali DM1 LED lights (review)).
The basic steps for configuring a Deutsch connector are:
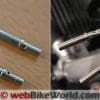
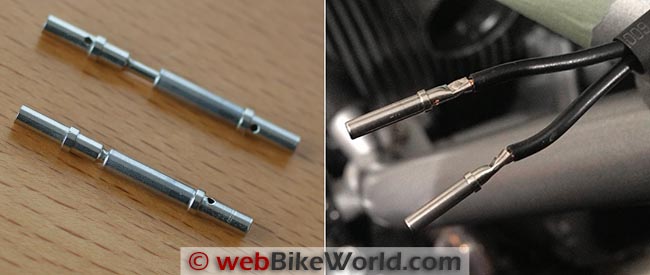
- Strip each wire back 6 mm (0.25 inch), insert the wire into the Pin/Socket contact and make the crimp.
- Hold the housing securely and insert the crimped contacts through the rear grommet straight into the connector until a click is heard; the contact is now locked in place.NOTE: if more than a single wire, insert them together and evenly through their respective holes.
- Insert the appropriate wedge with its keyed shape and colour (Orange for Sockets and Green for Pin) in from the front (connection-side) of the housing; the wedges will snap audibly into place.Note: a thin pair of needle-nose pliers is needed for the Green wedge whereas the Orange wedge is simply pushed and locked into place, becoming the face of the housing.
- With all contacts seated and locked, and the wedges seated as well, a gentle tug on the leads at the back of the housing will confirm if all is solid.
- Repeat this procedure for the other half or next connector.
Disassembly
Re-doing or repairing a Deutsch connector is possible; it just takes a bit of patience and the right tools.
Hold the housing firmly from the rear and with a thin pair of needle-nose pliers grasp and pull the wedge directly out.
With gentle backwards pressure on each wire use a thin flathead screwdriver or contact removal tool to move the tiny locking finger in the housing down and away from the contact.
As the contact loosens, hold the rear seal in place and gently pull the wire with contact directly out from the back.
If rebuilding, make sure the new contact crimps are good and that the front and back seals and wedges are still in good shape.
If they are damaged or marked in any way replace them so that overall integrity of the housing and thus the connection isn’t compromised.
Applications
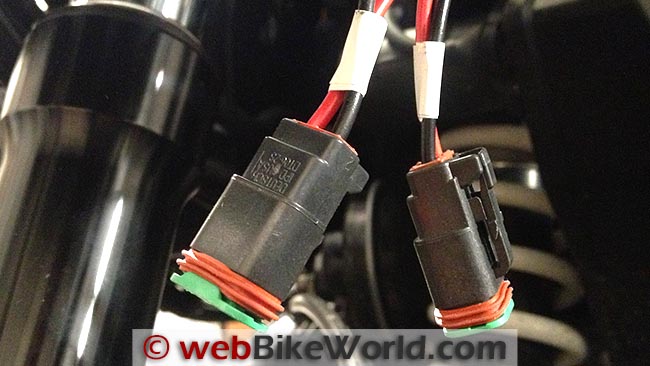
The right Deutsch connector can be a solution for many applications on a motorcycle be it a light, heavy duty or something in between. They may be more complicated than other pin-based connectors, but the benefits they bring are worth it.
On a motorcycle such as the BMW F800GS (report), where space can be limited, I have used Posi-Lock connectors on some of the accessories, while others have two- and four-pin Deutsch connectors.
But my BMW R1100R and R1200 motorcycles basically utilize Deutsch connectors for all of the added accessories.
That’s because the larger machines have more room to run multi-lead harnesses and house the larger Deutsch connectors in two, four and six-pin configurations.
By the way, the six-pin Deutsch connector is very effective for wiring in low-draw accessories.
Deutsch connectors provide a quick disconnect capability with a watertight seal when properly assembled and when the two halves are connected.
It takes a bit of pressure to force the two pieces together and take them apart; push down the top latches and always hold the housings (not the leads preferably) while separating the two pieces.
I have a fair number of electrical accessory installations to do, sometimes in haste or ad-hoc for evaluation purposes.
And part of my winter work in the garage includes going over all of the accessory installations on my motorcycles to see where multiple in-line connectors can be replaced with a multi-pin Deutsch connector.
Remember, the right tool for the right job!
Conclusion
There are many different types of electrical connectors available for use on motorcycles.
But few of them provide the quality and durability of the Deutsch connector, which is why this type is one of the most widely used by many motorcycle manufacturers for OE (original equipment) installations.
So don’t be put off by the seeming complexity of the Deutsch connector.
In assembling and using the connectors and experiencing the simplicity and robustness they provide, along with their professional look, the rewards will be there.
▪ Motorcycle Product Reviews
▪ Maintenance and Repair Articles
| wBW Product Review: Deutsch Connectors | |
|---|---|
| Manufacturer: TE Connectivity | List Price: $5.00-$6.00 USD per connector, varies. |
| Colors: Black, Gray, Red, others by series. | Made In: Unknown |
| Review Date: February 2013 | |
Owner Comments and Feedback
See details on submitting comments.
From “P.W” (April 2013): “Recently I did a project using Deutsch connectors (the usual 2 pin ones you show in your article sourced from Eastern Beaver) and had problem with 3 of 4 wedges fitting properly.
One wedge on one of the female connectors was simply too long- its leading edge deformed on insertion and had to be trimmed, 30 second fix with clippers.
Both of the wedges on the male fittings could not be driven in to proper depth so the pins would be exposed no matter how much force was exerted – they were both too fat to fit.
Both were made to fit with a combination of clipping and grinding to proper thickness with a Dremel but that wasted 20 minutes.
In all instances, pins were properly crimped with correct tools and fully seated to depth. Wire gauge was appropriate for the connector used.
Based on my experience with this batch of fittings, my next project will use weather packs, as has been most of my past practice.
These have wide use as OEM in the US auto industry and I have never had a problem with them or their parts.
It appears one can encounter some odd issues with Deutsch connectors that waste more time than the specific part justifies; too bad, they are a nice and compact design.
UPDATE: I got a quick reply from Jim at Eastern Beaver who confirmed my observation, explained how it happened and is replacing the parts. Great service from Jim as always.
He accidentally packed the female wedges with the male fittings and the male wedges with the female fittings – they actually look like they ought to fit that way and the wedges bear no markings of any kind indicating what fittings they match.
So this error could be repeated by anyone who has both types of wedges and fittings. In contrast – no such error is possible with a weatherpack connector.”
From “B.P.” (February 2013): “What a great write-up on Deutsch connectors — kudos to H.B.C.! I wish I had known about these connectors and Wirecare.com two or three bikes ago.
Eastern Beaver, where I’ve gotten some electrical goodies over the years, has some similar connectors, but the pins offered use fold-over wire-attachment points; the Deutsch pins with full strand enclosures seem like a much better system.
As it is, I think I’m almost done (well, there’s always something else) with electrical farkles. For me, hard to justify that $250 crimper, although I really like it and if I were starting with a new bike, I’m pretty sure I’d buy it.
I do have one question. Do you or H.B.C. have any suggestions or tips in identifying wire gauges if, say, you’re working on one side with existing OEM wiring?
I ask because you have to set that crimper to the gauge in question. Is the best way to use some strippers with gauge markings?”
Editor’s Reply: We use one of these 5-buck tools: Stainless Steel Wire Gauge – Measures Both Standard And Metric
Once you get a feel for the wire gauges typically used on motorcycles, the sizes become recognized, sort of like being able to identify the size of a metric bolt head. Another handy tool is a graduated Wire Stripper and Crimper, which indicates the wire gauge also.


