It was just about this time of year, long ago and far away, when Mom would drag me to the nearest department store to poke through the new crop of fall clothes for the upcoming school year.
But we ran into the same problem every fall.
I wasn’t short, fat or tall — I was just about average in size.
That meant that all the clothes that fit were long gone, to be found on the backs of all the other perfectly average Joes who had the smarts to get to the store in August rather than September.
You could count on it — if there was a shirt, shoes or jacket that I liked, my size would be sold out.
Thus, I usually ended up with the most bizarre combinations of leftover colors and fabrics that could be found.
I had little success trying to convince the opposite sex that this look was was a new styling trend.
Variations of that problem have been haunting me ever since.
For example, I have evolved a very thick neck planted on an average sized chest.
This means that no off-the-rack dress shirt will fit; if the chest is correct, the neck is too small and if the neck fits, the body of the shirt looks like a parachute.
It’s the same with motorcycle clothing. I have a heck of a time finding clothes that fit correctly; if the waist fits, the legs don’t and if the pants do, the jacket won’t.
This problem is especially acute with one-piece leather motorcycle suits.
According to the charts, I fall in between a size 54 and 56.
I have tried on several brands; usually the size 54 will fit from the waist down but is too small in the chest.
The next size up, a 56, fits me in the chest but the waist, the rear and the legs are too big.
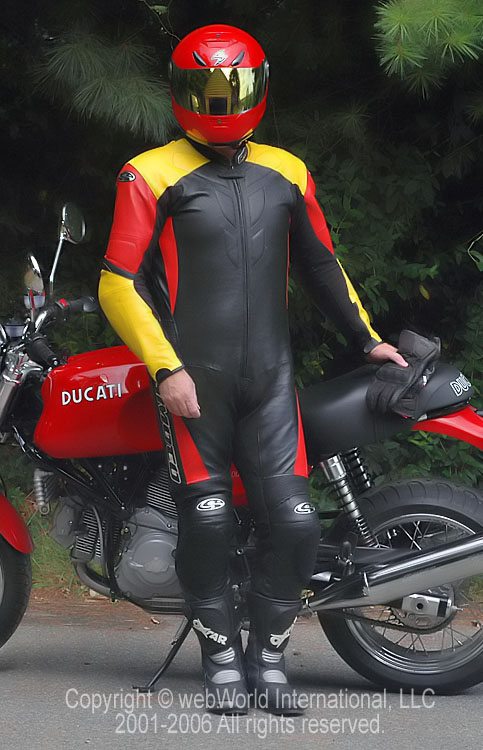
The sizing issue is evident in the photographs of me wearing the Lookwell Leathers one-piece off-the-rack suit that we reviewed not too long ago.
Although that suit doesn’t feel that loose when it’s worn and at the time of that review I thought they fit well.
Another problem I have is that the knee armor in off-the-rack motorcycle pants is always situated in the wrong location. It usually ends up somewhere down south of my knee.
I’m not sure why this is, because I don’t think my legs are out of proportion to my height, so who knows?
I’m convinced that the manufacturers do not adjust the location of knee armor depending on the pants size; they simply measure down X centimeters from the crotch and install it there.
I can sometimes find a near-perfect fit in one brand or another, but I finally decided to spring for a set of custom motorcycle leathers just to get something that really would be perfect.
After considering the various options, I discovered that it really isn’t that much more expensive to order a custom fitted suit anyway, considering how much I’ve spent on clothes that I don’t wear because they don’t fit.
Kangaroo vs. Cow Hide
And I figured that as long as I was going all the way, I might as well do it right and use kangaroo skin, rather than cow hide.
Why kangaroo? It’s supposed to be one of the strongest yet lightest leathers available.
The Australian kangaroo industry conducted many studies on kangaroo leather, and they claim that the hides have a “highly uniform orientation of fiber bundles in parallel with the skin”.
This, along with the lack of sweat glands, supposedly gives kangaroo skin excellent abrasion resistance, which is perfect for motorcycle leathers.
Custom motorcycle leathers made from kangaroo skin are usually much lighter than their cow hide counterparts.
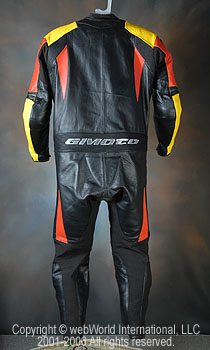
The Lookwell one-piece suit weighs in at a hefty 10.5 pounds (size 56), compared to the GiMoto custom made kangaroo skin suit shown here at just a hair over 7 pounds, about 30% less.
The weight difference is very noticeable when wearing or carrying the suits.
Sharp-eyed readers will realize that this is somewhat of an apples-to-oranges comparison, because the Lookwell size 56 suit has bunches of extra leather to begin with simply because it doesn’t fit me as snugly as the GiMoto custom motorcycle leathers.
A true weight comparison could only be found by having two identical custom suits made, one in cow hide and one in kangaroo.
Nevertheless, I’d guess that a kangaroo suit would weigh around 20-35% less than the same suit made from cow skin.
Measuring for Custom Motorcycle Leathers
I’m not sure how I discovered the GiMoto brand, but their website led me back to Motostrano, the U.S. distributor.
GiMoto makes a nice selection of one- and two-piece leather suits and Motostrano includes a lot of information on ordering the GiMoto custom motorcycle leathers, which can also be ordered in two piece styles if desired.
After some email discussion back and forth with “Joe” at Motostrano, who was very helpful, I downloaded the custom leathers order form and broke out the measuring tape.
Now if you’re thinking about ordering some custom motorcycle leathers, this is the area where I think I can provide the best advice, based on my experience with this project.
The first thing is that I’ve noticed that all of the order forms for the different manufacturers of custom motorcycle leathers are different; that is, they ask for different measurements.
This in and of itself is rather strange — you’d think there would be some standardization in the dimensions they need, but apparently not.
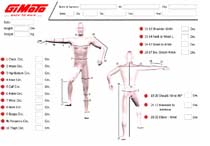
The GiMoto form requests 20 different body measurements.
I’m not sure it’s a case of “more is better” when it comes to custom leathers; there are a few crucial measurements and my feeling is that a few millimeters off one way or another on some of the less important dimensions won’t really matter.
The first important tip is to use an accurate tailor’s measuring tape.
These are the soft fabric types that are used to measure a body for clothes. Believe it or not, they’re not easy to find. I had one from a Vanson Leathers promotional kit, but it isn’t very accurate.
I have recently searched all over for a good cloth tape measure but I honestly can’t find a good source.
If you know where to find one, please forward the info to me at the email address at the bottom of this page and I’ll add it to this article.
[UPDATE: see the comments section below for potential sources of measuring tapes.]Here’s another tip: the cloth measuring tape that you use should always be compared to a good-quality steel tape measure for accuracy.
I found out too late that the Vanson tape is not accurate at all — it’s already off by one millimeter at one inch!
By 25 inches, it’s off by 4mm. Not good. (Note: See visitor comments b below).
The other major problem with all of the ordering forms I’ve seen is that they are vague about the location of the exact measuring points. For example, the GiMoto form asks for an “outside waist to ankle” length.
There’s a graphic of a generic human form, but who really knows where the “outside waist” dimension is?
Or the wrist? Inside the crotch? The “hip bottom”? It would be nice if they included some photos of an actual measuring session.
We also did some experimentation and found that every person taking the measurements will come up with significantly different numbers each time, so be careful.
Here’s another potential problem: as an ex-machinist, I know that it’s very important to avoid cumulative errors.
These are the errors that creep in when the start of one measurement is taken from the end of another. Generally speaking, all measurements should always start from the same point.
For example, it’s hard enough to measure from the ankle to the knee, then from the knee to the hip and from the hip to the neck, given that we don’t really know where the exact points in each of these locations should be.
So why not use the floor as the starting point?
Then the measurements could be from the floor to the ankle, floor to knee, floor to hip and floor to neck. Simple subtraction would then provide enough information to know the distance between any of these points.
Sure, you’d still have the problem of knowing exactly where each of these points lie on the body, but at least the cumulative error could be eliminated.
If the measurement from the ankle to the knee is off and the measurement from the knee to the hip is also off, by time you get up to the neck the measurements could be significantly wrong.
This is compounded by the person taking the measurements, who may find it difficult to start the tape at exactly the same point each time.
Watch For Errors!
Which brings me to another tip: I suggest using a felt-tip pen to mark each point on the body, so at least there’s a better chance at a consistent starting point for the measurements.
A photo could be taken and sent with the order form, which can help the custom motorcycle leathers manufacturer understand the source of the measurements (and the shape of the customer’s body).
Actually, I’m surprised that the custom leathers manufacturers don’t ask for a few body profile photos anyway.
The bottom line here is to be very careful, because it’s way too easy for multiple errors to slip in to the ordering process.
Get a good tape measure, mark up the body to use the same points, take multiple measurements (even measuring again a few days later) and provide the custom motorcycle leathers manufacturer with as much information as possible.
And one more thing: make sure you understand what you should wear when the measurements are taken. Motostrano recommended wearing underwear only and holding the tape firmly but slightly loose around the skin.
It is important to know whether the manufacturer wants close-fitting measurements with no extra space or if they want the measurements to reflect the final fit.
And by the way — we’ve covered this before, but remember that to work correctly, motorcycle clothing must have a snug fit. This is to allow the armor and padding to stay in place during a fall to protect the rider.
If the suit, jacket or pants are too loose, the armor can easily move out of location, greatly diminishing its protective qualities. Keep this in mind when measuring for your leathers.
The Wait
Although all of this information on measuring for ordering a set of custom motorcycle leathers may seem like common sense, it took me some time to understand all of these implications.
Believe it or not, we took only two sets of measurements, which pretty much corresponded, then filled out the form and faxed it in.
The next day I started thinking, and after checking some of the measurements again, I sent some corrections to Motostrano.
Also, the order form from the GiMoto site has very small boxes to enter the measurements and I was afraid that by time it was faxed over a couple of times that my scribbling wouldn’t be legible.
So I sent an entire new set of measurements in an email to Motostrano, hoping that they would forward it to the GiMoto factory.
Motostrano claims a 4 to 8 week delivery time for GiMoto custom leathers.
That sounded pretty reasonable to me. I placed my order on April 2 and received the leathers on July 27, which was nearly 16 weeks, or just about twice as long as the estimate. I’m not sure if this is typical or not.
The Colors
Most of the custom motorcycle leathers manufacturers allow a certain amount of customization with leather panels of different colors. Extra-cost options abound but can quickly add hundreds of dollars to the order.
Choosing the color combination on a set of custom motorcycle leathers is definitely the most fun part of the process.
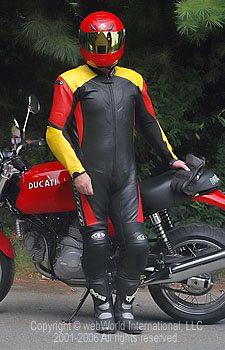
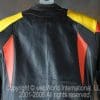
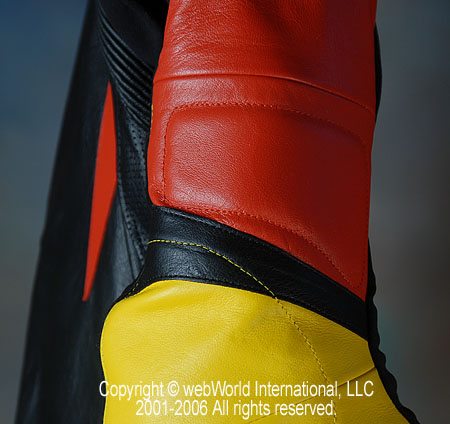
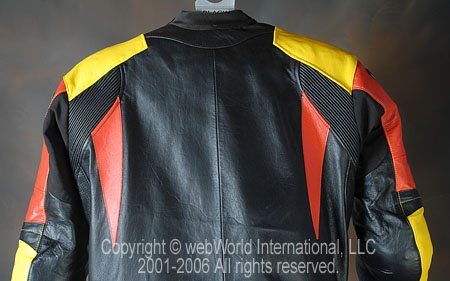
I used the GiMoto online custom color application to play with various combinations and settled on the mildly high-visibility and hopefully body-slimming pattern shown in these photos.
The Fit
The longer I waited, the more nervous I became.
I kept second-guessing the measurements and had to stop looking at my copy of the order form because every time I did, I’d come up with a different result.
The day finally arrived and I took the suit out of the box. I was — and remain — impressed. This is one great-looking set of custom leathers, and the construction and quality is first rate.
But how do they fit? After all my worrying, everything turned out fine.
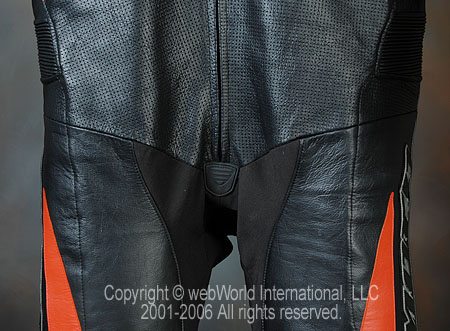
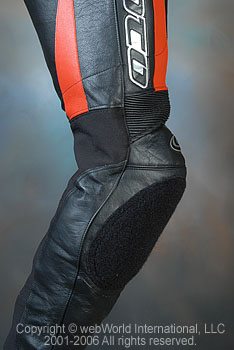
The suit fits very tight, more like a set of MotoGP race leathers than a touring suit for sure, but it does fit.
The legs are especially comfortable.
They feel rather like a thin layer of padding has been sewn in to the liner, but this isn’t so.
It’s just that the stitching and the design and, I think, the kangaroo hide make them very soft and pliable.
I was expecting a bit of a struggle when it came to stretching the upper section over my torso, but it doesn’t seem any more difficult than putting on the Lookwell suit, which is definitely larger.
I have not yet tried wearing the EDZ Motorcycle Wicking Underwear u underneath, which is supposed to help one get in and out of a set of leathers, but will do so as the weather cools off a bit.
In the end, the only measurements that I’d change if I could would be the length of the torso, because the suit seems a bit tight in the crotch.
Perhaps I could also have used another 10 mm or so in the waist and chest — it’s a tight fit, and I’ll have to be careful not to gain an ounce of weight!
But I wanted a tight fit and that’s what I got. There’s no way that this armor is going to move out of place in this suit. In fact, the only other spot that is probably too tight is in the crook of my arm, of all places.
We may have transcribed the numbers incorrectly, because of all the dimensions on the suit, the elbows seem like a strange place to have an error.
I’ve worn the leathers several times and while I don’t really notice that they’ve stretched.
I can say that wearing them gives an altogether different feel for the motorcycle; the tight fit allows my body to “feel” the messages that are being transmitted through the various bike bits.
What’s Missing?
I now realize that I never asked about a back protector or a wallet pocket (I wonder what Rossi does with his wallet while he’s racing?).
There’s no mention of these on the order form and the Motostrano custom motorcycle leathers ordering page only lists an “integrated pocket for spine protector” as one of the features, but there is none on my suit.
I guess I was so concerned about all of the other details that I simply forgot to ask.
I discovered that I can fit the Knox Stowaway back protector i inside the suit, but it does make the suit fit that much tighter. It would have been nice to have some extra room included in the back to account for the armor.
I also never thought about asking about internal pockets for a wallet or cell phone. The suit has a single small pocket inside the chest, barely big enough to fit a wallet.
The suit has no other storage, which I guess befits its racing heritage.
So it’s back to the drawing board to look for a very small tank bag or some type of seat bag that can stow a bottle of water and a cell phone.
The Details
The zippers on the GiMoto suit look dainty, but I’m hoping that the GiMoto folks know what they’re doing and that the zippers will hold up.
I’ve been having some trouble lately with the Nylon zippers used on most motorcycle clothing, with broken teeth, sliders that refuse to slide and unraveling stitches.
The GiMoto suit if fully lined with that black mesh taffeta-like material that seems to be ubiquitous in all motorcycle clothing. I have no complaints at all with the comfort of the suit.
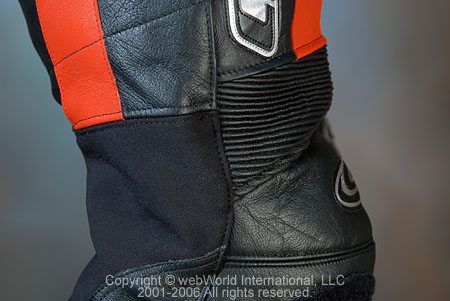
Stretch panels are included in the back of the legs, the crotch and under the arms. These add to the comfort level and they are also strategically located to keep the suit tight where it matters.
The armor is the CE-approved, foam backed full-race hard stuff in the shoulders and the elbow/forearm region.
Only a very thin layer of minimal padding was included at the hips and the chest, which is a bit of a surprise, but this seems typical on other custom motorcycle leathers I’ve seen.
The collar is the short racing type and it uses kangaroo leather on both sides.


The Construction
Based on my observations, there seem to be two strategies regarding leather one-piece suit construction.
Some leather clothing manufacturers use various layers of leather sewn with double, triple (or more) stitching. The panels are designed to act as the abrasion layer.
The other strategy is to minimize the number of external stitches and leather wear panels because the thread is one of the first things to go during a slide.
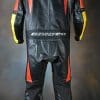
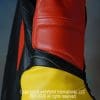
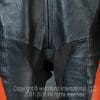
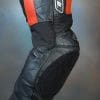
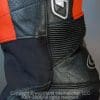
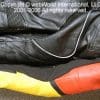
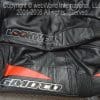
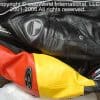
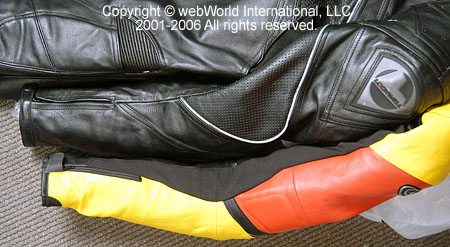
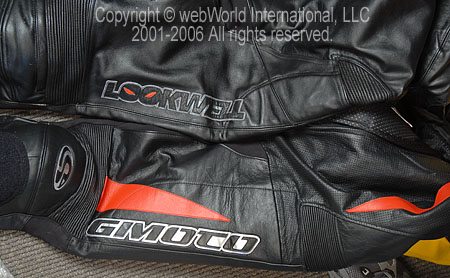
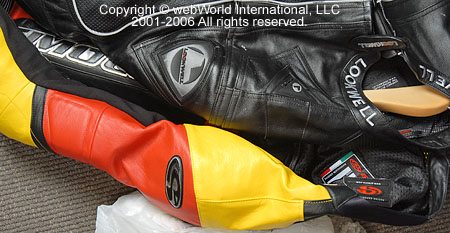
I have included a couple of photos (below) to compare the Lookwell and GiMoto suits.
This GiMoto suit is designed with a minimal number of panels and lots of hidden or internal stitches, while the Lookwell suit has many different panels and external double stitching.
GiMoto claims that they use triple or quadruple stitches in the critical areas.
There are several places on the suit with one row of external stitching, like on the shoulders and arms, but it appears that these are also backed by folded leather areas with multiple stitches.
I’m guessing that it’s more expensive and time consuming to design and sew a suit with hidden stitching, so most of the off-the-rack leathers use the panel strategy.
It’s my understanding that holes in the leather might weaken that particular area, and I’d rather not see the external single stitches on the GiMoto suit, so I hope they know what they’re doing.






Ventilation and Air Flow
The suit shown here is by no means the only design or style that can be ordered from GiMoto. Perhaps I should have biased my design more towards a sport-touring fit, but I got what I ordered.
Both perforated and non-perforated leather in kangaroo or cow hide can be ordered.
I usually like to purchase perforated leather clothing, because I figure I can always wear somewindproof underwear in cooler weather.
Leather is pretty hot to begin with, so anything that can be done to keep me cool is welcome. The GiMoto suit shown here is fully perforated down the front and it works great.
I am surprised, in fact, because I feel nearly as much air flowing through this suit as I do when wearing my maximum heat wave mesh clothing.
It does get pretty sticky inside the tight-fitting suit on really warm days though, and peeling it off can be a struggle.
My advice is to take it slow and work your way out of the suit a little at a time to avoid pulling a muscle, which is easy to do with the gyrations that are necessary to remove the leathers.


Conclusion
This was my first experience with ordering a set of custom motorcycle leathers and there was a lot to learn that I hope can benefit our visitors.
I really like this suit; it’s stylish and it feels great, albeit a bit tight. Just one more reason to drop 10 pounds?
If I had to do it over again, I’d pay much closer attention to the measurements and I’d include lots of supporting information and photos in the hope that the manufacturer would actually use it. I’d also request some extra room in the back for a protector.
I’m glad I went for the kangaroo leather and the perforations.
The suit cost $1,620.00, including shipping, which is provided free by Motostrano to U.S. customers. Considering that the off-the-rack GiMoto suits run somewhere between $1,000.00 and $1,300.00, I think the extra money is worth it to get the custom fit.
This is a moot point for me anyway, because I have not been able to find an off-the-rack suit that fits.
| wBW Review: Custom Motorcycle Leathers by GiMoto | |
|---|---|
| Manufacturer: GiMoto (Italy) | List Price: $1,620.00 |
| Colors: Many color combinations and styles available. | Made In: Italy |
| Product Comments: GiMoto will make custom one- or two-piece motorcycle leathers. | |
Owner Comments and Feedback
See details on submitting comments.
From “D.S.” (November 2014): “Just found your article about the Gimoto custom suit, and noticed that you complained about the vagueness of the measurements instructions.
I know 2 (YouTube) videos from Hideout Leathers in UK (very highly regarded there) that show the process: Hideout Leather – Made to Measure motorcycle jacket and Hideout Leather – How to measure for trousers.”
From “R.S.” (10/10): “A week ago Monday (Oct 18) I had my first, and hopefully last, highside at about 65mph. Broke my left clavicle, got serious bruising from neck to thigh.
The leathers were Dainese with shoulder padding but only leather on the outside. Never again. Metal sliders at least. Alpinestars made the back protector and it worked wonderfully but I had no chest protection.
That will also change before I get on the track again (it really hurts to lie down in bed).
The most important item that will be added is clavicle protection.
The medics put a collar on me and would not remove it until two different teams had examined x-rays and me, just to make sure I would not be paralyzed from the neck down.
The tether systems seem kind of Mickey Mouse but it will be May before I can get on the track again and by then they may look wonderful.”
From “Redbeard”: “Even a pirate needs a good measuring tape, and any half-masted sewing store will have a good one.
Jo-Ann Fabrics (in the U.S.A.) will carry a variety. Some are inch only so make sure you get what you want.
Prices also vary starting at a buck, but even the best one, with accurate inch and metric measurements, is worth the investment. I use it to make me sword fightin’ shirts don’t you know.”


