I recently fell in love with a cherry-red Moto Guzzi Sport 1100.
It was offered for sale by a nice young man who only rode it Sundays and never, ever, raced it.
As it was very late in the summer, the asking price had dipped to the “Holy Cr*p, what a deal!” level and I was practically forced to buy the bike, in spite of some slight misgivings about the ergonomics.
But…a test ride revealed that my hands became uncomfortable after about fifteen minutes in the saddle.
However, since a previous owner had fitted some rather bizarre, semi-circular bar grips (imagine a couple of those mini-footballs we had as kids, with handle-bars rammed through the long axis), I optimistically chose to assume that these were the main source of the problem.
I went ahead and bought the bike, but alas, after switching the footballs out for regular sportbike gel-grips, I was still experiencing hand pain.
Finally forced to emerge from my cocoon of denial, I had to admit that the problem was probably caused by the long, loooong, stretch to the clip-ons.
Still in love with the bike (although admittedly, there was trouble in paradise), I decided to do some research to see if there was a way to relocate the position of the grips so they were more upright and/or closer to to the rider.
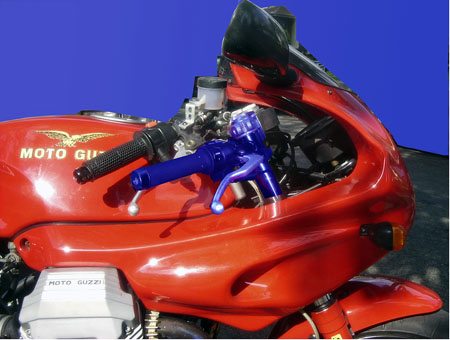
The Handlebar Conversion
The stock Guzzi clip-ons for the 1100 Sport and Daytona models angle downward at about 5 degrees from the horizontal. So one quick and easy alteration that raises the hand position slightly is to flip those babies upside down on the forks. This brings the operator’s hands up about two inches and barely alters the look of the bike at all.
In my case, however, this had already been done by the previous owner. The peculiar grips that the bike came with were starting to make more sense to me at this point; somebody had clearly been struggling with this problem before I bought the bike.
After a bit of research into possible options, I decided that aftermarket bar-risers were the way to go. Unfortunately, it turns out that many of the slickest bar-risers, like the Two-Brothers Racing offerings, are specific to a particular model of bike. This is a problem in terms of fitting the sport 1100/Daytona series of Guzzis, or any other bike with production numbers too low to have generated a big aftermarket product selection.
While there are risers now available for the newer V-11 series of Guzzis, there seems to be nothing built specifically for the previous generation of machines. What I needed was a set of “universal” risers with maximum possible flexibility—a design that could be adapted to the heretofore unexplored country of the Sport 1100 without major machining or heartache.
Convertibars Adjustable Handlebars
After several more weeks of research, I settled on a product called Convertibars, made by a company called Invex in St. Paul, Minnesota.
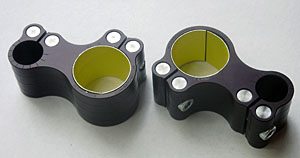
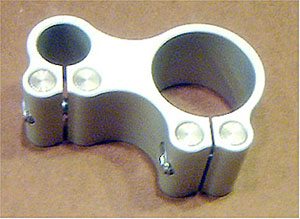
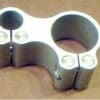
These “convertible handlebars” are built around an aluminum, figure-eight clamp, with the larger circle of the “eight” locked around the fork upright just under the triple tree, while its smaller attached mate projects out to the side (or the front, or the back depending on how you rotate it) in the same plane (see the photo at the top of this page).
An “L” shaped handlebar fits into this second clamp and can be raised, lowered or turned independently. A big selling point of the Convertibars design is that they can be switched quickly back and forth between an aggressive sporting profile and higher comfort mode.
An Allen wrench is provided by the manufacturer that fits into a rubber end-cap on one of the bars. During a ride, a quick stop by the side of the road and about thirty seconds loosening and retightening is all it takes.
I’m told that about 25% of Convertibars buyers actually purchase the product to get a lower than stock hand position for track-days on their too-plush rockets!
More important than the ability to switch configurations, from my point of view, was the fact that the extreme flexibility of the bar system offered an infinite range of adjustment. This seemed likely to raise my chances of finding a single workable configuration on my Goose.
Measuring the Handlebars
The first hurdle to buying and fitting the kit was determining the correct size of clamp to order. Since I happen to live within spitting distance of St. Paul, I was eventually able to get some hands-on assistance from the factory in this regard.
Like all the bar-riser makers, Invex produces clamps sized only to fork tubes of the common, standard dimensions. A little research in the Guzzi archive told me that a ’95 sport should have a fork diameter of 41.7 mm, which naturally, is not a standard Convertibars clamp size (nor indeed do ANY of the other manufacturers carry it). A 41 mm diameter and 43 mm diameter were the closest sizes available.
When I discussed this situation with a very helpful fellow at the Convertibars help line, he suggested that I bring the bike in to the shop to be measured.
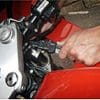
The photo (left) shows Tim measuring my fork tube at the correct point with a set of Vernier calipers.
The measurement is taken as close as possible to the underside of the triple-clamp, right at the stock clip-on.
A previous measurement I had taken indicated a diameter of 41.65mm using an old Vernier caliper from my garage.
With a nicer instrument and, no doubt, a better hand, Tim measured 41.56 mm. This is too far from 41 mm or 43 mm for these standard clamps to simply slip into place and go, but luckily an easy solution exists.
Sitting right there at a computer on the shop floor, we jumped on the Internet and ordered some 0.02″ (0.5 mm) aluminum shim stock from McMaster Carr. Eight dollars later, I had two square feet of material winging its way toward me via UPS.
Back at the Convertibars stockroom, we then picked out a “universal” bike kit with 43mm clamps, selecting the extended length option.
This standard variant adds about 2 cm of extension between the big and small clamp, a useful option for bikes like the Sport 1100 that have pinch-bolts sticking straight out to the sides of the Triple-clamp.
In order to rotate the whole bar assembly from back to front or visa-versa, this extended length allows the vertical part of the handlebars to clear those pinch-bolts.
Also, the longer variant allows the maximum amount of rearward extension if that should be your preference (and it was definitely mine).
The Convertibars guys were extremely helpful in fitting my rather less common bike, and I would endorse their customer service to anyone. Since for the majority of their buyers a personal visit to the shop is impractical, they maintain a telephone help-line to advise you both before and after you purchase a kit.
Convertibars also has a full refund policy; if you find that your kit wont fit, you get your money back. This is especially valuable for anyone trying to fit a motorcycle like my Guzzi Sport, which has not been previously tested with the product.
 The Convertibars Factory
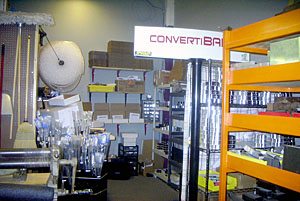
Before handing me my kit, Tim took me on a short tour of the Invex/Convertibars shop floor.
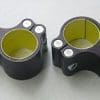
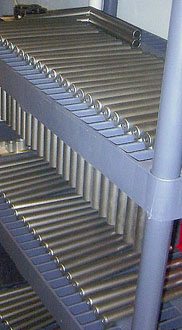
I saw rack after rack of beautifully finished 7/8″ Stainless Steel bars of various lengths (there are several options), machined aluminum clamps, special bar-weights and other goodies that come as part of the standard kit.
There were also various extended length clutch-cables and hydraulic lines that they provide for bikes which are known to require them.
I also saw the computer-controlled milling machine which carves each clamp from a solid aluminum billet in approximately 12 minutes.
Stainless steel Allen-bolts and a quartet of stainless, female fittings complete each clamp as it comes off the line.
Steering Lock and Cables
There are two possible impediments to fitting any sport-bike with handlebar risers: the fairing and the cables.
Either of these two can limit or even prevent repositioning of the handlebars.
Based on experience, Invex recommends an extended clutch cable and/or hydraulic lines for most popular sportbikes, and they include the parts in a model-specific kit where necessary.
Taking a look at my heretofore-untested bike at full steering lock both ways, Tim had made a tentative prediction that a couple inches of height could be gotten without fitting longer cables. He hastened to make clear that this was only a guess, however, and that the only way to absolutely be sure was to actually install the bars on a given model of bike.
Each kit is fully guaranteed, so my risk was mainly my own time and I was eager to get started. In pursuit of quick results, and from a general reluctance to get in over my head project-wise, I was really counting on being able to raise the bars without installing new cables (or God forbid, cutting into the fairing!).
Longer cables or alterations to the brake reservoir, etc., would be modifications for the next round of improvements, once I had convinced myself that bar-risers were actually going to help.
Installing the Convertibars Kit
Arriving home with my kit, I watched the short, instructional CD-ROM (complete with kitschy, blue movie background music) and got down to business. I carefully measured the necessary shim length by calculating the internal circumference of a closed clamp (Pi x Diameter for anyone who slept through high school geometry).
Marking the shim stock with a sharpie, I used heavy kitchen scissors to cut two strips of material one mm shorter than this length, and as wide as the clamp itself. Each shim was held around increasingly small cylindrical objects until it had enough curve to be easily inserted into a loosened clamp. So far so good…
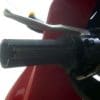
The next step was to remove the existing grips. These can sometimes be carefully peeled off for re-use, but as I had a new pair I wanted to try anyway, I cut the old ones off with an Exacto blade.
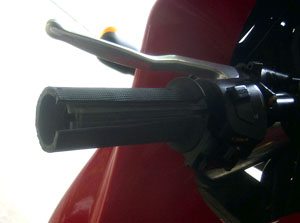
As you can see, the old grips are actually 1″ I.D. touring grips fitted over PVC clear tubing on my 7/8″ clip-ons. This had been an earlier experiment in vibration reduction which I was content to abandon as only slightly helpful (if at all).
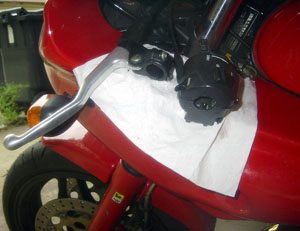
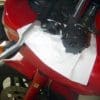
With the grips off, hand controls were unscrewed and removed from the stock bars to hang down onto the fairing.
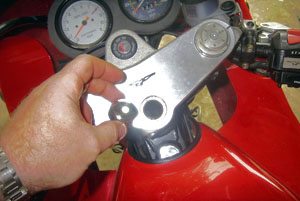
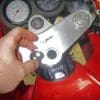
Next the triple-clamp was removed. Starting with the central nut, which luckily, does not play a role in holding the steering-head together, each of the three Allen heads on the upper face is completely loosened and then the plate is gently tapped from underneath until it frees up enough to be pulled off the tubes.
The ignition lock and wiring will remain attached, so it can actually be pulled away only a few inches and set forward near the windshield.
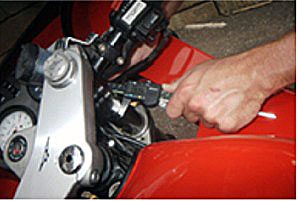
Smaller Allen wrenches were used to unclamp the stock clip-ons and remove them. Next the Convertibars clamps were slipped onto the forks and tightened slightly. With the shims, the fit turned out to be excellent.
Hand controls were then loosely clamped into position around the new Convertibars bars, which are then supposed to be slipped into the clamps.
It became necessary to slide the clamps as low as possible on the fork tubes to let this happen, as the control cables had just barely enough slack to get the base of the bar into the proper hole.


Routing the Cables on an 1100 Sport
A good deal of grunting and cursing was heard up and down the alley near my garage, but the bars eventually popped in. Next came routing the control cables and adjusting and checking the bars.
At this point I went through about three hours of pulling cables this way and that, putting the triple clamp in place, tightening things, turning the steering to full lock, cursing, loosening things, pulling the triple-clamp, re-routing cables, replacing the triple clamp, tightening, testing, cursing, undoing, etc., etc…
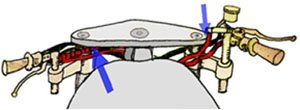


Let me save fellow Sport 1100 owners a great deal of frustration by cutting directly to the chase. Using the stock clutch cable and hydraulic line, there is one routing configuration, and one only, that actually works.
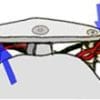
It requires the cables to be routed, not around the outside front of the steering head (which would be preferable), but to pull them back beneath the triple clamp between the fork tubes and the vertical handlebar tubes (see Photo 7).
The red lines in the graphic show the final position of my cables, while the black lines indicate the routing that would be preferred in an ideal world.
Without longer cables that go outside the front of the fork tubes, it is obvious that it won’t be possible to quickly and easily rotate the main clamp body forward around the fork tubes.
The triple-clamp would have to be pulled and cables brought around to the front of the fork. Not a huge job, but not completely painless, either. Since my main goal was simply to find a single new (and better) position for the bars, this lack of easy conversion was not necessarily a big negative, but I will note that in order to make full use of the convertibility feature of the product a Sport owner will need a longer clutch cable, brake line and throttle line.
You will also need to go with the shortest option when choosing the vertical length of the bars. Otherwise, pushing them low in a forward position will bring the lower end of the bar into contact with the horizontal ledge of the fairing.
It can be see that, with the set-up that I finally found, the left bar can go no higher than a certain point due to binding of the clutch-cable fitting on the underside of the triple-clamp (see the blue arrow). The right bar, on the other hand, can go no lower than that same height in order for the hydraulic fitting to clear the upper side of the triple clamp, while at the same time the ignition/throttle lines prevent it from getting much higher.
The graphic exaggerates these conditions for clarity, but in reality, at one magical bar position, both grips are at the same height and angle, everything fits, and the rider ends up with his hands about two inches higher and three inches farther back than the stock clip-ons, even reversed, would allow.
In turning the steering to full lock either way, everything just barely clears the fairing; it would be hard to get another centimeter of height without making contact, so the benefit of adding custom cables would be strictly in facilitating conversion, as there’s no more height to be had.
As far as the controls go, although the cable routing looks a little startling at first, nothing binds or hangs up. The clutch lever must be turned farther underneath the bar than the stock layout, in order to get it’s rather long fitting under the triple clamp, and the subsequent bend around the fork tube is somewhat severe.
As it turns out, this bend put enough pressure on the clutch cable to suck out every iota of slack, and even a little bit more. After a few days of riding, I realized that the clutch was basically never quite completely disengaging, and that I was experiencing unintentional slippage. A couple of turns at the clutch cable adjustment under the bike gave me back some slack and cured this problem.
As far as I can tell, the bike is currently operating in a safe and mechanically sound fashion. A tuner at one of the local Euro-bike shops looked it over and came to the same conclusion. The clutch cable bend looks a little odd, but everything seems to function smoothly.
Conclusion
The handlebars seem extremely firm, and I feel perfectly confident cranking them around and putting weight on them.
The pain in my hands and wrists has been reduced by about 80 percent, and as an added bonus, the bars project out to the sides a bit farther, giving me better leverage and making it easier to pilot what is, after all, a big, heavy machine.
Perhaps at some future date I’ll order a custom clutch-cable and hydraulic line so that I can route them around the outside of the steering head and quickly convert back and forth from high to low. On the other hand, since I cant imagine really wanting to reposition the bars down low (at least until Moto GP realizes its mistake and comes a knocking at my door), maybe I wont bother.
In any case, my experience with the Convertibars product has been pretty much unalloyed satisfaction, and I can now say for certain that it WILL fit on a Guzzi Sport 1100 with the existing cables, and that it WILL increase comfort and usability.
Fit and finish are good, flexibility is extreme and customer service unimpeachable. Two painless thumbs up for Convertibars from this satisfied customer!
▪ Motorcycle Product Reviews
▪ Maintenance and Repair Articles
| wBW Review: Convertibars Adjustable Handlebars | |
|---|---|
| Manufacturer:Convertibars | List Price (2014): ~$340.00 |
| Colors: Silver | Made In: U.S.A. |
| Review Date: October 2005 | |
Owner Comments and Feedback
See details on submitting comments.




 The Convertibars Factory