Before one starts a journey, one usually needs to know the “how and why”.
While other things, like the ‘when and where” may just remain factors to be considered.
webBikeWorld prides itself in making sure work of any nature is as fully detailed as possible so readers may gain maximum value from their visits.
The idea also is to develop insights and over the longer term, a reference framework for others to follow and add to.
Accordingly — and with the Editor’s indulgence — the following submission addresses the first steps regarding removal of key plastic components from the BMW S1000XR, for accessorizing or maintenance purposes.
Of course, the desire is that all of this work will be of a non-destructive nature, minimizing the need to buy expensive replacement parts that could also be hard to obtain, while cutting into riding time.
As we go forward with the BMW S1000XR series, removal of other parts, plastic or otherwise, will also be detailed in follow-on maintenance and repair reports and tips submissions and of course, in the respective accessory installation articles.
Introduction
Ah — the joys of owning a new motorcycle and a new model!
But with that pleasure there always seems to be a bit of apprehension — not just related to how well the new machine is going to perform but also to the sourcing of the all-essential accessories…
The other great joy (usually) in owning a new machine — at least for those of us who undertake such journeys — are the discovery activities taken to determine the What, How, Why and sometimes the Where of parts and pieces.
And typically this discovery process is either based on a keen interest in all things related to the motorcycle or, the pending or planned installation of an accessory, in which case, the better the understanding, the better the experience, or so we hope.
This is known as an opportunity!
Setting the Stage
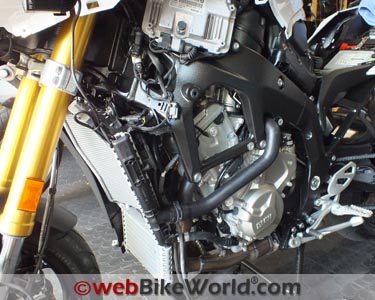
So this brings us to the BMW S1000XR, a complex machine under its plastic body parts.
As it happens, that sleek and stylish air-beating plastic is quite simple to remove and replace. This is important for anyone interested in competition, for dealer servicing, for work done by the owner and for accessorizing.
A focus of this initial insight is the XR’s side and lower fairing sections, including the smaller trim panels and related pieces.
The side fairing sections are large but with minimal mass due to lots of stylized cut-outs that complement and show-case the frame.
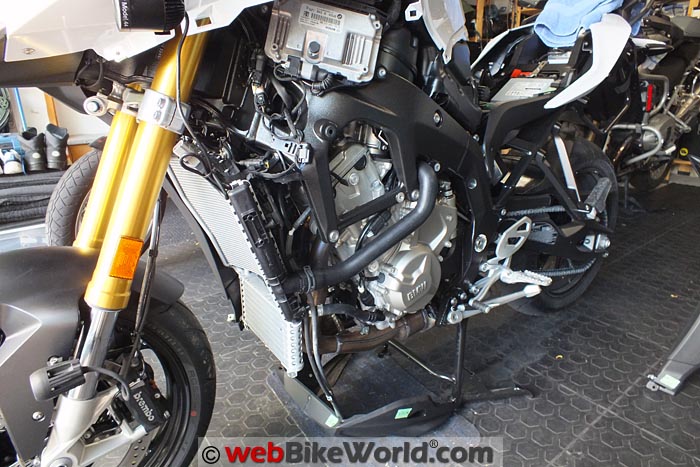
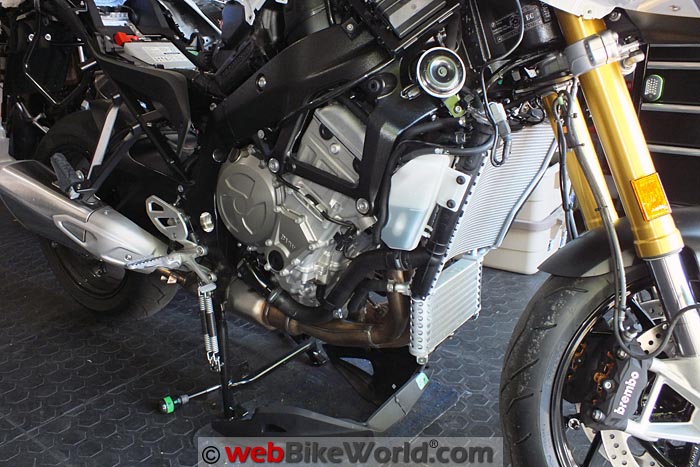
And with a few minutes of work, the logo trim panels and fairing side sections can be removed, providing easy access to frame and engine points and some of the electronics, as intended.
Removing body plastic on a motorcycle sometimes raises concerns regarding its strength and resiliency, but the XR’s pieces are strong and — once one understands how the various pieces are fitted — very easy to work with.
No matter how observant or skilled we think we are, there is always something, at some point in time, during some work activity, that will trip us up or lead to some head scratching, which is why the database on the XR is growing with every work effort.
Related to that, this is also why you might see small sections of masking tape on the parts shown in various photos. It is used to identify or highlight something; direct visual indicators can be everything.
Also, with the easy availability of cameras in cell phones, be sure to take plenty of photos during the process, which can become crucial in a re-assembly. Also, there are voice recording apps that can be used as you talk through the disassembly, adding notes and a voice record of the procedures.
Hardware Notes
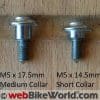
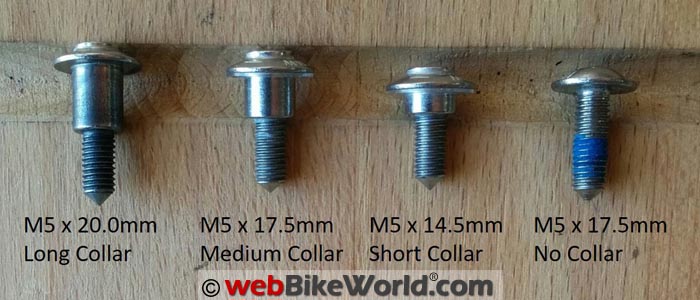
For sake of clarity, BMW Motorrad identifies standard M5 fastener hardware by length only, which is good, as this (typically) serves to also identify the specific application for that hardware.
And as the specific application may involve securing one, two, three or more overlaid sections of plastic at a single point, the “shoulder” or collar length of the fastener is also important; as such, it is important to know which screw is used for each mounting point.
The three main M5 screws used on the S1000XR plastic include:
- M5 x 14.5 mm with a short collar (SC).
- M5 x M5 x 17.5 mm with medium collar (MC).
- M5 x 20.0 mm with long collar (LC).
Many of the screws have thin plastic washers installed under the head. Some stay in place and most do not; they go missing regularly.
They do serve a purpose in protecting the plastic from the harder underside of the fastener head though and I have a stock of very thin rubber washers on hand for replacement purposes “just in case”.
Of course, other hardware of varying sizes and lengths is used on the S1000XR and these pieces will all be identified in follow-on postings.
And on a final hardware note of sorts: some procedures, hardware or even body parts that are documented for new motorcycle models may change over time, with yearly product releases and/or ensuing component recalls or updates. The same goes for third-party accessory instructions.
Plastic Component Familiarization
This section provides a short text-based summary of each of the identified plastic components on the S1000XR, with a final section below detailing the step-by-step disassembly.
Fuel Tank Cover
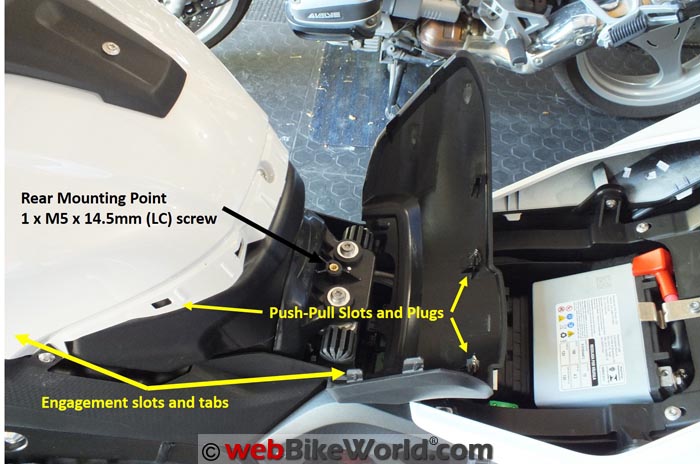
Lower Section: Insert the ignition key into the rear section lock and turn it left to release the faux two-piece single section seat. This exposes a well-organized and readily accessible under-seat area divided into two distinct sections and at the front, a plastic tank cover or pad.
This lower rear tank cover or pad is a curved molded plastic piece with front and upper tabs that slide into and engage slots in the one piece centre tank cover section, with one screw used at the rear.
Rear Side Panels
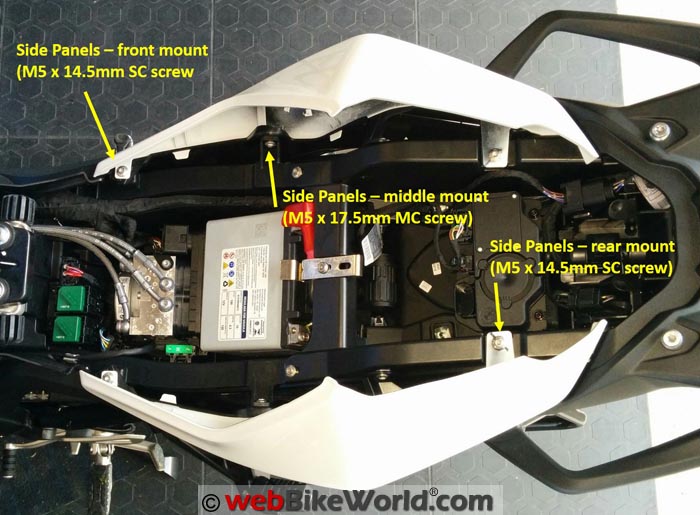
These molded and flared side pieces fit under the edge of the saddle, held in place with three screws: two vertical (front and rear) and one horizontally mounted at the middle point.
The front and middle screws secure both the side panel and the underlying cowling section pieces.
Once the fasteners are removed, the side panels are pulled outwards and away from the sides for access purposes and to better expose the long front to back cowling sections.
Tail Part Cowling Sections
The long cowling sections extend from the fairing side sections all the way back to form the tail section housing with left and right sides joined by plastic pop rivets at the rear.
The cowling pieces engage with the rear of the large fairing side sections at two points; one hardware mount and one insert fit.
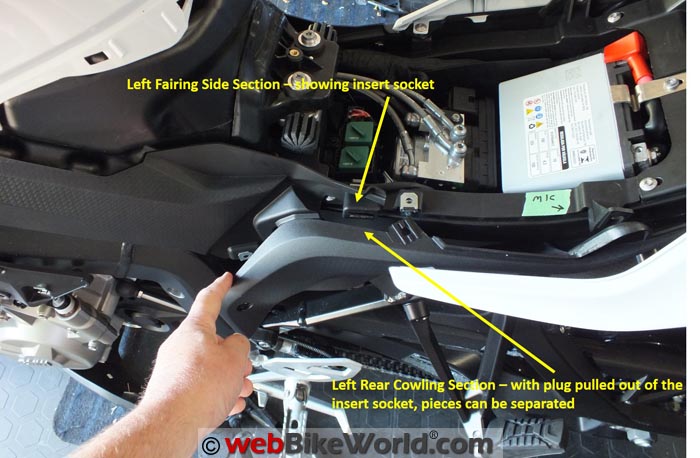
With the front located screw removed, the square insert plug on the top of each cowling piece sitting inside a matching cut-out on the back point of each fairing side section is pulled out, allowing separation of the two pieces.
For most of the accessory and maintenance work I have envisioned, complete removal of the tail part cowling sections should not be required. But time — and perhaps circumstance — will tell.
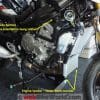
Lower Engine Spoiler
Like the rear side panels and tail part cowlings, the lower engine spoiler overlaps and supports some parts of the large fairing side sections.
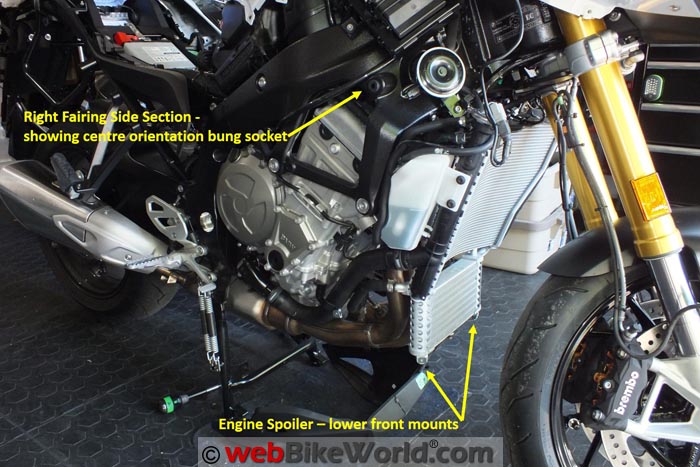
Usually, removing it entirely is the easy way to go and it serves to reveal two hidden mounting points for the side sections.
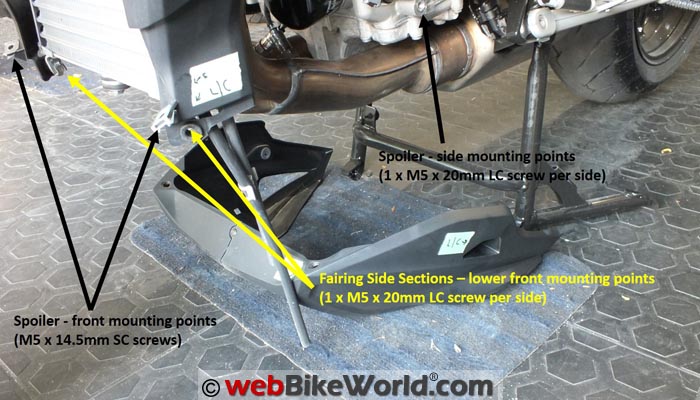
There are four mounting points: one part way back on each side and one at each front corner (angled). With the fasteners removed, lift the front edge of the spoiler away from the lower front of each fairing side section and remove the spoiler.
Doing this now reveals the two front lower mounting points for the fairing side sections, previously hidden.
Insert (Logo) Trim Panels
These stylized panels emblazoned with the S1000XR logo can actually be removed independently of the rest of the parts at any time, providing quick access to some electronics and connections. But they must also be removed before tackling the main fairing side sections.
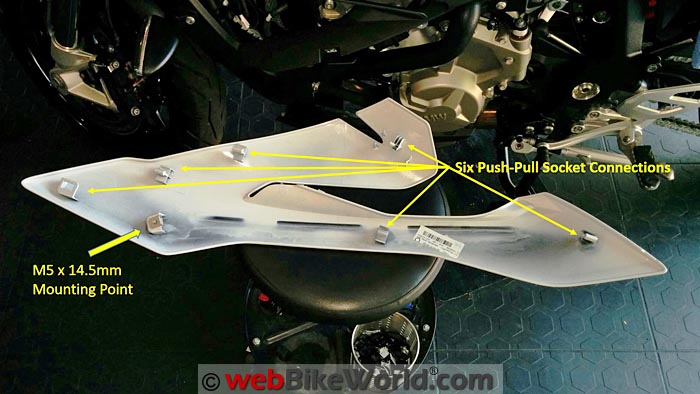
There are seven mounting points for each trim panel: one screw and six push-pull socket style connections.
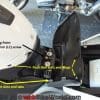
The single M5 screw is (somewhat) hidden on the inside of the left and right fairing side section and they can be felt and accessed by reaching up through or behind the front forks. A short or flat palm-style ratchet works great here.
These screws pass through holes on the left and right fairing side sections and mount to flat sliding nut on the trim panels, pulling the two sections together tightly and securely for a smooth conforming fit.
Frontal air pressure against and around these pieces at speed exerts a lot of force; separation from the bike is not an option!
The other mounting points are push-pull mounts; thin-metal spring tangs or plugs push into receiver cut-outs on the fairing side sections, less the most forward one that is reversed for offset and strength purposes.
With the screw removed on each side, start at the front of the trim panel and pull it out firmly by the edges to separate the socket connections. Work top and bottom moving towards the rear, pulling the panel away from the fairing section.
The right side has an extra piece. It’s a small “spoiler” section that is mounted directly to the fairing side section, aligned with a lower edge insert fitted into a tab and secured using with a single M5 screw.
Removing this small piece separately is optional; it comes off with the fairing side section panel.
But I’m in the habit of removing it separately to get it out of the way, because it’s one less thing to worry about while pulling the large side panel off.
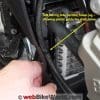
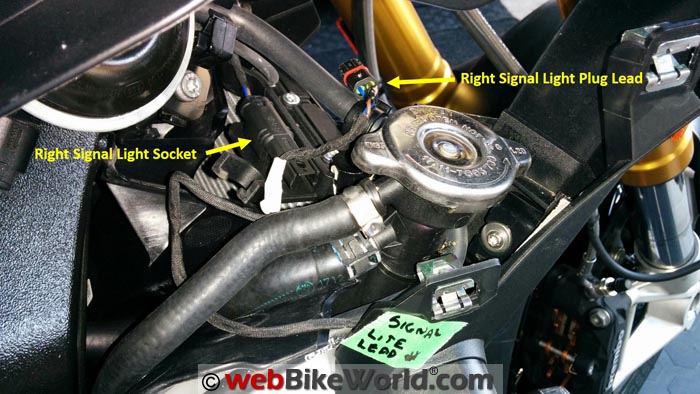
With the S1000XR logo trim panels removed, direct viewing of and direct access to many of the components and harnesses underneath is now possible, including the left- and right-side front signal light leads.
The signal light modules are mounted on the fairing side sections and the long thin leads with connectors are routed over to their receptacles attached to radiator cowling components.
As such, disconnecting the leads now before tackling the larger side sections is good, so they don’t get forgotten and damaged when removing the side section.
Fairing Side Sections
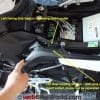
If the small two-lead signal light leads haven’t been removed from their finger-twisting locations, this should be done now. Be sure to remember how the leads are routed — or better yet, take another photo (although I’ve actually re-routed the leads to better protect them and simplify access).
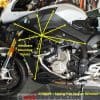
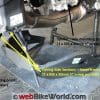
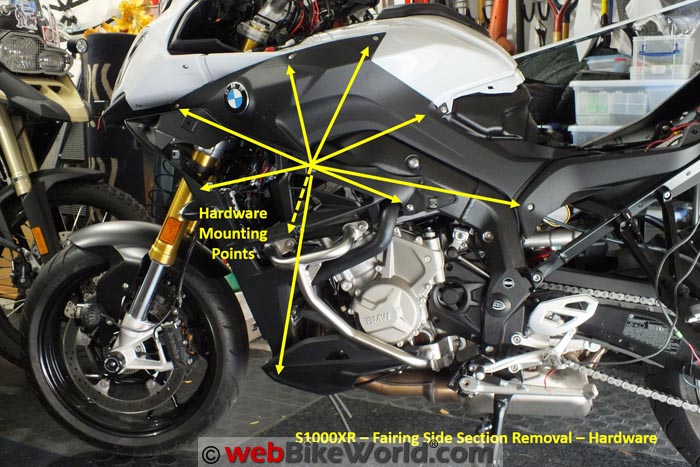
There are seven screw mounting points (eight on the left if the engine guards are installed) along the top, back and front areas of each side panel.
Once the fasteners are removed and the rear part is clear of the side cowling pieces, the upper edge of each section can be pulled away from its four push-pull engagement points on the upper front fairing and fuel tank cover plastic that isn’t being removed at this time.
Finally, the large plastic bung plug, which is molded more or less at the centre of each section that serves to orient and secure the pieces during removal or installation can be pulled gently out of its frame mounted rubber insert socket.
The Step-by-Step Removal Process
Removing the Seat: insert key, turn to left and lift seat up and away out of the front alignment spools.
Tank Cover
- Remove the single M5 x 14.5 mm (SC) screw at the base of the piece.
- Grasp each side, pull the piece back to separate it from the tank cover cut-outs.
- Then lift the piece away (revealing a hidden fairing side section mount on each side).
Rear Side Panels
- Remove the front M5 x 14.5 mm (SC) screw.
- Remove the centre horizontally mounted M5 x 17.5 mm (MC) screw.
- Remove the rear M5 x 14.5 mm (SC) screw.
- Next, pull the side panels outwards and then away.
Cowling Sections
- Remove the lower front M5 x 14.5 mm (SC) screw that joins the front of each cowling section to the back section of the fairing side sections.
- Pull the pressure-fitted square insert plug at the top of the cowling section out of the cut-out on the top back section of the fairing side section.
- Then separate the two components so that the back of the fairing side section is free and clear.
Lower Engine Spoiler
- Remove the M5 x 20 mm (LC) screws from the left and right side mounts.
- Remove the two front corner M5 x 14.5 mm (SC) screws.
- Lift the spoiler forward and down to clear other components.
Insert (Logo) Trim Panels
- Remove the M5 x 14.5 mm (SC) screws from the left and right inside upper fairing edges (these are the only two hardware points for the side trim panels).
- From the front, grasp the top and bottom of the panel and pull out forcefully to separate the push-pull inserts, work to the rear and remove the panels.
Fairing Side Sections (Left and Right) Panels
- Remove the M5 x 17.5 mm (MC) screw from the front upper side of each panel (below the upper fairing section/beak).
- Remove the two M5 x 17.5 mm (MC) screws from the angled upper edge of the panel where it overlays the tank cover.
- Remove the M5 x 14.5 mm (SC) screw from the upper rear point. It is exposed once the tank cover (lower) is removed.
- If not done under the Cowling Section, remove the M5 x 14.5 mm (SC) screw from the back point securing the front of the rear cowling piece to the fairing side section.
- Remove the M5 x 20 mm (LC) screw from the frame mounting point (through rubber spacer washer), located just above the engine clutch assembly.
- If engine guards are installed, remove the M5 x 10 mm (no collar) screw from the Left side fairing section mount.
- Remove the M5 x 20 mm (LC) screw from the upper front fairing side panel mounting point located directly above the radiator.
- Remove the M5 x 20 mm (LC) screw from the lower front mount (revealed once the spoiler is removed) located on a small tang off the bottom of the oil cooler frame.
- Starting at the front, pull the top edge of the panel outwards so the four top push-pull inserts are separated from their mounting points on the upper fairing and tank cover pieces.
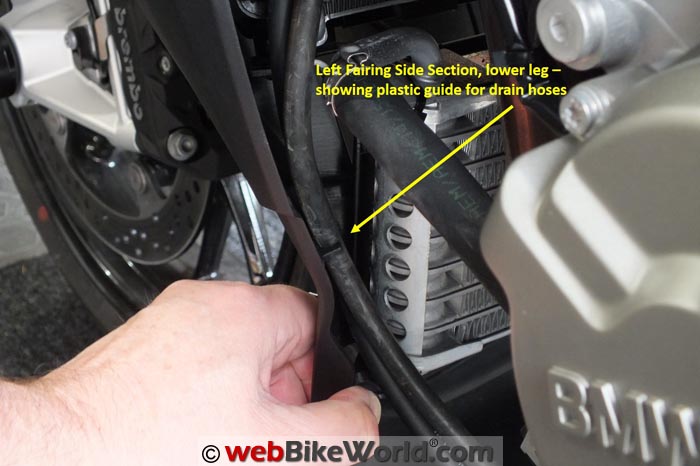
- Separate the two drain hoses from their guide inserts located on the inside front wall of the left fairing side section panel, and then grasp the fairing side section and pull the plastic locator plug out of its rubber insert frame socket.
- The panel should now be free and can be put aside.
References
In not (yet) having the maintenance manual for the S1000XR, one of the best published sources of information are the BMW Motorrad diagrams and parts listings for current and (non-current) models.
These are typically accessible from dealer websites and BMW Motorrad forums.
The diagrams are good visuals and the accompanying parts listings, original or as updated by BMW Motorrad provide a good overview for reference purposes.
I used the following diagrams for this project:
- BMW Motorrad Diagram 46_1786 – Cover for Fuel Tank
- BMW Motorrad Diagram 46_1774 – Rear Side Panel
- BMW Motorrad Diagram 46-1773 – Tail Part
- BMW Motorrad Diagram 46_1791 – Engine Spoiler
- BMW Motorrad Diagram 46_1785 – Fairing Side Section
And of course I would be remiss if mention was not made of the many related forums and specific S1000XR threads that so many of us participate in. Collect the knowledge and share it!
Conclusion
Remember that depending on the market, country or model variant involved, some differences in layout, components and hardware may be found.
As more discovery is undertaken and other components removed, this posting will be updated or a follow-on done.
Specific work requirements for particular parts or accessories will be detailed in related submissions. Let the accessorizing, and enjoyment of the S1000XR continue…
Master Listing of All wBW Motorcycle Product Reviews
Owner Comments and Feedback
See details on submitting comments.
From “J.W.” (December 2015): “Loved the article by H.B.C. on the new Beemer fairing and fastener layout. Awesome article, keep up the great work. I’ll be looking forward to more of the same.
It’s hard to find good articles like this for people who like to work on their own bikes, especially new releases. I’ve been looking for info on this bike’s suspension and there isn’t anything out yet, not even the dealers.
Any more articles on the S1000XR would be greatly appreciated. Love your site, look at it whenever I’m looking for reviews on any bike products.”


