The BikerCom (aka Biker Com) intercom and communications system is a relatively new product. It’s a unique hybrid system, combining wired and wireless features to get the job done.
It may not satisfy everyone, but compared to other wired or wireless motorcycle intercom and communications systems it does a lot and it does it all extremely well.
Call it a hybrid or call it a compromise; I call it one of the best-designed, well-built and most solid performing systems I have ever used.
No, I’m not finished with it yet. Yes, it has potential not yet explored.
For those who have been following, this is part 8 of the 2009 webBikeWorld Bluetooth Extravaganza, an ongoing series of evaluations of Bluetooth-based motorcycle communications systems. As with most of the other evaluations there are two parts to this Biker Com review and a third may be in the offing.
Part One introduces and discusses the system, features, initial configuration and, other information, all to help you become better informed about this unique system. Part Two will describe the installation (on a helmet and motorcycle), system use, summary and compatibility tables and available technical information.
Early this rainy summer the Editor felt the need to load me up with goodies…knowing full well that like a crow, I can’t resist the shiny new things. Actually I volunteered and as I finish this evaluation in early September, when summer seems to have having finally arrived, you won’t hear me complaining.
Playing with toys is what I live for — just ask my spouse and friends. Besides — we know that the only real way to evaluate communications system is from the saddle, and that means riding time.
And before getting in to the fabric of this evaluation, a little thread needs to be pulled here — that being Bluetooth. I have to say — and disregarding the skeptics — that I am most impressed with the progress Bluetooth has and is making and how it is being applied.
Except for one, all of the systems evaluated so far have speed, versatility, reliability and the ability to add other peripherals via a wired connection. Again except for one, all of them support the Advanced Audio Distribution Profile (A2DP) for full stereo audio streaming.
As well, most of them support the Audio/Video Remote Control Profile or AVRCP which makes for some feature rich configurations and to a great extent, hands-free in the truest sense. This industry segment seems to be alive, well and growing and in that sense, we all win.
Introduction
I have no hesitation in using wired, wireless or a combination system. For both my spouse and I using a motorcycle communications system is just part of our motorcycling regime: seldom do we leave home via two wheels without this capability. What gets used depends largely on requirements and sometimes, the platform.
The Biker Com system is a product of Open Road Solutions, in existence formally since 2007 although development of the Biker Com intercom and communications system had been ongoing for several years prior. The head office is located in Taiwan along with other corporate activities.
As their flagship motorcycle communications system, Biker Com is a result of experience gained by the founding principles and what was seen as a global motorcycling requirement for a complete quality system. A dynamic development program has seen continuous development and refinements based on user feedback.
While open to debate, the Biker Com system is somewhat of a hybrid — combining wired and wireless components and technologies that work together as a hub controlled system, it still allows components to function in standalone mode.
It is unique in many ways but also mainstream in others: some categories can be compared with other systems while some cannot.
In The Big Box
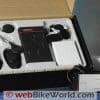
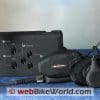
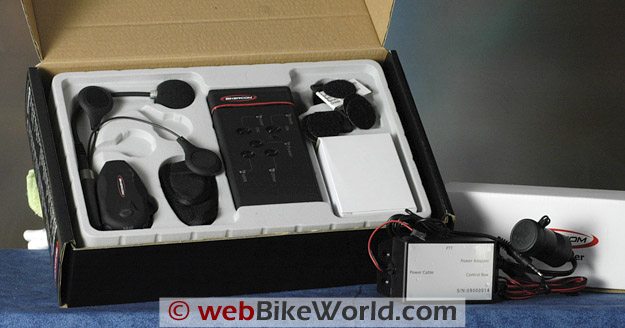
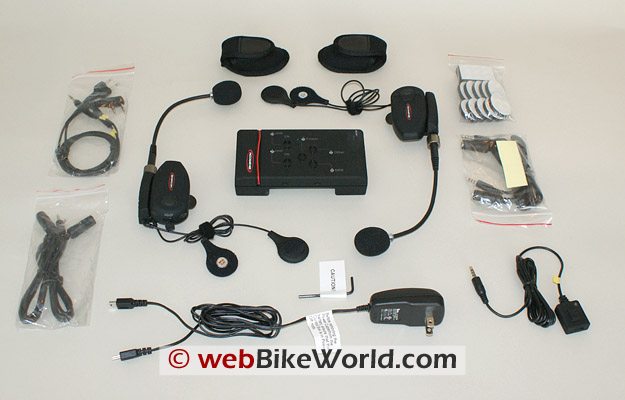
The display box is quite large but considering everything packed inside, totally understandable:
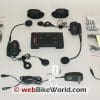
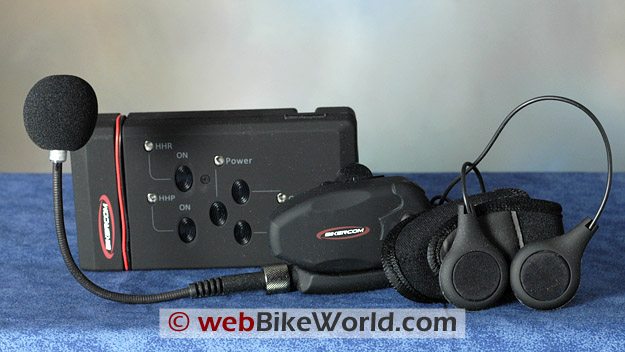
- Control Box (system hub).
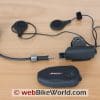
- Two Bluetooth headset modules – Helmet Headset Rider (HHR) and Helmet Headset Passenger (HHP).
- Two Helmet Headset Clips (helmet clamp brackets).
- Two detachable boom microphones.
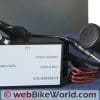
- Two small foam carry cases for the removable Bluetooth modules.
- A 110-220 AC/DC charger with dual mini-USB connectors.
- Three 3.5mm stereo audio cables (straight to 90-degree connectors).
- Two radio interface cables, both with dual-plug (L and K standard) connectors.
- Two 3.5mm 4-element extension cable used for the Push-to-Talk harness or the radio connection.
- One powered Push-to-Talk (PTT) harness with bi-adhesive backing.
- One long two-wire fused (3 Amp) power harness for connection to 12V DC power.
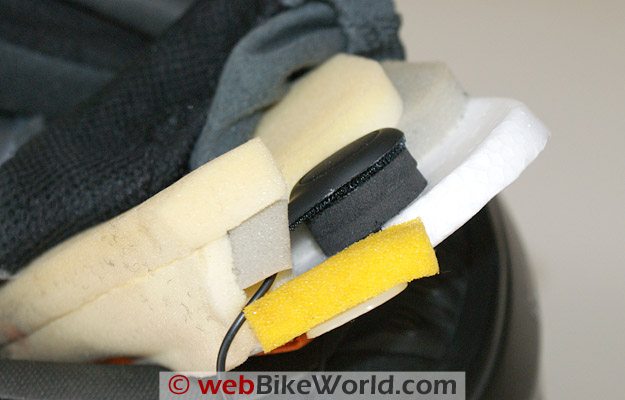
- An installation bag with a hex key and a great selection of foam and hook and loop mounting bits to aid in mounting up the headset and in getting speaker placement just right.
BikerCom Noise Filter
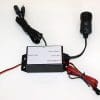
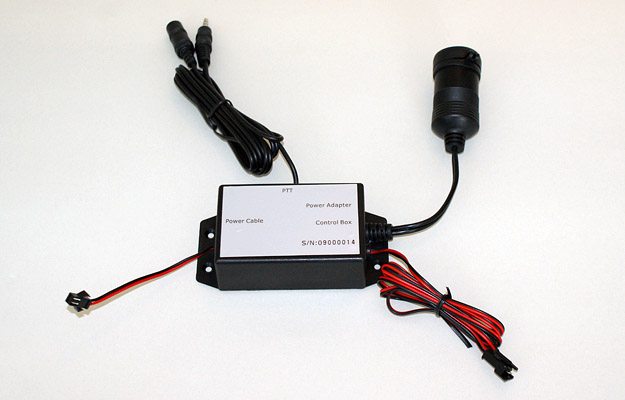
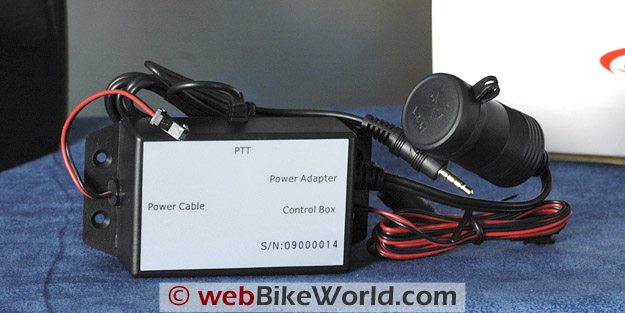
One other component sent along indicates the effort put into identifying requirements and producing a solution; that being the optional BikerCom Noise Filter Accessory component. Two of these were included in one of the first shipments and I got two more with the last kits received.
These electronic modules are meant to be used if a two-way radio is added to the system, powered by the motorcycle battery and/or is connected to an external antenna, as is often the case with many CB radios.
It’s probably a good idea to install a noise filter anyway. When battery power is used or components like the Control Box are mounted on the motorcycle (under the seat and/or near the battery or management modules) the system can become ‘dirty’ or conductive in an electrical sense, which can cause interference.
The BikerCom Noise Filter isolates the Biker Com components from conductive noise. If not filtered or attenuated out, this noise ends up being heard in the headset and it can be transmitted during voice sessions. This is not an uncommon issue, having experienced it myself on various motorcycles.
The filter unit is meant to be mounted more or less permanently although the system wiring allows the filter unit to be connected or removed from the system in short order — great for evaluation purposes.
The Control Box
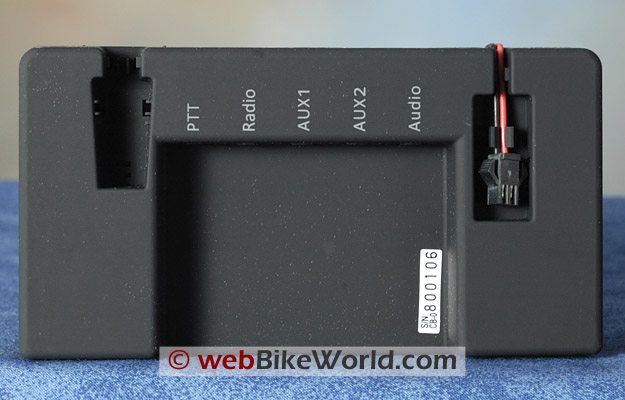
The core of the BikerCom system is the Control Box or hub. All intercoms or communication devices that will be used must connect to this hub by wire or wirelessly by Bluetooth and in turn the hub wirelessly transmits and receives audio to and from the helmet headsets. With five 3.5 mm audio ports, plus the ability to pair up with two Bluetooth devices, a variety of peripherals can be connected via the Control Box.
Based on Bluetooth version 2.0, the Control Box provides Class 2 power for connectivity, allowing a wireless range of up to 10 m or 33 ft under optimal conditions between the Control Box and paired Bluetooth devices. The proprietary wireless link between the Control Box to the rider’s and passenger’s headsets provides a similar range.
This hub approach, similar to a standard network hub, has its advantage in allowing multiple wired or wireless connections with the Control Box which then manages the audio feed to and from the headsets based on system priorities and features.
Some will perceive that the BikerCom is more complex to use and manage than standalone Bluetooth systems, in reality it is not and is actually easier to use than some ‘simpler’ headset systems. The only (possible) disadvantage is that Control Box is another component to deal with for power, storage and security – something that users of wired systems already know of.
What really differentiates the BikerCom from other wired and wireless systems is that the system link between the Control Box and the Headsets is wireless. And with the Push-To-Talk (PTT) component installed (even if radios are not going to be used) the system is powered On and Off by this device; direct access to the Control Box is not needed.
The BikerCom Control Box supports the Headset Profile (HSP), the Advanced Audio Distribution Profile (A2DP) and in all likelihood, the Hands-Free Profile (HFP) that provides the additional interface features supported by the BikerCom.
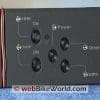
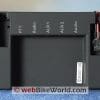
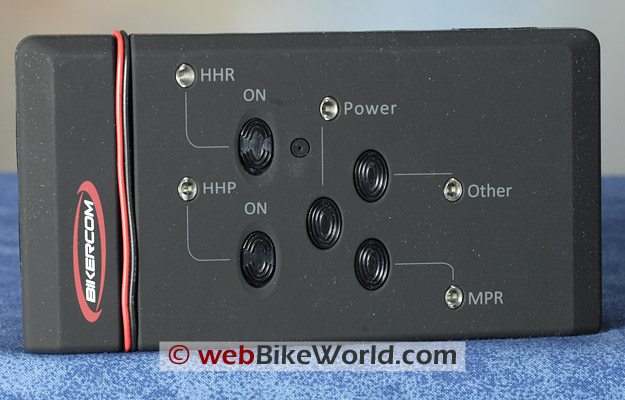
The unit measures 14.0 x 7.5 x 3.0 cm (Length x Width x Thickness), weights 150gr and is finished in a smooth flat black finish. The face has five buttons, all slightly recessed and all with corresponding LEDs for status light display.
The HHR (Rider) and HHP (Passenger) On/Off buttons are arranged vertically on the left, while the Power, Other and Mobile Phone Rider (MPR) buttons are right of centre. The control module is powered via a 12V DC fused harness connected directly to the battery or some other appropriate switched/un-switched power source.
The Control Box is turned On and Off by using the main power button on the box or by the PTT button, if it is connected. A voltage monitor turns the system off when supply voltage drops below 12.5V DC…a seemingly minor feature but important in the overall scheme of things.
Activating the wireless link to the headsets is done with the HHR and HHP buttons. The ‘Other’ button is used to connect with a Bluetooth device and the Mobile Phone Rider button is for pairing with the Rider’s (primary) Bluetooth device.
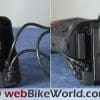
A two-wire power harness with mini-connector emanates from the bottom left of the Control Box. A cutout on the back provides the mounting surface for the five 3.5mm connector ports: PTT, Radio, Aux 1, Aux 2 and Audio. Two other small cutouts on the back side allow power connectors to be tucked out of the way when not in use.
The Helmet Headset
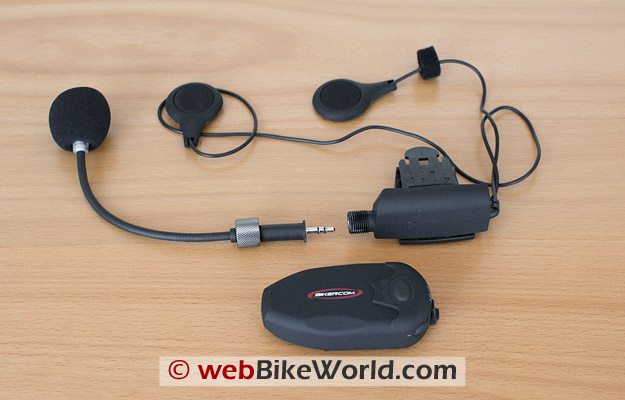
The two helmet headsets included with the BikerCom system are called the Helmet Headset Rider (HHR) and the Helmet Headset Passenger (HHP). (Editor’s Note: The HHR and HHP are what I would normally call the rider and passenger intercom module).
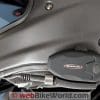
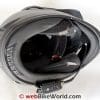
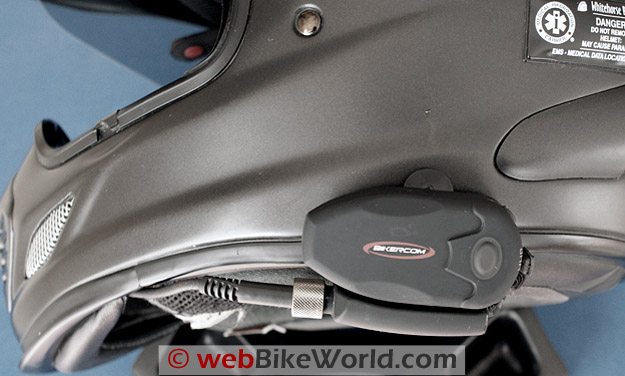
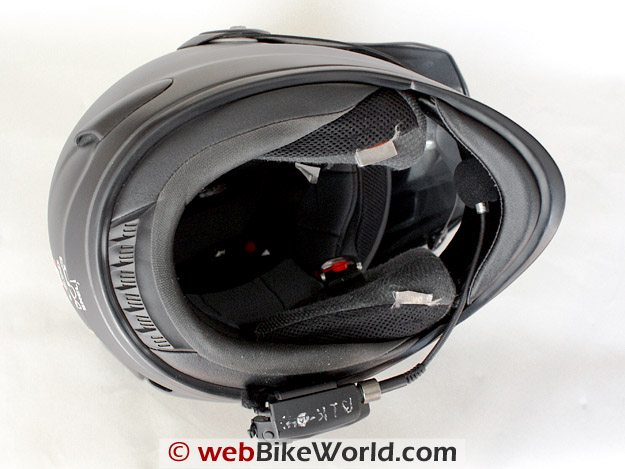
The headset assemblies are multi-piece, comprising the actual Rider and Passenger Bluetooth module and the mounting bracket. Mounting is done by using either the clip or bracket secured to the bottom edge of the helmet shell or secured by use of supplied (thick) adhesive hook and loop pads. The speakers are hard-wired as is the boom microphone base.
A small screw-off mount with a 3.5 mm connector lets the boom microphone be changed or replaced in seconds, a good feature. Even though the boom microphone is not obtrusive and stays in place, a thin wire assembly would work as well or possibly better in some full face helmets.
The headset module snaps down onto the bracket, locking the two pieces together securely — easily one of the best latch mechanisms seen on any of the systems. The microphone is marked with a black and a silver wrapping next to the wind-sock covered microphone. For correct orientation the silver marking is on the mouth side.
The speaker leads are long enough for the XD3, the Nolan and the BMW System Six, so I suspect they will be fine for most installations. Helmet installation will be described in Part Two.
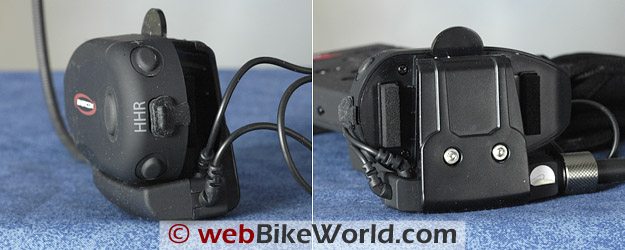
Headset controls and indicators are simple. There is a status light just in front of the Multi-Function Button (MFB) positioned towards the rear of the module. Two small pressure controls for volume Up and Down are located on the top and bottom back edges respectively.
The mini-USB 5.0V power port is located on the back of the module and a small and very flexible weather plug, itself attached to the module, is compressed and pushed in to seal the power port when not in use.
Initial Actions & Observations
Each kit includes a small 110-220V charger for North American use. As with other systems coming to market or being updated, the charger features dual mini-USB connectors for charging both system modules concurrently.
With the latest kits on hand, the first action was to unpack the goodies from the boxes and inventory everything. I mark the rider and passenger Bluetooth modules of each system with the last three digits of the control module serial number to provide a measure of system control and reduce the chance of components, once paired, from getting mixed up.
All four Bluetooth modules were placed on their initial charging. The red light on the modules indicating charging went out after only 1.5 hours on the first set and just over 2.5 hours on the second set. Even with some residual charge, it is still important to fully charge the units up before initial use.
With tentative mounting spots on both the BMW R1200R and F800GS identified, initial use will see the modules carried in the tank-bags occupying the same space as the smaller StarCom (wired system review) Digital systems do when in use. For more installation information see Part Two.
With this hub-based system, the headsets for the rider and passenger are paired to the control box rather than each other. While the procedure is not complicated, it is somewhat different from most other Bluetooth headset systems. Hint: read the instructions or you might be fiddling around for quite awhile.
Another observation is that the buttons on the control box seem hard to operate (this point was actually raised by the representative regarding one of the earlier versions). The latest systems received work better, but the On/Off switches on both the rider and passenger Bluetooth modules still only move about 1.5 mm between on and off.
This is a small amount of play, but a definite click is heard and felt when they are used.
This brings up ease of use – the three pressure activated controls are not hard to operate with light to medium weight gloves, but the two On/Off buttons given their slight recess and minimal travel can be tricky. Better tactile control or use of pressure buttons for all five would really help here.
For many users direct access to the control box is likely to be limited once everything is installed and wired up, similar to other mainstream wired systems. Being able to power the system on and off via the powered Push-to-Talk component is the perfect solution when access is limited.
Initial System Configuration
Although my first pairing was to use the Bluetooth headset module in a standalone configuration paired to my HTC Touch (detailed in Part Two), from a ‘system’ perspective, the first pairing effort undertaken should be with the Control Box.
To Pair the BikerCom Control Box and the Rider’s Bluetooth Module (the HHR):
Step 1 – Both devices must be off.
Step 2 – Press the multi-function button or Multi-Function Button for ten seconds, its light flashes Red and Blue indicating pairing mode.
Step 3 – With the HHR (rider’s) button on the Control Box already on, turn on the main power.
Step 4 – The HHR Control Box light blinks Red – within a few seconds pairing will occur.
To Pair the BikerCom Control Box and the Passenger’s Bluetooth Module (HHP):
Step 1 – Make sure the HHR (rider’s) headset is already connected to the Control Box (per above).
Step 2 – Switch the HHP (passenger’s) button on and wait 5 to 10 seconds until the light starts to flash Red.
Step 3 – Press the Multi-Function Button on the passenger headset until in Pairing Mode, indicated by the light flashing Red and Blue.
Step 4 – Switch the Control Box HHP switch OFF and then ON: the two devices will connect.
Once connected or reconnected, both the rider and passenger Bluetooth intercom status lights on the Control Box are a steady Blue with blinking Red and the indicator on the helmet modules blink a rhythmic Blue.
Wireless Connection One: MPR, or Mobile Phone Rider
The Biker Com system has something called a “Mobile Phone Rider” (MPR). For this Bluetooth connection I used the HTC Touch device. With the Control Box powered up and then the HHR, the status indicators will light up and settle into their connection patterns.
With the mobile phone readied, pushing the MPR button for a few seconds causes its light to flash Blue then into the familiar Red/Blue flashing that indicates pairing mode.
In a few seconds the ‘BC-MPR’ device shows up on the screen. After accepting the pairing, the only services option presented is ‘Headset’, nothing else. This typically indicates that the basic functions supported by the headset and hands-free profiles are supported.
Initial calls were made using the phone and its menu features. As soon as the call was initiated audio was switched over to the headset. I could terminate the call by using either the phone menu, pressing the Multi-Function Button on the headset once quickly or, best of all, having the other party terminate the call.
If the mobile phone supports voice control or voice dialing functions and if properly configured pressing the Multi-Function Button once should activate the appropriate menu on the phone. I did get the HTC to call two different numbers that I have saved off in the voice activation menu.
As the MPR connection is Priority One for the system the audio from the device is only streamed to the HHR (Rider) headset for privacy.
Just remember that control of the motorcycle and being aware of your surroundings is the only priority here: anything that can be a distraction shouldn’t be.
Wireless Connection Two: Other
Any audio from devices paired under this option is streamed to both the rider and passenger headsets as a stereo broadcast or shared stream, although the passenger will lose all audio if a higher Mobile Phone Rider (MPR) priority is active (see table above).
Pairing the Garmin zumo 550 With the BikerCom System
With the GPS Bluetooth readied, push the Other button on the Control Box for a few seconds to put it in pairing mode. It takes about 30 seconds for the two devices to find each other. The zumo displays ‘BC-Other’ as the device to add, which I did and then set the Audio menu for Navigation, MP3 and Phone.
After another minute the two devices actually started to communicate, the typical delay I get when using the zumo’s Bluetooth. The mono audio stream finally got pushed to the hub and then up to the headset. The zumo wireless link is noisy and the audio stream of poor quality.
Pairing the BMW Navigator III+ (Garmin 2820) With the BikerCom System
Although I usually complain about its lack of features compared to a zumo550 or something newer, the Navigator always impresses me when it comes to pairing, reconnecting and just plain working as a paired device.
I paired this GPS using both the mobile phone and the Other (BC-Other) connections. Both pairings took a few seconds and that was that. The Auto-Connect feature of the BMW Navigator that I typically leave turned on usually had the two devices paired by the time the helmet was put on.
Hint: Pairing devices via the BC-Other allows both headsets to listen to the stereo broadcast from the hub. Any mobile phone connection is heard only in the rider’s headset.
Rider and Passenger Bluetooth Module (HHR and HHP) Constraints
The Biker Com is comprised of a set of two Bluetooth modules, the HHR (Helmet Headset Rider, or the rider’s Bluetooth intercom module) and the HHP (Helmet Headset Passenger, or the passenger’s Bluetooth intercom module) that function as a pair.
As system components, the rider module has most features available to it at all times but while the passenger can receive most audio, outside of the intercom, the user cannot actively participate in phone or radio sessions.
The headsets are not meant to be standalone units as they were specifically designed to function with the Control Box or hub. As well, they are not a device qualified by the Bluetooth Qualification Body, so reliable performance in standalone mode with Bluetooth devices is not guaranteed.
The Bluetooth Qualification Body is part of the Bluetooth Special Interest Group (SIG), the organization that “oversees the development of Bluetooth standards and the licensing of the Bluetooth technologies and trademarks to manufacturers” (Wikipedia).
The Intercom functions between a system set of the paired BikerCom rider and passenger headsets and is not meant to be used as a longer distance rider-to-rider capability. With typical use the intercom and shared stereo or broadcast feature is solid out to about 25 feet, but anything after that is very sporadic and clear line of sight becomes critical.
I did conduct one test with the headsets worn by two riders on two motorcycles, but unless you are practicing the side by side routine, something never recommended, using the two headsets as a rider to rider intercom capability is just not viable.
Both the rider and passenger Bluetooth modules are meant to be paired individually or collectively to a single device: the Control Box. While not having Bluetooth Qualification, either headset can be used individually to pair and connect with one Bluetooth device.
For standalone use or with the hub off-line this is an option that can be exercised to provide a mono or stereo audio stream to the headset.
Once the headsets have been discretely paired to other devices they will not connect to the Control Box. Only one pairing can be undertaken by the headset, so no switching between devices is possible. To restore the headsets to the system, the individual rider and/or passenger intercom module pairing procedure must be completed.
Audio Signal Prioritization
Good systems assign priorities and the Biker Com is no exception although with more device connections possible, some groupings take place within the respective priorities.
As described in the manual, there are two scenarios that serve to detail the situations that bring the priorities into play with the resultant conditions:
| Mobile Phone Rider (MPR) Connection Not Active |
|---|
| Priority 1, Bluetooth MPR is available for rider Intercom – enabled Priority 2 audio inputs are enabled |
| Bluetooth Other – shared – Push-to-Talk – as activated – Radio (two-way) – audio IN shared, audio OUT from HHR only – Auxiliary 1 – shared (ie – GPS for navigation) – Auxiliary 2 – shared (ie – Radar detector alerts) |
| Priority 3 functions enabled and shared |
| – Audio input enabled and shared to both HHR and HHP |
| Mobile Phone Rider (MPR) Connection Active |
| Priority 1, Bluetooth MPR in use by rider Intercom – disabled Priority 2 functions maintained for HHR (rider) |
| – Bluetooth Other – Push-to-Talk – Two way radio – audio IN and OUT via HHR only – Auxiliary 1 – Auxiliary 2 |
| Priority 3 functions disabled |
| – Audio input disabled to both HHR and HHP |
The Intercom
The duplex wireless intercom allows the rider and passenger to talk back and forth freely. The intercom is available except when the rider’s Priority One device (e.g., the mobile phone) is active. The intercom is voice activated (VOX) and obviously optimized for rider with passenger use.
While I had presumed that the intercom would be available only when both headsets were connected and in use, I was wrong. With the Control Box and rider headset connected and the passenger headset switched off (no passenger connection) the headset VOX (Intercom) can be triggered by the rider.
I thought that having the powered Push-to-Talk component connected was part of the issue — it is not. So to see how the matter was going to impact standalone use, I purposefully took a fairly high speed highway run in very windy conditions with the front vent of the Arai XD3 helmet open and/or the visor up so as to deliberately activate the VOX due to noise levels.
When the intercom goes active, music is muted and that ‘open channel’ audio loop is there in the headset – you have to wait a minimum of ten seconds for it to time out (if it does) before any other audio resumes. Thankfully each headset module can be individually adjusted depending on noise and audio (microphone) input levels.
This is done by using the Volume Up and Volume Down buttons in a specific sequence to increase or decrease the sensitivity values in discrete steps. My fear was that even the highest adjustment would not be enough and that the VOX would keep triggering.
But I found that the highest setting works quite well. Unless there is a sudden loud noise, inside or outside the helmet, the VOX will not typical trigger while on the road, making use of the system with only the rider module operating a more sustainable proposition.
Have used and evaluated many communications systems with VOX, manual or automatic activation or a combination, I prefer those that allow the intercom to be de-activated or activated by either user.
Where the intercom is or can be a switched feature, the primary consideration is to make sure that as desired or needed, the intercom is activated before getting totally focused on the twisty road ahead — button fumbling is not recommended, especially when an ‘uh oh’ corner comes up!
VOX does have its advantages, but it needs to be carefully engineered and calibrated so that high and low thresholds accommodate a wide range of environmental and user conditions and provide sufficient adjustment for fine tuning.
Advanced Audio Feature
Another feature that also becomes quite noticeable, but much more appreciated, is the automatic audio control that maintains a consistent or ‘fixed’ audio level in the helmet vis-à-vis the surrounding environment. Most four-wheeler systems have had this feature for some years even though many owners don’t know it is there…
As ambient noise levels increase or decrease helmet volume increases or decreases accordingly. The feature works by sampling with adjustments made dynamically. It works quite quickly and smoothly in reacting to changes to the user environment. This I like.
As recommended in the manual, I took time to ‘tune’ each connected peripheral with the system and as previously identified made sure that intercom activation volumes were at the required settings. This all contributes to a more enjoyable audio environment inside the helmet.
Wired Connections
Easy street awaits — just plug the desired peripheral directly into the appropriate port on the back of the Control Box and allow the hub to manage the audio stream to the headsets based on system priorities (see table provided below).
Connecting an Audio Player to the BikerCom System
With the rider module active and the Control Box powered up, plugging in the iPod Nano activates that device and almost instantly the stereo audio stream arrived in the helmet.
Connecting a GPS Device to the BikerCom System
Both the Garmin zumo550 and the BMW Navigator III+ were connected to the Control Box via their audio cables using Auxiliary One as the input port. As long as no higher priority audio is active (Rider MPR), active audio from the device will heard by both rider and passenger.
As this is a wired connection music streamed from the control box to the headsets is stereo but the monotone navigation instructions are just that — mono. Navigation instructions will override the music temporarily as audio output from the device is managed internally.
Owner Comments and Feedback
See details on submitting comments.
From “D” (3/10): “In (Part 3 of the Biker Com review) I am confused in the 2nd and 3rd paragraphs. Are you stating that the Midland radios will not work at all with this setup? Would it be possible to elaborate more on exactly what you discovered? I am hoping to find a US source for this product soon. It was stated that they had trouble with the Midland (FRS/GMRS) radios, but it was unclear if they would work. Can the reviewer elaborate if the FRS/GMRS radios will work with this product?”
HBC’s Reply: Given the referenced paragraphs of the BikerCom Part 3 – Using the BikerCom System article, I believe you are asking about FRS/GMRS radio use, which I explained was not successful, even though it was possible on occasion to get the system to key or transmit, and on another instance, receive a transmission from another radio, but never with any consistency. I did point out that my testing was ongoing.
At the time of publication, the only radios successfully used were the two portable transceivers provided by OpenRoad. These transceivers are multi-band in function and can be used quite freely in some parts of the world, but for North America, they are for Amateur Radio use (for which I am licensed). These transceivers are state of the art and fully compatible with the BikerCom systems. My success in using this equipment was identified in the article.
So no, the Midland FRS/GMRS radios, nor anything else tried so far, will work properly. Some will key, and some will receive, but not both. The not-acceptable workaround is to press both the BikerCom PTT and the transmit button on the radio to initiate a transmission.
I am working on an update and have, as time permits, been testing a wider range of FRS/GMRS radios on-hand or as on loan, to try and identify the primary issues, which I suspect are switching delays in the individual radios and VOX settings to mention two. Accordingly, I am working my way through an extensive test matrix to see what works and what doesn’t.
There is such a wide range of consumer radios on the market, especially here in North America, and there are also real differences between brands and models in different parts of the world based on regional or national restrictions and guidelines.
I know that BikerCom is hoping to get a list of qualified radios drawn up, but given their limited North American market presence right now, it could take a while: which is one reason I am trying to work through the issues. I do not yet know of any North American distributor for the BikerCom systems, unfortunately.
I was planning on doing a follow-up on the systems, once the updated pieces are received from Open Road and the radio issue was going to be part of that. I have been in contact with some overseas users and hopefully some radio related information will be forthcoming…
Hope some of this information helps.”
From “R.U.” (10/09): “Thanks for the great review. I wish you would address the volume level. I always ride with ear plugs, and have no problem adjusting the volume on my StarCom so that I can hear perfectly. Does the BikerCom have sufficient volume to overcome ear plugs?”
HBC’s Reply: I had a comment in the articles about wearing earplugs, etc…but to be more specific and direct:
It is seldom that I ride anywhere without wearing earplugs, unless doing some with/without earplugs audio tests on systems, helmets, etc. Once the individual device audio output levels are set, and the volume on the BikerCom Bluetooth module is adjusted for comfort levels, particularly with earplugs, then the automatic audio control takes care of the rest.
Although a subjective comment, from my perspective I haven’t noticed any difficulties in still being able to hear incoming audio when wearing my standard earplugs. I would have to say that there is sufficient output for most users. In high noise environments, I have the Rider module at around the 75 percent point. I have cranked the Rider module up once or twice to maximum and it was a bit much.
Just remember that every individual configuration depends on the rider (hearing, audio level preferences and ear protection used) and the equipment (motorcycle, helmet, clothing, etc).
I also have a StarCom Digital system and it definitely has more gain than the BikerCom, but that is not unusual, or unexpected, for a wired system with higher output standards.”
From “A.S-K.” (9/09): “I am very much interested in HBC’s review of BikerCom and I am looking forward to the reviewer’s installation (or solution) to the BMW System 6 helmet!!
Your reviews are fantastic help.”


