I’ve been searching for a wireless motorcycle intercom system for some time now.
I remain amazed that apparently no one has yet exploited Bluetooth technology to make this happen.
When they do, we’ll be there.
But in the meantime, I still needed a motorcycle intercom, preferably without any of the fancy features and electronics that add cost and complexity.
As I was looking through one of the British bike magazines, I found an advert for the BackChat Vixen intercom system that seemed to be too good to be true.
The system sure hit all the hot buttons, with a marketing pitch that promises an “acoustic intercom” that is an “incredible value for (the) money”.
Although my eyes skipped over the “acoustic intercom” bit (more later), the “incredible value” line got my attention!
I’m also a big fan of the British RIDE magazine motorcycle product recommendations, and the BackChat Vixen system has kept its RIDE “Best Buy” (see comments from BackChat Intercoms below) rating for some time.
So I figured we’d give it a try.
As it turns out, an acoustic intercom is a modern term for the old style “bridge to engine room” tube used in steamships of old.
The BackChat Vixen system has, as advertised, no wires, no batteries and no electronics.
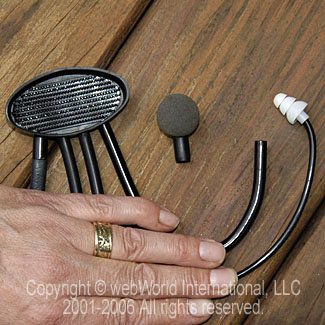

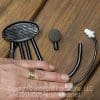
(Above) Foam covered “microphone” (center) and silicone ear tip can be plugged into shortened tubes. Back side of “junction box” on left showing plastic “hook and loop” teeth.
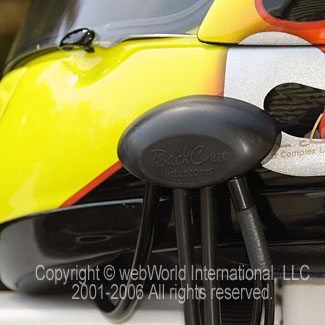
The Backchat Intercom
So how does it work?
To be honest, it took me a while to figure out how to get everything installed, and I wasn’t even completely sure how the system worked until it arrived in the mail and I read through the instructions a couple of times.
My feeling is that the BackChat Vixen website and printed info could probably do a better job of describing the system, and it would be nice to have better photos illustrating the mounting directions.
But the BackChat Vixen folks were very helpful, even placing a couple of overseas calls to me to make sure my order included the parts I was looking for.
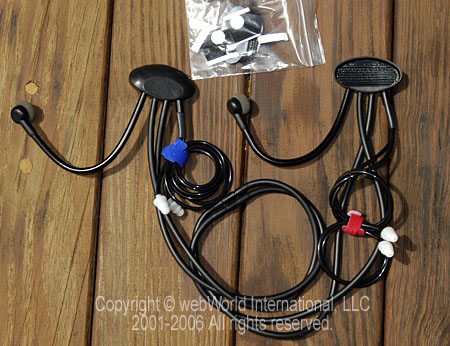
I’m not saying I can describe how it works any better than the manufacturer, but in most basic terms, the system consists of two “junction boxes” (my term for them) that are made from some type of plastic or Nylon.
One junction box is installed on the rider’s helmet and one is installed on the passenger’s helmet.
Each junction box has four tubes sprouting out the bottom. One tube runs up to the rider’s mouth, another tube runs from the rider back to the passenger, the third tube runs from the passenger back to the rider and the fourth splits into two tubes which are plugged into the rider’s ears.
The junction boxes have a thick plastic “hook and loop type” (see Alan’s comments below) material permanently mounted inside. Two matching pieces of hook-and-loop material with double-sided tape are provided with the kit for mounting on the helmets.
Once the protective film is peeled off, the hook-and-loop is placed on the lower part of the helmet (pre-locate everything first with the helmets on) and the junction box can them be attached or removed as desired by pulling it off the hook-and-loop.
The instructions recommend mounting the junction box for the rider on the right side of the helmet for riders in countries that drive on the left and the left side of the helmet for riders in countries who drive on the right-hand side.
The passenger’s junction box always goes on the opposite side. This is supposed to keep the tubes out of the wind and it also allows enough slack for over-the-shoulder traffic checks.
It’s easy enough to get everything installed. I recommend laying everything out first with the helmets on. By moving the junction box around on the side of the helmet, the best location for mounting can be found, which is the spot where the microphone tube can be routed up underneath the chin bar until it is just in front of the lips.
We then marked the location on the side of the helmet with a permanent marker (not recommended, use an erasable marker or grease pencil instead!). After removing the helmets, we then peeled the backing off of the hook-and-loop and stuck it on the helmet.
Once the junction boxes are mounted on the helmets, all there is left to do is to plug the two tubes together and start talking! Very easy once you get the hang of it. I had to read the instructions about 4-5 times to make sure I understood everything, but it’s easier than it sounds.
Conclusion
The BackChat Vixen motorcycle intercom system is actually pretty amazing — I had my doubts about how well a couple of simple tubes would conduct sound back and forth, but it works well. I’ve only used it as the rider, and when the passenger talks, it sounds like the sound is coming from slightly in the distance in back of me. Kind of eerie actually, and maybe some sort of psychological illusion, but it sounds just like it would if a person is sitting behind me and talking.
That said, I do have a couple of complaints. I wish the tubes were all just a bit longer — maybe about 2″ or so. Since the tubes can be cut and the silicone ear tips and the foam-tipped “microphone” can be plugged in to the tube no matter how long or short, a few extra inches would allow more options.
For example, I wish the speaker tube was about 2″ longer, because it’s just barely long enough to fit under the chin bar. Also, it’s not always possible to mount the junction box where it should be. Just by chance we pulled the AFX FX-11 Lightforce helmet off the shelf to use for the passenger.
This helmet has a vent cover along the lower chin right where the junction box should be mounted. We had to mount the junction box back about an inch or two farther than we liked, which affected the placement of the microphone inside the helmet. Since the microphone needs to be very close to the lips for the best sound, it would be nice to have some extra room to play with if necessary.
That’s not really a deal-breaker, but I am concerned about a more serious — at least for me — problem. The ear tubes have silicone ear tips which are inserted into the ears before mounting the helmet. I found that these ear “plugs” don’t stay in my ears and they also do a poor job at decreasing ambient noise. It’s really too noisy for me to ride comfortably when using only the BackChat Vixen ear tips.
Also, the increased noise levels make it more difficult to hear the passenger, especially when speeds reach over about 60 MPH or so. This is especially noticeable on bikes like the Tiger, with its half-faring, which spills turbulent air up around the bottom of the rider’s helmet and causes lots of noise. The ambient noise levels aren’t really a problem on the BMW K1100LT with its full fairing, but my experience is that overall it becomes difficult to hear as the speed increases on unfaired bikes.
Lori, our Women’s Motorcycle Clothing page editor, acted as pillion on a few rides as we were evaluating the system. She said it isn’t as noisy in the back, and she does not have a problem hearing the rider, even at the elevated speeds. However, she has another problem — she doesn’t like the silicone-tipped tubes in her ears, and finds them uncomfortable after about 20 minutes or so. I don’t find them to be any more bothersome than reusable ear plugs, but if you’re not used to wearing the silicone type, this may be a bother. I wonder if a 90-degree elbow on the end of the tube for mounting the silicone tips would be a better design?
Overall, the BackChat Vixen motorcycle intercom system works well, and in most instances provides surprisingly good sound, especially for the price. There are no batteries or electronics to worry about, which is a plus. It’s slightly fussy to get everything set up correctly before every ride, but it’s a real pleasure to have the ability to talk and share the fun.
Comments From Alan at BackChat Intercoms
“Hi Rick, If I may make some comments regarding your report on the BackChat! Acoustic Intercom :
- The ‘Helmet Unit’ has a raised polyurethane badge rather than the ‘embossed’ letters. (These were a bad move on our part !)
- The name should always be ‘BackChat intercom’.
- The RiDE Magazine gave us the ‘BEST BUY’ …..(not ‘recommended’) in 1997 and has not been superceded since then.
- Point taken and photos added to the instructions – thank you.
- You say ‘junction boxes’ – we say ‘Helmet Units’.
When describing the ‘four tubes sprouting out the bottom…….’ I think we could say that…..’one tube runs from the rider microphone to the pillion twin earset and one tube runs from the pillion microphone to the riders earset, giving ‘duplex’ or two-way conversation. The earsets have washable silicone earplugs that give significant hearing protection when inserted correctly’.
Whilst the ‘hook and loop’ material is similar to Velcro, it is not in fact a ‘hook and loop’. This tends to ‘catch’ material and sticks when you don’t want it to. Our material is an industrial material where ‘small mushrooms’ lock together and is extremely hard wearing.
The Helmet Units can be fitted or removed instantly.
You say you wish the tubes were all just a bit longer. We have found that this length is the optimum but sometimes a little extra might be needed on some bikes where the passenger is sitting way back. A phone call to us will get the customers required length dispatched right away. This also applies to any extensions necessary for the boom tube.
Again, the boom fits most helmets but as they are changing all the time, it would be impossible to keep up with these and as our components are purchased in large numbers, changes can only be made at certain times.
May I suggest that you earplugs did not stay in perhaps because they were not inserted deep enough. The instructions do say that when putting the earplugs in, to lubricate them (twice) and then …..’suck on the spigot to “draw” the earplugs in and you will hear them seal the ear canal properly’.
We are actually sourcing some new – much softer – earplugs and they will be on stream in around 4 weeks from now. Yes, on unfaired bikes the performance is less then faired types but the ‘Windjammer’ is a good idea for stopping turbulence up the front of the chin bar.
As for a 90 degree bend, with the softer earplugs, this will not be necessary and should a bend be necessary, there are instructions for ‘molding’ a sharper bend in the eartube.
I have to thank you for the review which is objective and honest and I do hope that you will take my comments in the spirit of trying to improve the detailing.”
Editor’s Note: Thanks for the clarification Alan – I couldn’t have done a better job, so I printed your comments verbatim. Also note that the new BackChat logo is featured in the photos below; this is the logo that now appears on all BackChat intercoms.
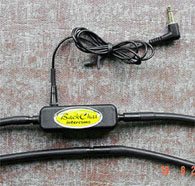
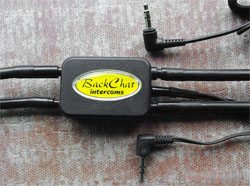
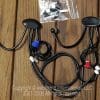
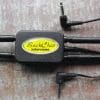
Additional Note from Alan: We also now have SatNav inputs to the BackChat systems – The one on the left is for a SATNAV input or AUDIO MP3/CD into the Rider earset and the one on the right is for BOTH rider and pillion to receive either/or SATNAV and CD/AUDIO.
Owner Comments and Feedback
See details on submitting comments.
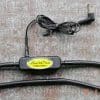
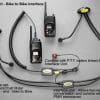
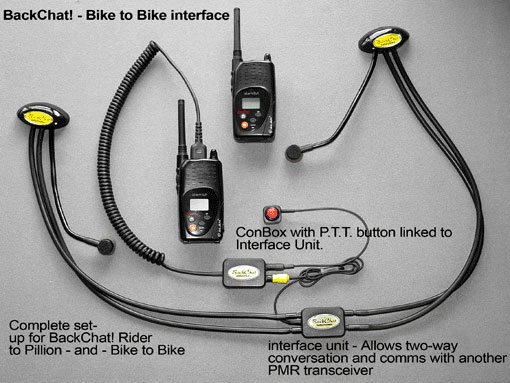
From BackChat Vixen: The BackChat, a Bike to Bike Interface is here. Simply plugs into the central connections and links directly (microphone and speaker integral to unit – NO POWER) to FRS (UK PMR446) Radio transceivers. It gives very clear and noise-free communications and makes the BackChat even more of a great buy.”
Here’s a photo:
From “D.K.”: “I’ve been toying for some time with the idea of ordering the BackChat system to replace what my wife views as the overly cumbersome electronic intercom system my wife and I used on our Honda ST1300 so it was interesting to read some first hand experience with the BackChat unit. FWIW: I used an acoustic intercom system called the “Bi-Comm” when tooling around on my 1972 Suzuki 550 back in….1972.
“Everything old is new again” is true again! The Bi-Comm was similar to the BackChat but lacked the bulky connector boxes. As I recall it worked rather well, especially as there was no other real rider/passenger intercom system in those days.
Keep up the good work with WBW, it’s a daily ‘net stop for me.”


