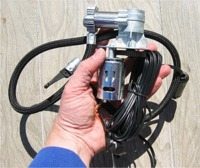
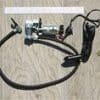
This air pump can be used for motorcycle tires — it’s easy to carry and can be powered from a motorcycle battery or other 12-volt battery.
I was on the lookout for a cheap, lightweight and effective motorcycle tire air pump.
This would be something to carry in a saddlebag or tank bag in case of a flat, or to use at home for inflating motorcycle tires.
Motorcycle tires should always be checked before each ride to make sure they are inflated correctly, so it pays to have a simple air pump handy.
I have a flat repair kit, that I usually only carry on long trips, but it won’t do much good if I can’t get the tire inflated.
After looking around at hand pumps, cans of tire inflator gas, CO2 cartridges, etc., I happened to read a post on a motorcycle email list that discussed converting an air pump.
It said that if you can find a small, inexpensive Campbell Hausfeld air compressor, you can rip the guts out and make a small and lightweight pump that can be used for motorcycle tires.
I’m not the only person to think of this — there are other websites out there with similar information and some photos. But I was definitely intrigued, so I had to try it for myself, and I figured I’d post this information for others to see.
It’s very easy to turn one of these small air compressors into an even smaller carry-on motorcycle tire air pump.

If you really get carried away, you can strip this pump down to the bare essentials by cutting down the air hose and electrical cable to minimum lengths.
I elected to leave my cables at full length; I figure that the whole assembly is pretty small, and you never know when you may need the extra length to pump a buddy’s tire or to connect to a car’s cigarette lighter.
Plus, I planned on using this in the garage, and leaving the length as is makes it easier to get to my motorcycles.
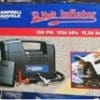
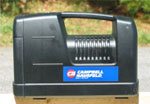
You should be able to find this Campbell-Hausfeld RP1200 (or similar) air pump at your local Wal-Mart (Photo 1). I found mine just by chance for $9.96. A definite bargain!
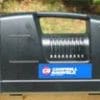
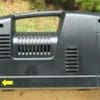
Take out the 3 screws at the locations shown in Photo 3. Split the case apart — it may take some force with a screwdriver, but there’s really nothing in there that can get hurt. You’ll hear some serious crunching, but this part is trash anyway.
Note: wBW Visitor “J.M.” wrote to tell me why I probably had to use a screwdriver to force it apart — a fourth screw! He writes: “Yes, I bought one of the Campbell-Hausfeld compressors at Wal-Mart. This is really a nice small package.
My comment is that in your instructions, you say to remove the three screws when there is actually a fourth screw hiding under the pop off cover. Using a knife to slice the stickers along the seams allows the case to easily separate”. Thanks J.M.!
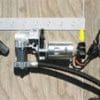
Rip out the guts! Here’s what you’re left with, shown in Photo 4 (minus the clump of grass on the right-hand side of the photo!); the only difference is I used some electrical tape to attach the on/off switch to the cable. That’s a 12-inch scale at the top of the photo.
I didn’t cut the electrical cable and the air hose to make them shorter, although you can do this if you want an even more compact assembly.
The arrow in Photo 5 points to the fan that keeps the pump cool when it’s in the case. I used a hacksaw to cut the shaft to remove this piece; I figured I wouldn’t need it, since the case is history.
Be careful if you do this — the shaft that the fan runs on is made of some pretty tough metal, and you don’t want to bend the internal part of the shaft.smaller carry-on motorcycle tire air
Note: For informational use only. All material and photographs are Copyright © webWorld International, LLC – 2000-2011. All rights reserved. See the webBikeWorld® Site Info page. NOTE: Product specifications, features and details may change or differ from our descriptions. Always check before purchasing. Read the Terms and Conditions!


